32
CDJ-350
1
2
3
4
A
B
C
D
E
F
1
2
3
4
6.3 DETAILS ON SERVICE MODE
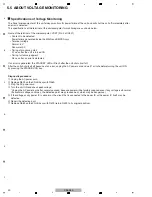
[1] Display of various information
How to Enter Service Modes
1)
V
ersion/error history
The
V
ersion Display mode is entered after the RELOOP key is held pressed for at least 10 sec.
(This does not apply when the TEMPO slider is set to the end "–" (uppermost) position or "+" (lowermost) position.
Each time the BPM LOCK key is pressed in
V
ersion Display mode, the versions for the MAI
N
, DISPLAY, and DSP
programs are displayed, in that order.
To change screens between
V
ersion Display and Error History, press the
V
I
N
YL MODE key while the
V
ersion Display
screen is displayed.
The error log screens will be changed if you press the DI
V
IDE (LEFT) or DI
V
IDE (RIGHT) key while the error history is
displayed.
2) Service mode (Panel diagnosis/JOG load measurement)
To enter Service mode, set the POWER switch to O
N
while holding the BACK and TEMPO RA
N
GE keys pressed.
To enter JOG Load Measurement mode, set the TEMPO slider to the + (MAX) position during Service mode.
For details on how to operate, see “[2] Confirmation of the button input and an indication function.”
Set the POWER switch to OFF to quit this mode.
3) CD drive diagnosis mode
To enter CD Drive Diagnosis mode, set the POWER switch to O
N
while pressing the TIME and CD SELECT keys pressed.
Set the POWER switch to OFF to quit this mode.
4) Firmware Updating (USB media)
To enter this mode, set the POWER switch to O
N
while pressing the SOURCE SELECT USB and RELOOP keys pressed.
After updating is completed, set the POWER switch to OFF to quit this mode.
5) Firmware Updating (CDROM media)
To enter this mode, set the POWER switch to O
N
while pressing the SOURCE SELECT DISC and RELOOP keys pressed.
After updating is completed, set the POWER switch to OFF to quit this mode.
6) Factory reset
To enter this mode, set the POWER switch to O
N
while holding the SOURCE SELECT USB and BACK keys pressed.
For details on items to be factory-reset, see “8.3 USER SETTABLE ITEMS.”
Summary of Contents for TRAKTOR PRO CDJ-350
Page 8: ...8 CDJ 350 1 2 3 4 A B C D E F 1 2 3 4 2 2 USABLE DISCS AND USB DEVICES ...
Page 9: ...9 CDJ 350 5 6 7 8 5 6 7 8 A B C D E F ...
Page 10: ...10 CDJ 350 1 2 3 4 A B C D E F 1 2 3 4 2 3 PANEL FACILITIES ...
Page 11: ...11 CDJ 350 5 6 7 8 5 6 7 8 A B C D E F ...
Page 71: ...71 CDJ 350 5 6 7 8 5 6 7 8 A B C D E F ...
Page 73: ...73 CDJ 350 5 6 7 8 5 6 7 8 A B C D E F H C 4 4 CN401 ...
Page 75: ...75 CDJ 350 5 6 7 8 5 6 7 8 A B C D E F H C 4 4 CN401 ...
Page 79: ...79 CDJ 350 5 6 7 8 5 6 7 8 A B C D E F ...
Page 93: ...93 CDJ 350 5 6 7 8 5 6 7 8 A B C D E F H H SMPS ASSY SIDE B SIDE B CN1 CN2 FOR CUXJ ...


