background image

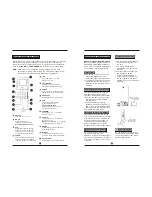
Before using your new air conditioner, be sure to familiarize yourself with 

the remote control. The following is a brief overview of the remote 

controller itself. For instructions on how to operate your air conditioner, 

refer to the 

BASIC 

and 

ADVANCED 

functions sections of this manual.

Note:


HEAT mode is not supported by your appliance if you have 


purchased a cooling-only version. The HEAT mode option on this 


controller will not function with cooling-only appliances.

Not sure what a function does?

Refer to the BASIC FUNCTIONS and 

ADVANCED FUNCTIONS sections of 

this manual for detailed descriptions 

on operating your air conditioner.

• The button designs on your unit 

   may differ slightly from the 

   illustrations and examples shown.

• If the indoor unit does not have a 

   particular function, the function 

   selection on the remote will have 

   no effect.

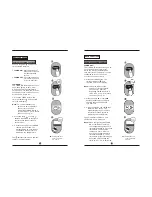
Your air conditioning unit comes 

with two AAA batteries, which 

should be inserted into the remote.

• Remove the back cover from the 

   remote to expose the battery 

   compartment.

• Insert the batteries, paying 

   attention when matching the (+) 

   and (-) ends of the batteries with 

   the symbols in the compartment.

• Re-attach the back cover.

The remote control holder (which 

may or may not have been included 

with your unit) can be attached to a 

wall or stand. Check that the air 

conditioner is receiving signals 

before installation. Use the two 

included screws to install the holder.

For optimal product performance:

• Do not mix old and new 

batteries, or ones of different types.

• Do not leave batteries in a remote 

that will not be used for more than 

2 months.

• The remote controller should 

   be used within 8 meters of 

   the unit.

• The unit will beep when 

   signals from the remote are 

   received.

• Curtains, direct sunlight, etc. 


can interfere with the


receiver’s infrared signal.

•  If the remote controller will 

   not be used for more than 2 

   months, be sure to remove its 


batteries.

Do not dispose of batteries as 

unsorted municipal waste. Refer 

to your local laws for the proper 

disposal of batteries.

3

4

Handling the Remote Controller

Special Note

Inserting/Replacing Batteries

Installing the Remote Holder

       Note About the Battery

Remote Controller Tips

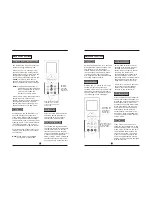
Button Layout and Functions

ON/OFF

Turns the unit on or off.

LED

Turns the indoor unit’s LED

display on or off.

FOLLOW ME

Activates the remote as the

thermostat instead of the unit.

TURBO

Sets the unit to reach the preset

temperature in the shortest time.

SHORTCUT

Sets/activates your own presets.

FAN

Cycles through fan speeds 

in the following order:

AUTO LOW MED HIGH

Hold this button for 2 seconds

to activate silent mode.

TEMP

Raises temp. in 1˚ increments.

Max 86˚F (30˚C).

TEMP

Lowers temp. in 1˚ increments.

Min 62˚F (17˚C).

NOTE: 

Press and hold         together

to alternate between ˚F and ˚C.

SWING

Starts/stops the horizontal louver

auto-swing feature.

DIRECT


Set the desired up/down air flow

direction. (Each press is 6 degrees)

SELF-CLEAN

Starts/stops the self-clean feature.

MODE

Cycles through the

following operation modes:

AUTO COOL DRY HEAT FAN

ECO

Starts and stops the energy

efficiency feature. Hold this

button for 2 seconds in order

to activate the sleep feature.

1

2

13

3

4

11

10

6

7

8

9

14

5

12

1

4

3

2

5

6

13

11

14

10

7

8

9

12

Front cover 

slides down

TIMER

Sets the timer for turning the 

unit on or off. See the BASIC

functions section for instructions.

!

       Battery Disposal

Remove the back

cover to install

batteries

The remote

controller goes

into the holder

Summary of Contents for RG57A6/BGEFU1

Page 1: ...design and specifications of this product are subject to change without prior notice as development continues Consult with the sales agency or manufacturer for details is a registered trademark of Parker Davis HVAC International Inc Parker Davis HVAC International Inc 3250 NW 107th Ave Doral FL 33172 USA Tel 305 513 4488 Fax 305 513 4499 e mail info pd hvac com Website www pd hvac com Copyright Pa...

Page 2: ...ted and found to comply within the limits for a Class B digital device pursuant to section 15 of FCC law These limits are designed to provide reasonable protection against harmful interference in a residential installation This equipment generates uses and can radiate radio frequency energy and if not installed and used in accordance with these instructions may cause harmful interference to radio ...

Page 3: ...ld be used within 8 meters of the unit The unit will beep when signals from the remote are received Curtains direct sunlight etc can interfere with the receiver s infrared signal If the remote controller will not be used for more than 2 months be sure to remove its batteries Do not dispose of batteries as unsorted municipal waste Refer to your local laws for the proper disposal of batteries 3 4 Ha...

Page 4: ...temp or temp buttons 3 Press the ON OFF button to start the unit Note Fan speed can t be set when in AUTO mode AUTO Mode Operation Setting Temperatures LCD Screen Icons Indicators Basic Functions 5 6 ON OFF The unit is on when this is displayed Transmission Indicator Displays when the remote sends signals to the indoor unit Timer ACTIVE Displays when the timer is set Timer OFF Displays when the ti...

Page 5: ...uttons 3 Press the ON OFF button to start the unit Note Fan speed can t be set when in DRY mode DRY Dehumidification Mode Basic Functions 1 Press the MODE button to select HEAT mode 2 Set your desired temperature using the temp or temp buttons 3 Press the FAN button to select the fan speed 4 Press the ON OFF button to start the unit Note As the outdoor temperature drops the performance of your uni...

Page 6: ...ting the TIMER function Basic Functions Ex Setting the unit to turn on after 2 5 hours Ex Setting the unit to turn off after 5 hours TIMER OFF The TIMER OFF feature allows you to set a fixed period of time after which the unit will automatically turn itself off For example it can be scheduled to turn off when the user leaves home for work 1 Press the TIMER button The timer off indicator and the ti...

Page 7: ...he TIMER ON feature of the system to turn itself on in 6 hours Configure the TIMER OFF feature of the system to turn itself off in 8 hours Setting the TIMER function The example on page 11 shows how to set the system to turn on after 6 hours operate for 2 hours and then turn itself off See the figure below The remote display will be as shown Note If the user wishes to incorporate the scheduling fe...

Page 8: ...of this moisture has usually evaporated When self clean mode is active the system will clean itself and afterwards will turn itself off automatically This feature can be used as often as needed but is only available in COOL AUTO or DRY mode Turbo Mode Turbo mode forces the unit to reach the set temperature in the quickest time possible In cooling mode this will result in the unit jump starting the...

Reviews: