


49
MEH-P5350
-
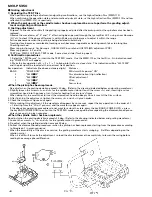
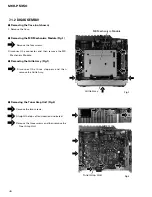
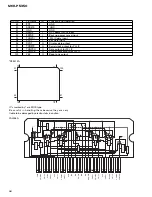
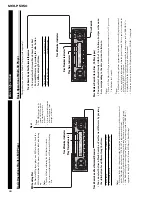
Removing the PU Unit
1. Provide short solder in section A, then remove the
connector
2. Remove the two screws, then erect the board in the
direction indicated by the white arrow head.
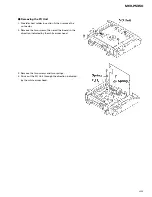
3. Remove the two screws and two springs.
4. Drive out the PU Unit through the direction indicated
by the white arrow head.
Summary of Contents for MEH-P5350
Page 4: ...4 MEH P5350 2 2 EXTERIOR A B ...
Page 6: ...C D E 6 MEH P5350 2 3 MD MECHANISM MODULE ...
Page 16: ...KEY MICROCOMPUTER RESET 560 R47 2R7K 16 MEH P5350 1 2 3 4 1 2 3 4 D C B A 3 3 KEYBOARD UNIT B ...
Page 17: ...B LCD BACK LIGTH B A KEYBOARD UNIT CN831 17 MEH P5350 5 6 7 8 5 6 7 8 D C B A ...
Page 30: ...30 MEH P5350 1 2 3 4 1 2 3 4 D C B A A A TUNER AMP UNIT ...
Page 31: ...31 MEH P5350 5 6 7 8 5 6 7 8 D C B A A SIDE B ...
Page 33: ...33 MEH P5350 1 2 3 4 1 2 3 4 D C B A A CN831 B B SIDE B KEYBOARD UNIT ...
Page 35: ...IC Q D 35 MEH P5350 D C B A 1 2 3 4 1 2 3 4 C MD UNIT C SIDE B ...
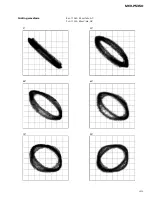
Page 43: ...43 MEH P5350 Grating waveform 45 0 75 60 30 90 Ech Xch 50mV div AC Fch Ych 50mV div AC ...


