background image

05

25

En

Chapter 5

Playing discs

 Note

• Many of the functions covered in this chapter apply to DVD and 

SACD discs, Video CDs, CDs, DivX video/WMV and MP3/WMA/
MPEG-4 AAC/JPEG discs, although the exact operation of some 
varies slightly with the kind of disc loaded.

• Some DVDs restrict the use of some functions (random or 

repeat, for example) in some or all parts of the disc. This is not a 
malfunction.

• When playing Video CDs, some of the functions are not 

available during PBC playback. If you want to use them, start the 
disc playing using a number button to select a track.

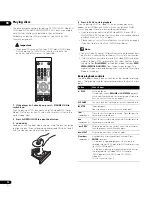
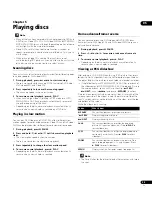
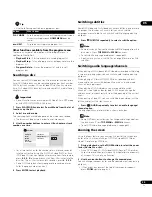
Scanning discs

You can fast-scan discs forward or backward at four different speeds 
(only one speed for DivX video/WMV).

1

During playback, press 

 or 

 to start scanning.

• There is no sound while scanning DVDs (including DVD-Audio), 

DivX video/WMV and Video CDs.

2

Press repeatedly to increase the scanning speed.

• The scanning speed is shown on-screen.

3

To resume normal playback, press 

PLAY.

• When scanning a Video CD playing in PBC mode or a MP3/

WMA/MPEG-4 AAC track, playback automatically resumes at 
the end or beginning of the track.

• Depending on the disc, normal playback may automatically 

resume when a new chapter is reached on a DVD disc.

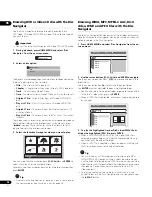
Playing in slow motion

You can play DVD-Videos and DVD-R/-RW at four different slow 
motion speeds, forwards and backwards. Video CDs and DivX video/
WMV can be played at four different forward slow motion speeds.

1

During playback, press 

 

PAUSE.

2

Press and hold 

/

 or 

/

 until slow motion playback 

starts.

• The slow motion speed is shown on-screen.

• There is no sound during slow motion playback.

3

Press repeatedly to change the slow motion speed.

4

To resume normal playback, press 

PLAY.

• Depending on the disc, normal playback may automatically 

resume when a new chapter is reached.

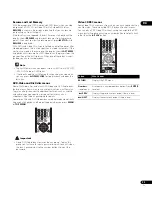
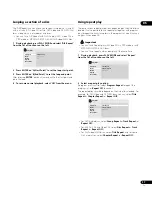
Frame advance/frame reverse

You can advance or back up DVD-Video and DVD-R/-RW discs 
frame-by-frame. With Video CDs and DivX video/WMV file you can 
only use frame advance.

1

During playback, press 

 

PAUSE.

2

Press 

/

 or 

/

 to reverse or advance a frame at a 

time.

3

To resume normal playback, press 

PLAY.

• Depending on the disc, normal playback may automatically 

resume when a new chapter is reached.

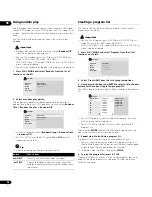
Viewing a JPEG slideshow

After loading a CD/CD-R/-RW containing JPEG picture files, press 

(play) to start a slideshow from the first folder/picture on the disc. 

The player displays the pictures in each folder in alphabetical order.

• If the folder contains MP3/WMA/MPEG-4 AAC files, playback of 

the slideshow and MP3/WMA/MPEG-4 AAC file repeats. During 
the audio playback, you can still use the skip (

PREV

/

NEXT

), scan (

/

) and pause (

 

PAUSE

) functions.

Pictures are automatically adjusted so that they fill as much of the 
screen as possible (if the aspect ratio of the picture is different to 
your TV screen you may notice black bars at the sides, or at the top 
and bottom of the screen).

While the slideshow is running:

 Note

• The time it takes for the player to load a file increases with large 

file sizes.

Button

What it does

 

PAUSE

Pauses the slideshow; press again to restart.

PREV

Displays the previous picture.

NEXT

Displays the next picture.

/

Pauses the slideshow and rotates the displayed 
picture 90º (counter) clockwise. (Press 

PLAY

 to 

restart slideshow.)

/

Pauses the slideshow and flips the displayed picture 
horizontally or vertically. (Press 

PLAY

 to restart 

slideshow.)

ZOOM

Pauses the slideshow and zooms the picture. Press 
again to toggle between 1x, 2x and 4x zoom. (Press 

PLAY

 to restart slideshow.)

MENU

Displays the Disc Navigator screen (see page 26).

DV58AV_KU_EN.book  25 ページ  2007年8月30日 木曜日 午後1時6分

Summary of Contents for Elite DV-58AV

Page 1: ...Operating Instructions DVD Player ...

Page 2: ...is connected Consult the dealer or an experienced radio TV technician for help D8 10 1 2_En Information to User Alteration or modifications carried out without appropriate authorization may invalidate the user s right to operate the equipment D8 10 2_En WARNING Handling the cord on this product or cords associated with accessories sold with the product will expose you to lead a chemical known to t...

Page 3: ...rges and built up static charges Article 810 of the National Electrical Code ANSI NFPA 70 provides information with regard to proper grounding of the mast and supporting structure grounding of the lead in wire to an antenna discharge unit size of grounding conductors location of antenna discharge unit connection to grounding electrodes and requirements for the grounding electrode See Figure A LIGH...

Page 4: ...at 20 feet sewing machine 70 Vacuum cleaner hair dryer noisy restaurant 80 Average city traffic garbage disposals alarm clock at two feet THE FOLLOWING NOISES CAN BE DANGEROUS UNDER CONSTANT EXPOSURE 90 Subway motorcycle truck traffic lawn mower 100 Garbage truck chain saw pneumatic drill 120 Rock band concert in front of speakers thunderclap 140 Gunshot blast jet plane 180 Rocket launching pad In...

Page 5: ...isc with the Disc Navigator 26 Browsing WMA MP3 MPEG 4 AAC DivX video WMV and JPEG files with the Disc Navigator 26 Looping a section of a disc 27 Using repeat play 27 Using random play 28 Creating a program list 28 Searching a disc 29 Switching subtitles 29 Switching audio language channels 29 Zooming the screen 29 Switching camera angles 30 Displaying disc information 30 06 Audio Settings and Vi...

Page 6: ...io performance of DVD Audio and Super Audio CD SACD The on board 24 bit 192kHz DAC means that this player is fully compatible with high sampling rate discs capable of delivering exceptional sound quality in terms of dynamic range low level resolution and high frequency detail In addition with SACD playback you can select which part of the disc you want to hear stereo audio multi channel audio and ...

Page 7: ... your country area Do not use or store batteries in direct sunlight or other excessively hot place such as inside a car or near a heater This can cause batteries to leak overheat explode or catch fire It can also reduce the life or performance of batteries Hints on installation We want you to enjoy using this product for years to come so please use the following guidelines when choosing a suitable...

Page 8: ...o WMV files ISO 9660 Level 1 or 2 compliant CD physical format Mode1 Mode2 XA Form1 Romeo and Joliet file systems are both compatible with this player Multi session playback No Unfinalized disc playback No File structure may differ Up to 299 folders on a disc up to 648 folders and files combined within each folder DVD R RW compatibility Only DVD R DVD RW discs recorded in Video Mode DVD Video Mode...

Page 9: ... The filename of the movie file has to be repeated at the beginning of the filename for the external subtitle file The number of external subtitle files which can be switched for the same movie file is limited to a maximum of 10 DivX video compatibility Official DivX Ultra Certified product Plays all versions of DivX video including DivX 6 with enhanced playback of DivX media files and the DivX Me...

Page 10: ...s page 12 6 COMPONENT VIDEO OUT High quality video output for connection to a TV monitor or AV receiver that has component video inputs Connect using a commercially available three way component video cable page 12 7 CONTROL IN Use to control this player from the remote sensor of another Pioneer component with a CONTROL OUT terminal and bearing the mark Connect the CONTROL OUT of the other compone...

Page 11: ...O OUT and AUDIO OUT 5 1ch jacks to a set of A V inputs on your TV Use the supplied audio video cable connecting the red and white plugs to the audio outputs and the yellow plug to the video output Make sure you match up the left and right audio outputs with their corresponding inputs for correct stereo sound See page 12 if you want to use a component or S Video cable for the video connection 2 Con...

Page 12: ...ctively doubles the scanning rate of the picture resulting in a very stable flicker free image To set up the player for use with a progressive scan or HD High Definition TV see Resolution Max on page 33 When the player is set to output progressive scan video the PRGSVE indicator lights in the front panel display Important If you connect a TV that is not compatible with a 1080i 720p 480p and switch...

Page 13: ...on your AV receiver It s convenient to use three stereo audio cables one for the FRONT one for the SURROUND and one for the CENTER and SUBWOOFER channels You can also use the S Video or component video jacks to connect to the AV receiver if you prefer Tip After connecting up and switching on you should change the Audio Output Mode setting page 36 in the Initial Setup menu from the default 2 Channe...

Page 14: ... well as almost every kind of digital audio that the player is compatible with including DVD Video DVD Audio see below for limitations SACD Video CD CD WMA MP3 MPEG 4 AAC DivX video and WMV Use an HDMI cable not supplied to connect the HDMI OUT interconnect on this player to an HDMI interconnect on a HDMI compatible display The arrow on the cable connector body should be face up for correct alignm...

Page 15: ... each time you change connected components or remove the HDMI cable Note that HDMI Control may not operate properly if you do not use an HDMI cable that supports the HDMI 1 3 specification Category 2 or later Changing the output resolution Use the OUTPUT RESOLUTION button located on the remote control to switch the output resolution for the HDMI and component video outputs Depending on the type of...

Page 16: ...stopped press to switch off on the front panel display and disable the video and digital outputs Use this when you want to hear audio from the analog outputs with no interference from other signals when listening to a DVD Audio disc for example The indicator lights when the Pure Audio feature is switched on This button only functions when Pure Audio Button page 34 is set to Available These include...

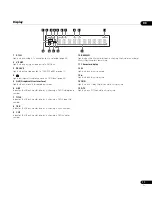
Page 17: ...ng a DVD Audio group number 7 TITLE Indicates that the character display is showing a DVD Video title number 8 TRK Indicates that the character display is showing a track number 9 CHP Indicates that the character display is showing a DVD chapter number 10 REMAIN Lights when the character display is showing the time or number of tracks titles chapters remaining 11 Character display 12 Lights when a...

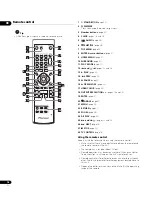
Page 18: ...RETURN page 21 23 ZOOM page 29 24 DISPLAY page 30 25 and pages 22 and 25 26 NEXT page 28 27 STOP page 22 28 TV CONTROL page 19 Using the remote control Keep in mind the following when using the remote control Make sure that there are no obstacles between the remote and the remote sensor on the unit The remote has a range of about 23 feet Remote operation may become unreliable if strong sunlight or...

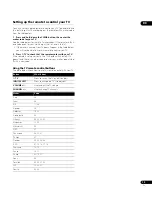
Page 19: ...at the remote works with your TV If the remote is set up correctly the TV should switch on off If it doesn t and there is another code given for your maker repeat step 1 with a new code Using the TV remote control buttons The table below shows how to use this remote control with your TV Button What it does TV Press to switch the TV on off standby INPUT SELECT Press to change the TV s video input V...

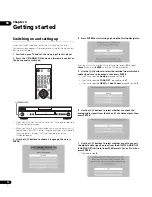
Page 20: ...tor begins 3 Use the buttons to choose a language then press ENTER 4 Press ENTER to start setting up using the Startup Navigator If you don t want to use the Startup Navigator press to select Cancel then press ENTER to exit the Startup Navigator 5 Use the buttons to select the terminal from which the audio signals are to be output then press ENTER If you have selected Analog proceed to step 6 If y...

Page 21: ...ed correctly If you have a conventional 4 3 TV you can leave the player on the default setting and move on to the next section 1 Press HOME MENU and select Initial Settings 2 Select TV Screen from the Video Output settings 3 If you have a widescreen 16 9 TV select 16 9 Wide or 16 9 Compressed If you have a conventional 4 3 TV you can change the setting from 4 3 Letter Box to 4 3 Pan Scan if you pr...

Page 22: ...e DVD discs that some playback controls don t work in certain parts of the disc This is not a malfunction If a disc contains a mixture of movie DivX video WMV and other media file types MP3 for example first select whether to play the movie files DivX WMV or the other media file types MP3 WMA MPEG 4 AAC JPEG from the on screen display The media file types are selected automatically when the Pure A...

Page 23: ...yback and open the disc tray DVD Video and DivX disc menus Some DivX media files and many DVD Video and DVD Audio discs feature menus from which you can select what you want to watch They may also give access to additional features such as subtitle and audio language selection or special features such as slideshows See the disc packaging for details Sometimes DivX and DVD Video menus are displayed...

Page 24: ... won t light Make sure that you ve selected this player as the HDMI input in the settings for the component you re using You may need to refer to the instruction manual of the component to do this See Connecting using HDMI on page 14 for more on HDMI compatibility There s no picture from the HDMI output This player cannot display pictures from DVI compatible sources See Connecting using HDMI on pa...

Page 25: ...resume normal playback press PLAY Depending on the disc normal playback may automatically resume when a new chapter is reached Frame advance frame reverse You can advance or back up DVD Video and DVD R RW discs frame by frame With Video CDs and DivX video WMV file you can only use frame advance 1 During playback press PAUSE 2 Press or to reverse or advance a frame at a time 3 To resume normal play...

Page 26: ...DivX video WMV and JPEG files with the Disc Navigator Use the Disc Navigator to find a particular file or folder by filename Note that if there are other types of files on the same disc these will not be displayed in the Disc Navigator 1 Press HOME MENU and select Disc Navigator from the on screen menu 2 Use the cursor buttons and ENTER to navigate Use the cursor up down buttons to move up and dow...

Page 27: ...ram list on page 28 Important You can t use Repeat play with Video CDs in PBC mode or with MP3 WMA MPEG 4 AAC discs You can t use repeat and random play at the same time 1 During playback press PLAY MODE and select Repeat from the list of functions on the left 2 Select a repeat play option If program play is active select Program Repeat to repeat the program list or Repeat Off to cancel The repeat...

Page 28: ...e Edit from the list of program options 3 Use the cursor buttons and ENTER to select a title chapter or track for the current step in the program list For a DVD Video disc you can add a title or a chapter to the program list For a DVD Audio disc you can add a whole group or a track within a group to the program list For a CD SACD or Video CD select a track to add to the program list After pressing...

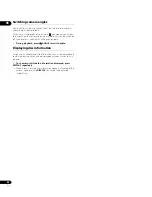
Page 29: ...e language from the disc menu Press TOP MENU or MENU to access To set subtitle language preferences see page 33 See Displaying external subtitle files on page 9 for more on DivX subtitles Switching audio language channels When playing a DVD Video and DivX video disc recorded with dialog in two or more languages you can switch audio language during playback When playing a VR format DVD R RW disc re...

Page 30: ...f you prefer see Display settings on page 34 During playback press ANGLE to switch angle Displaying disc information Various track chapter and title information such as the elapsed and remaining playing time can be displayed on screen while a disc is playing To show switch hide the information displayed press DISPLAY repeatedly When a disc is playing the information appears at the top of the scree...

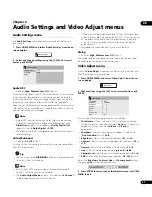
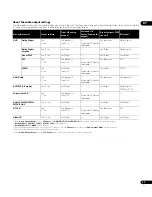
Page 31: ... Digital DTS or MPEG bitstream audio in other words no conversion to PCM Virtual Surround has no effect on the audio from the digital output See Digital Audio Out settings on page 32 for how to set up the digital output formats How good the surround effect is varies with the disc Dialog Settings High Medium Low Off default The Dialog feature is designed to make the dialog stand out from other back...

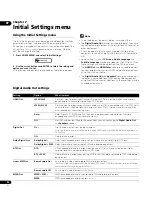
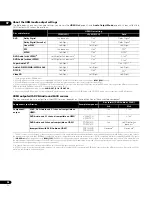
Page 32: ... device only accepts stereo input On this setting multichannel audio is downmixed to 2 channels for stereo linear PCM output LPCM 5 1CH Set if the monitor or device you have connected using HDMI is compatible with Liner PCM multi channel formats All audio signals are output as linear PCM 5 1 format Use this setting if you want to decode all streams by a player Auto Dolby Digital DTS MPEG and SACD ...

Page 33: ...MI Color Full range RGB If colors are weak this gives brighter colors and deeper black RGB Use this setting if colors appear overly rich on the Full range RGB setting Component Outputs component video format default setting for HDMI compatible devices Setting Option What it means Audio Language English If there is an English soundtrack on the disc then it will be played Languages as displayed If t...

Page 34: ...multi channel SACD audio area of the disc for playback CD Area Selects the standard CD audio area of an SACD CD hybrid disc for playback DVD Playback Mode DVD Audio All material on a DVD Audio disc is playable DVD Video Only the DVD Video part of a DVD Audio disc is playable DTS Downmix STEREO Downmixes DTS for 2 channel output to regular stereo See also DTS Downmix on page 35 Lt Rt Downmixes DTS ...

Page 35: ...r left repeatedly to lock more levels more discs will require the password press cursor right to unlock levels You can t lock level 1 This sets the new level and you will return to the Options menu screen Setting changing the Country Area code You can find the Country Area code list on page 46 1 Select Country Code 2 Use number buttons to enter your password then press ENTER 3 Select a Country Are...

Page 36: ...d play the content as often as you like and no message will be displayed Audio Output Mode Default setting 2 Channel If you connected this player to your amplifier using the 5 1 channel analog outputs front surround center and subwoofer outs set this to 5 1 Channel if you connected only the stereo outs set to 2 Channel Note Even if you set Audio Output Mode to 5 1 Channel you ll only get sound fro...

Page 37: ... Dolby Digital Linear PCM 2ch 5 1ch Left Right Left Right Left Right DTS 2ch 5 1ch 2ch downmix Front L R Surround L R Center Subwoofer 2ch downmix DTS MPEG 2ch 5 1ch Left Right Front L R Surround L R Center Subwoofer Left Right MPEG DVD Audio 2ch 5 1ch 2ch downmix4 Front L R 4 Discs that prohibit downmixing will be output as 5 1 channel even if 2 Channel is selected as the Audio Output Mode settin...

Page 38: ...CD SACD audio is not output from the HDMI terminal Left Right 5 1ch2 5 1ch DSD 2 3 Audio CD MP3 WMA MPEG 4 AAC Left Right Left Right Left Right DTS CD Left Right 5 1ch2 DTS3 Video CD Left Right Left Right Left Right Components specification Example component Disc format DVD Audio or SACD 2ch 5 1ch Component output SACD DVD Audio and 5 1 channel compatible on HDMI1 1 This unit checks the specificat...

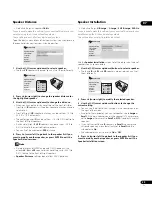
Page 39: ... playback Speaker Installation Default settings L R Large C Large SL SR Large SW On You only need to make this setting if you connected this player to your amplifier using the 5 1 channel analog outputs This setting does not affect digital audio output Use the Speaker Installation screen to tell the player what kinds of speakers you have connected 1 Use the cursor up down buttons to select a speak...

Page 40: ...very dirty wipe with a soft cloth dipped in some neutral cleanser diluted five or six times with water and wrung out well then wipe again with a dry cloth Do not use furniture wax or cleaners Never use thinners benzine or insecticide sprays or other chemicals on or near this unit If you use a chemical impregnated cleaning cloth read the instructions carefully before use These cloths may leave smea...

Page 41: ... settings so that the disc is shown in letter box format regardless of the setting Note Using the 16 9 Wide or 16 9 Compressed setting with a standard 4 3 TV or either of the 4 3 settings with a widescreen TV will result in a distorted picture Resetting the player Use this procedure to reset all the player s settings to the factory default 1 Switch the player into standby 2 Using the front panel b...

Page 42: ...ettings will be canceled Press STANDBY ON on the front panel to turn the player off Wait for OFF to disappear from the display then unplug the power cord The remote control doesn t seem to work The remote control is too far from the player or the angle with the remote sensor is too wide Use the remote within its operating range page 18 The batteries are exhausted Put in new ones page 7 The CONTROL...

Page 43: ...wn Sample Off the player automatically outputs the audio at 48 kHz This is not a malfunction Cannot output 192 kHz or 176 4 kHz digital audio The player does not output digital audio at these sampling rates The digital output is automatically downsampled Cannot output 96 kHz or 88 2 kHz digital audio Check that Linear PCM Out page 32 is set to Down Sample Off Some discs are digital copy protected ...

Page 44: ... page 15 if you want to reset the output resolution Check that the PURE AUDIO indicator is not lit If it is press the PURE AUDIO button See also Front panel on page 16 Depending on the HDMI cable being used 1080p output may not appear correctly No multichannel HDMI audio Make sure that the HDMI Out page 32 is set to Auto or LPCM 5 1CH and that SACD Playback page 34 is set to Multi ch Area See also...

Page 45: ...inition video plus standard to multi channel surround sound audio on a single digital connection HDMI features include uncompressed digital video a bandwidth of up to 5 gigabytes per second and communication between the AV source and AV devices such as DTVs ISO 9660 format International standard for the volume and file structure of CD ROM discs JPEG A standard file format used for still images JPE...

Page 46: ...1307 Maori mi 1309 Macedonian mk 1311 Malayalam ml 1312 Mongolian mn 1314 Moldavian mo 1315 Marathi mr 1318 Malay ms 1319 Maltese mt 1320 Burmese my 1325 Nauru na 1401 Nepali ne 1405 Norwegian no 1415 Occitan oc 1503 Oromo om 1513 Oriya or 1518 Panjabi pa 1601 Polish pl 1612 Pashto Pushto ps 1619 Quechua qu 1721 Rhaeto Romance rm 1813 Kirundi rn 1814 Romanian ro 1815 Kinyarwanda rw 1823 Sanskrit s...

Page 47: ...ut level 1 Vp p 75 Ω Jack RCA Audio output 1 stereo pair Output level During audio output 200 mVrms 1 kHz 20 dB Number of channels 2 Jacks RCA Audio output multi channel L R C SW SL SR Output level During audio output 200 mVrms 1 kHz 20 dB Number of channels 6 Jacks RCA Audio characteristics Frequency response 4 Hz to 44 kHz S N ratio 118 dB Dynamic range 108 dB Total harmonic distortion 0 0010 Wo...

Page 48: ...acement parts operating instructions service manuals or accessories please call the number shown below 1 8 0 0 4 2 1 1 4 0 4 Please do not ship your product to Pioneer without first calling the Customer Support at the above listed number for assistance Pioneer Electronics Service Inc P O BOX 1760 Long Beach CA 90801 1760 U S A For warranty information please see the Limited Warranty sheet included...

Reviews: