


En
21
Advanced
Operation
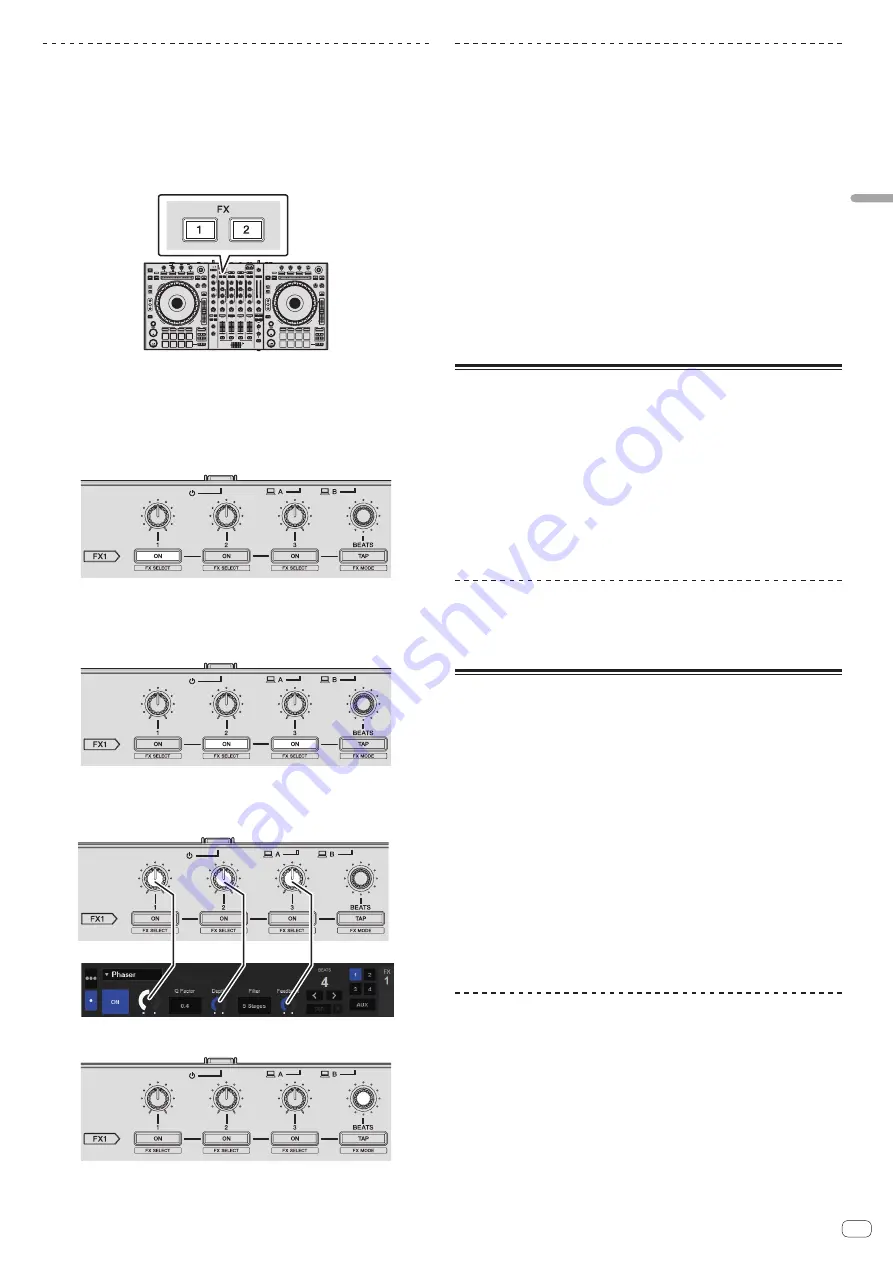
Operating in the single FX mode
1 Press the [TAP] button while pressing the [SHIFT] button to
switch Serato DJ’s DJ-FX mode to the single FX mode.
The mode switches between the multi FX mode and single FX mode each time the
buttons are operated.
2 Press the [FX1] button or [FX2] button of channel 1 to select
the effect unit to assign.
The number of the deck to which the effect is assigned is highlighted on the Serato
DJ screen.
3 Press one of the effect parameter buttons while pressing
the [SHIFT] button to select the effect type.
The selected effect is displayed on the Serato DJ screen.
4 Press the effect parameter 1 button to turn the effect on.
The effect switches between on and off each time the button is pressed.
!
The effect’s [
ON
] key is highlighted on the Serato DJ screen.
5 Operate the effect parameter 2 button or the effect
parameter 3 button to switch the effect’s parameter.
!
Depending on the type of effect, the button may not light when it is operated.
6 Operate the effect parameter control(s) to adjust the
effect’s parameter(s).
7 Turn the [FX BEATS] control to adjust the effect time.
!
It is also possible to set the BPM value to be used as the basis for the effect time
from the interval at which the [
TAP
] button is tapped.
For details, see
Switching the effect’s tempo mode
on page 21 .
Switching the effect’s tempo mode
With Serato DJ effects, there are two ways to set the effect’s tempo: with the “auto
tempo mode” and the “manual tempo mode”.
!
By default, the auto tempo mode is set.
Auto tempo mode
The track’s BPM value is used as the basis for the effect’s tempo.
Manual tempo mode
The BPM value used as the effect’s basis is calculated from the interval at which the
[
TAP
] button is tapped.
Switching to the manual tempo mode
While in the auto tempo mode, press the [TAP] button three
times.
!
When the [
TAP
] button is pressed for over 1 second while in the manual-tempo
mode, the mode switches to the auto tempo mode.
Using the SOUND COLOR FX function
These are effects that change in association with the [
COLOR
] control.
1 Press one of the [SOUND COLOR FX] buttons.
This selects the type of effect.
The button that was pressed flashes.
!
Even when one of the [
SOUND COLOR FX
] buttons is selected, if a different
[
SOUND COLOR FX
] button is pressed, the newly pressed button is selected.
!
For the types of effects, see
Types of SOUND COLOR FX effects
on page 22 .
!
The same effect is set for all channels.
2 Turn the [COLOR] control.
The effect is applied to the channel(s) for which the control(s) was (were) pressed.
Canceling the SOUND COLOR FX effect
Press the flashing [SOUND COLOR FX] button.
The effect is canceled.
Using the oscillator function
You can add a noise-based built-in audio source.
1 Use the [OSC ASSIGN] switch to select the channel to which
you want to apply oscillator sound.
!
[
CH3
]: Applies oscillator sound on channel 3.
!
[
CH4
]: Applies oscillator sound on channel 4.
!
[
MASTER
]: Adds oscillator sound to the master output.
2 Turn the [OSCILLATOR PARAMETER] control.
Turning the control clockwise or counterclockwise adjusts the oscillator sound tone.
3 Turn the [OSCILLATOR VOLUME] control.
Adjusts the sound level of oscillator sound.
4 Press one of the [OSCILLATOR SELECT] buttons.
This selects the type of oscillator sound.
The button that was pressed flashes for a certain period of time.
!
For types of oscillator sound, see
Type of oscillator sound
on page 22 .
!
You can select more than one oscillator sound.
!
While pressing the [
NOISE
] button, sound output continues.
Quitting the oscillator function
Oscillator sound automatically stops after a certain period of time and the
[
OSCILLATOR SELECT
] button changes from flashing to lighted.


