


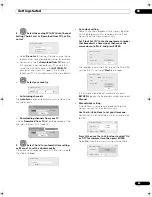
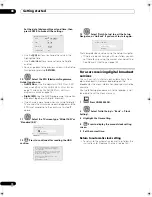


Recorder connections
02
66
En
HDMI, the HDMI logo and High-Definition Multimedia
Interface are trademarks or registered trademarks of HDMI
Licensing LLC.
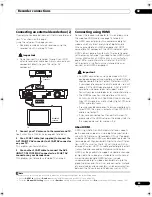
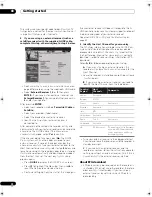
HDMI Control
By connecting the receiver subwoofer to an HDMI
Control-compatible Pioneer Flat Screen TV with an HDMI
cable, you can control this unit from the remote control
of a connected Flat Screen TV, as well as have the
connected Flat Screen TV automatically change inputs in
response to this unit starting playback.
Refer to the operating instructions for your Flat Screen TV
and
HDMI Control
on page 44 for more information about
which operations can be carried out by connecting via
HDMI cable.
Auto-select function
You can have a connected Flat Screen TV and the receiver
subwoofer automatically change inputs when playback
begins on this unit (including when you have a GUI (such as
Disc Navigator) set to display on this unit). Certain
connected Flat Screen TVs may have their power turned
from off to on when using this function.
Simultaneous power function
You can have this unit turn on automatically when the
power for a connected Flat Screen TV is turned on. To
have this unit’s power turned off when a connected Flat
Screen TV is turned off, you must change the
simultaneous power function of your Flat Screen TV.
Unified language function
By receiving language information from a connected Flat
Screen TV, you can have this unit’s language settings
automatically change to those of the Flat Screen TV
(language information can be received only when no
media is being played back and no recordings are taking
place, or when you choose not to display this unit’s GUI
displays).
Important
• The KURO LINK function name used on the web and
in catalogues is referred to as HDMI Control in the
operating instructions and on the product.
• Depending on the type of Flat Screen TV, some HDMI
input terminals do not support the HDMI Control
function. For details, see the operating instructions
supplied with your Flat Screen TV.
• To use the following functions, set this unit’s
HDMI
Control
to
Off
(page 159).
– The timer recording to use VPS/PDC (page 98).
– When you want this unit to automatically switch off
upon completion of timer recording. (When
HDMI
Control
is set to
On
, this unit does not automatically
switch off if your Flat Screen TV is switched on upon
completion of timer recording.)
– When using the Video Control function of an
external component.
– Child lock settings (page 99).
– When you connect a SCART cable and an HDMI
cable to the same Flat Screen TV simultaneously.
• HDMI Control may not operate properly if you do not
use a High Speed HDMI cable.
• Controls may not function properly in certain
situations, such as immediately after you have
connect an HDMI cable, turn this unit’s power off or
remove the power cable for this unit or the connected
component. If you experience any problems, set
HDMI Control to On for all connected units, and then
display the pictures stored on this unit on your Flat
Screen TV to improve the situations.
• We cannot guarantee this unit will work with HDMI
control-compatible components other than those
made by Pioneer.
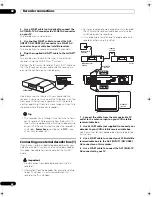
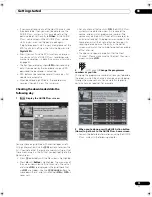
Connecting a DV camcorder
You can connect a DV camcorder or DVD recorder with
DV output to the front panel
DV IN
jack.
Important
• This jack is for connection to DV equipment only. It is
not compatible with digital satellite receivers or D-
VHS video decks.
•
Use a DV cable (not supplied) to connect the DV
jack of your DV camcorder to the front panel DV
IN jack of this recorder.
DV camcorder
STOP REC
PLAY
OPEN/
CLOSE
STOP
REC
USB
DV IN
STANDBY/ON
DV IN
From DV output
02SDVRLX70D_EN.book 66 ページ 2008年10月9日 木曜日 午後4時38分