Scrubbing
•
Turn the pad/brush switch to position 1 to engage the pad/brush motor. The pad/brush is lowered
to the floor by pushing on the pad/brush plate lowering block.
•
Immediately use the lever to apply the detergent water, and adjust it accordingly.
•
Put the run selector in its forward position and move the machine forward to begin scrubbing. The
right trigger moves the machine forward. Upon release, the machine will continue to move forward
for a few feet. The left trigger stops the machine from moving forward and also serves as a parking
brake.
•
Adjust the solution flow to get the whole surface completely wet after the pad/brush passage, but
without any excess that could generate splashes, stream or flows out of the squeegee.
•
Lower the squeegee with the pedal immediately after putting the run selector forward. Turn the
vacuum switch to ON.
•
At the end of the scrubbing and drying operation, first stop the solution flow by using the lever, then
lift the pad/brush and squeegee.
If the floor is very dirty or difficult to clean, a double scrubbing operation is recommended. On the first pass,
scrub with the solution flow on, the pad/brush down and on, the squeegee lifted and the vacuum off. On the
second machine pass, lower the squeegee and turn the vacuum on.
Water Filling and Discharge, Tank Cleaning
Before every scrubbing operation, open the solution tank and fill it with the proper quantity of water and
cleaner. The tank is constructed of polyethylene resistant to all acid and basic solution and to all dissolvents
found on the market. At the end of the scrubbing operation, discharge the dirty water from the recovery tank
by means of the hose. Rinse the tanks after each use, and thoroughly clean the tank and membrane at least
once each week.
Squeegee Adjustment
The squeegee must be perfectly adjusted to get a perfectly dry floor. The best results are achieved when the
edge of the rear blade touches the floor with a slanting of approximately 60° - 45° to the floor. Use the
squeegee adjustment knob to adjust the angle of the squeegee.
Drying can be negatively affected by a faulty suction operation. If the suction hose doesn’t work well, drying
will continue to be bad, even with all adjustment attempts. In this case:
a) Thoroughly clean the suction hoses, inlets and filters and the squeegee itself
b) Check vacuum motor operation
c) Confirm that all inspection openings of the tank are closed.
Optional Brush Assembly Replacement
To attach the brush:
•
Place the brush on the floor.
•
Position the machine so that the brush assembly is over the brush.
•
Turn on the brush motor and lower the brush assembly onto the brush. The brush will automatically
attach.
To remove the brush:
•
Tilt the machine with the brush motor engaged so that the brush does not contact the floor.
•
The brush will automatically drop to the floor.
9
Summary of Contents for CleanStar CS 2000
Page 13: ...Wiring Schematic CS2000 12 Machine Diagrams and Parts List 032408...
Page 15: ...Tanks Cover Group CS2000 14 012507...
Page 17: ...Pad Drive Group CS2000 16 012507...
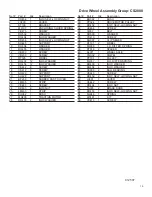
Page 19: ...Drive Wheel Assembly Group CS2000 18 012507...
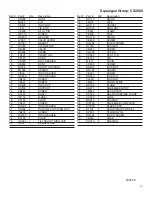
Page 21: ...Squeegee Group CS2000 20 032508...
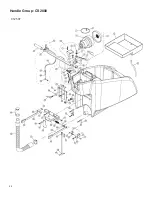
Page 23: ...Handle Group CS2000 22 012507...
Page 26: ......


