PICA Product Development iLink LCD Installation & User Manual Download Page 12

12

and/or

Channel A & B Output Level Adjustments:

Step 1:

 Verify CHANNEL A or B (OUT) is connected to either a MOH port or amplifiers AUX or CD input.

Step 2:

 Verify the unit is playing audio by listening to the internal monitor speaker.

Monitor Speaker

Source = XX


qp 

Cycles Internal Speaker to 

OFF

A

 or 

B

Step 4:

 Adjustment of  the stored audio output level can be done through the LCD and Menu. Depending upon 

the application either call into the phone system and be placed on hold OR listen to the PA systems speakers to 

fine tune volume.


Output A

Volume = XX

Output B

Volume = XX


qp 

Changes Volume

If you see a 

“  

Local Volume Disabled 

 message then the dealer has locked this setting.

Note: This setting only adjusts the units audio outputs and does not adjust the volume of the internal speaker! 
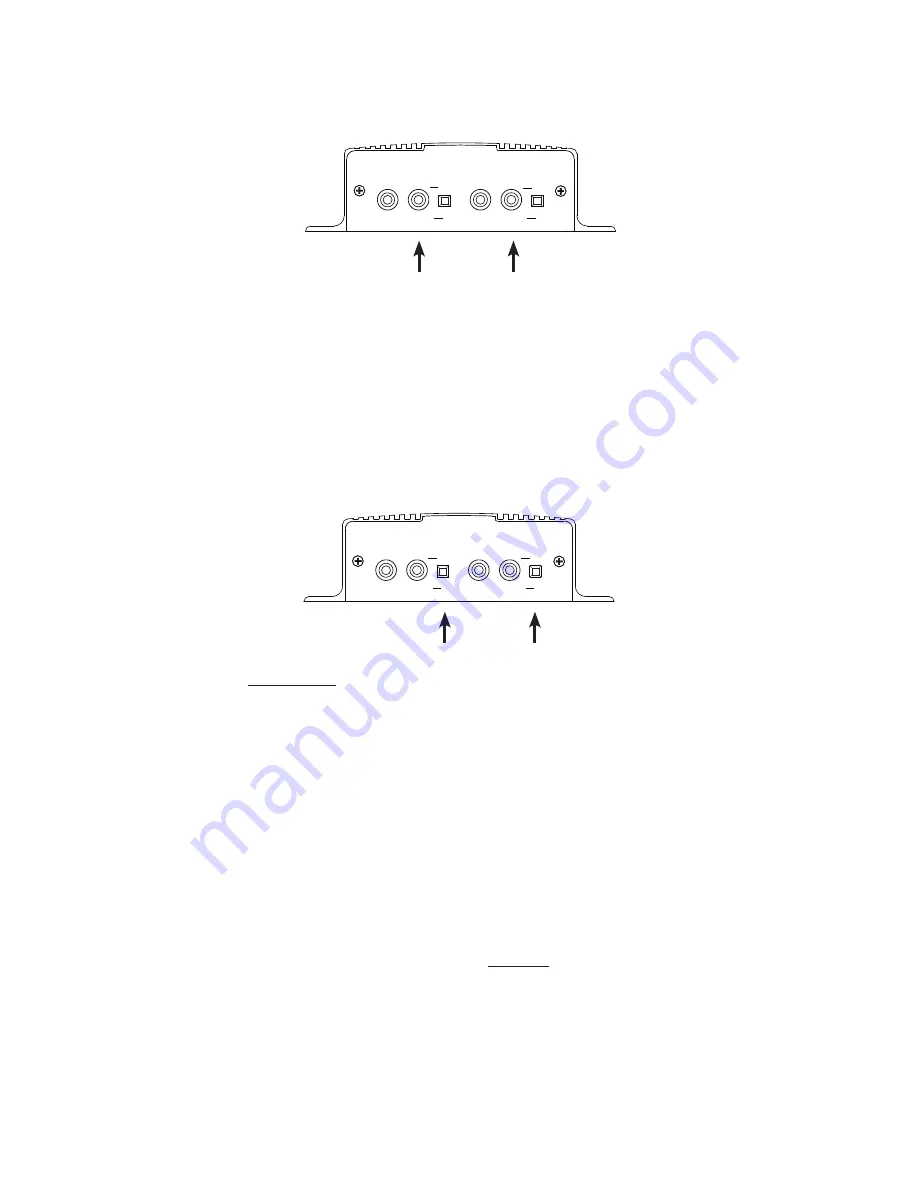
Step 3:

 Depending upon the device the 8Ω/600Ω switch may need to be pushed to better match the impedance of 

the device the iLink is driving.

Step 5:

 All audio adjustments are applied live so changes are saved to the unit instantly.

CHANNEL A

CHANNEL B

IN

OUT

IN

OUT

600Ω

MADE IN USA

600Ω

CHANNEL A

CHANNEL B

IN

OUT

IN

OUT

600Ω

MADE IN USA

600Ω

Summary of Contents for iLink LCD

Page 1: ...iLink LCD iLink LCD Wireless Installation User Manual...

Page 2: ......

Page 3: ...oftware suite When an update is needed your dealer connects to the iLink via your high speed Internet connection and digitally transfers the MP3 audio files and configuration settings you need Changes...

Page 4: ...net The jack also has two built in LEDs that report back network activity and speed status Rear of Unit CHANNEL A or B IN This signal level jack allows an external BGM Background Music source to be fe...

Page 5: ...u items SELECT BUTTON Keypad button used to select menu item to be changed UP and DOWN BUTTONS Keypad buttons used to make changes to selected items 2 x 16 LCD White lettering on blue backlighting LCD...

Page 6: ...X SerialNumber KXXXXXXX iLinkv07 33 C1 10 1 1 206 PressUPArrow toCallback OutputA Volume XX OutputB Volume XX InputABGM Volume XX InputBBGM Volume XX WiFiStatus OFF MonitorSpeaker Source XX IPMode DHC...

Page 7: ...e about 30 seconds 4 Press the UP and DOWN arrows to show WiFi networks found 5 Press SELECT to choose the WiFi network 6 Enter in Password for chosen WiFi Network a Display will flash and show curren...

Page 8: ...will also allow the units communication mode connect back address and port to be changed When changing Mode either DHCP or STATIC must be typed in the New Settings column When changing to STATIC mode...

Page 9: ...ler set through NTL Studio Call your dealer for details Wireless LAN If unit is connected to the Hardwire LAN it can be put into WiFi mode using the built in web portal using the following steps see p...

Page 10: ...applications follow the same procedure for the CHANNEL B OUT Step 5 Optional For messaging only applications the existing BGM Background Music can be fed through the iLink Connect the audio source to...

Page 11: ...lback and press the UP ARROW Press UP Arrow To Callback Step 4 The LCD will display Forcing Connect Please Wait Forcing Connect Please Wait Step 5 If there is a Connect Back record waiting for the uni...

Page 12: ...ced on hold OR listen to the PA systems speakers to fine tune volume Output A Volume XX Output B Volume XX qp Changes Volume If you see a Local Volume Disabled message then the dealer has locked this...

Page 13: ...e XX qp Cycles Internal Speaker to OFF A or B Step 3 Adjustment of the background music feedthrough level can be done through the LCD and Menu De pending upon the application either call into the phon...

Page 14: ...ese steps Step 1 Connect iLink to same network as your phone system some examples of tested phone systems are an Asterisk or Elastix Step 2 On the iLink LCD it will display the IP of the unit Step 3 I...

Page 15: ...nt of any eligible part or equipment covered under this warranty through a PICA Product Development LLC dealer only Buyer is responsible for all shipping and handling charges in connection with the pe...

Page 16: ...PICA Product Development LLC 4 Ash Street Extension Unit 1 Derry NH 03038 picapd com Rev 04 17 Copyright 1984 2017 by PICA Product Development LLC...

Reviews: