


46
6. Click “Save”
7. Next transfer GRD file to your data collector by connecting the device to your PC via USB cable, and copying the
geoid file to the data collector.
8. In SurvCE, you load the Geoid from the “Equip” tab and then going to “6 Localization” and clicking on the “GPS” tab.
Click the “Geoid File” button, then browse to find the new GRD file
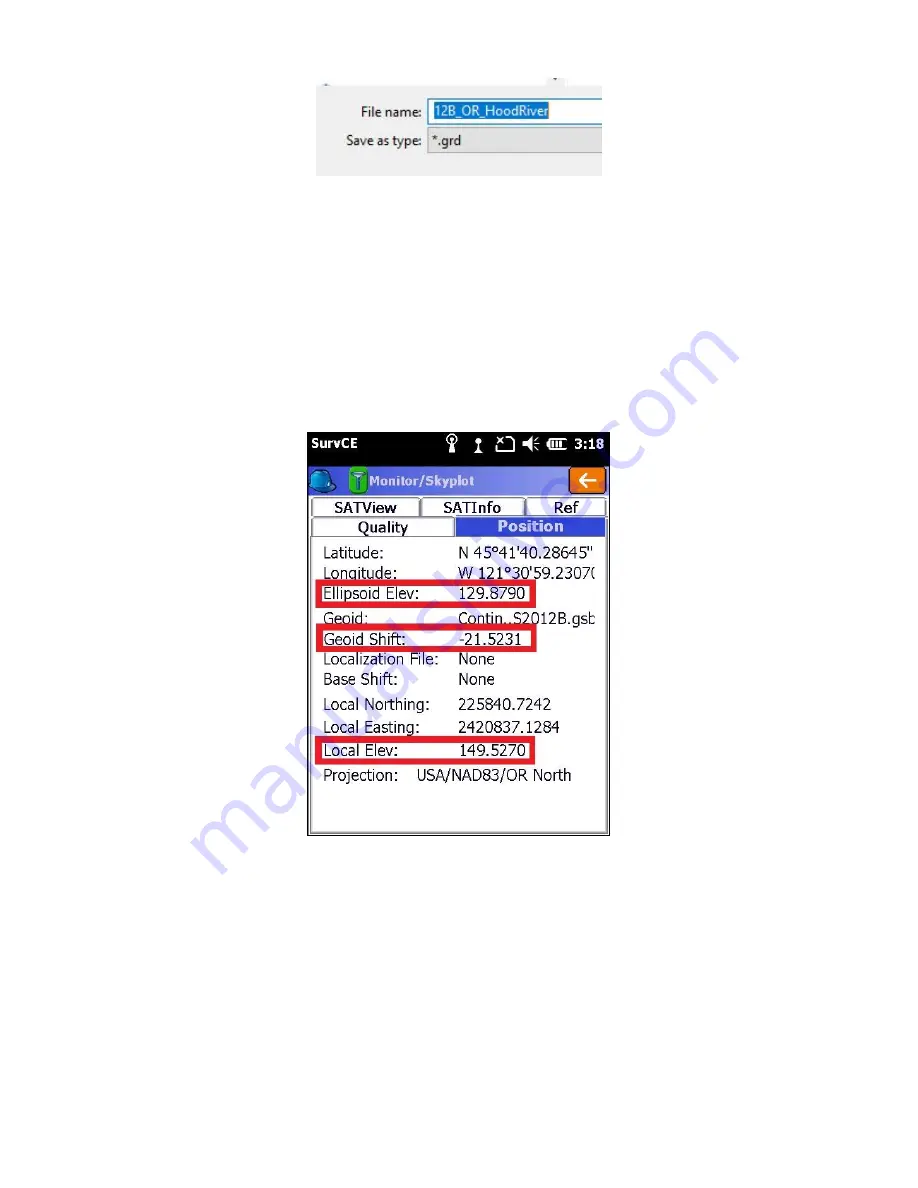
9. You can verify that a Geoid file is loaded and in-use by going to the “Equip” tab and then going to “7 Monitor skyplot”
and clicking on the “Position” tab where you will see the ellipsoid height, and the Geoid separation listed.
For most of the planet the Geoid separation is negative. It is subtracted from the Ellipsoid elevation and causes the
Local (Orthometric) elevation to be greater than the ellipsoid elevation.
If the Geoid file does not cover your survey area, or is not loaded you will see a screen showing the Geoid as “None”
and the “Ellipsoid Elev” is exactly the same as “Local Elev”
Summary of Contents for Stonex S4II
Page 34: ...34 SurvCE should now show the selected head as the Device 9 Click on the Receiver tab...
Page 51: ...51 3 Select the green check mark Wait a moment while the Data Collector adds the new point...
Page 55: ...55 13 Next go to File tab and click on 3 Points to view the list of adjusted points...
Page 57: ...57 2 Go to the File tab and click on 7 Import Export 3 Select Export Ascii File...
Page 65: ...65 Enter your Network key the Wi Fi Password presented on the phone 12 Click Next...
Page 78: ...78 7 Click Next 8 Enter Network key which is the wifi password then click Next...


