background image

17

EN

5  Use Bluetooth 

devices

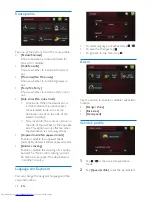
With this navigator, you can also make a call 

through  Bluetooth. Tap   to enter Bluetooth 

menu. (For PNS410BT and PNS510BT only)

Connect a device

Note


Philips does not guarantee the compatibility with all 

Bluetooth devices.


Before pairing a device with this system, read its user 

manual for Bluetooth compatibility.


Make sure that Bluetooth function is enabled on your 

device, and your device is set as visible to all other 

Bluetooth devices.


At one time, you can connect only one Bluetooth 

device to this system.


The operational range between this system and a 

Bluetooth device is approximately 3 meters (9 feet).


Any obstacle between this system and a Bluetooth 

device can reduce the operational range.


Keep away from any other electronic device that may 

cause interference.

Connect a device

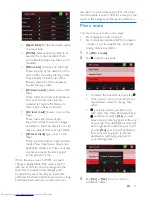
Enable the bluetooth function on your 

mobile phone.

Tap 

[Open]

 to active the Bluetooth 

function and tap 

[Pair/Connect]

.

Tap 

[Search]

 and then tap 

[Re-search]

 to 

search the Bluetooth devices that can be 

paired.

• 

You can tap 

[Stop]

 to stop searching.

In the device list, tap your device name and 

tap connect to start paring.

On your device, accept the paring request 

and enter the default password '1234'.


»

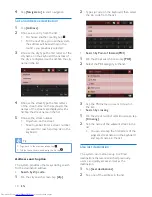
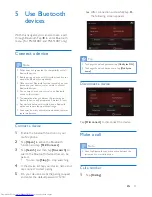
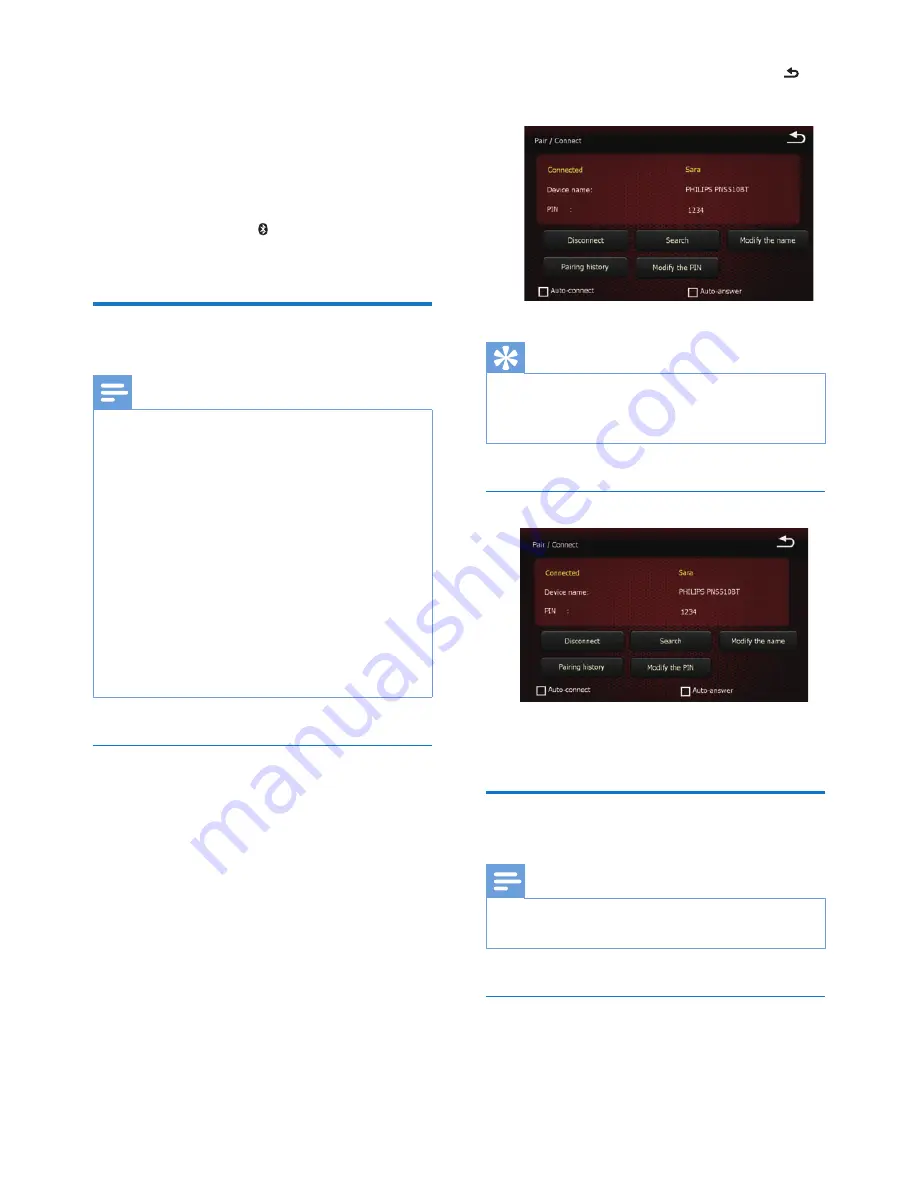
After connection successfully, tap   , 

the following screen appears.


Tip


To change the default password, tap 

[Modify the PIN]

.


To change the default device name, tap 

[Modify the 

name]

.

Disconnect a device


Tap 

[Disconnect]

 to disconnect the device.

Make a call

Note


Keep the Bluetooth connection active between the 

system and your mobile phone.

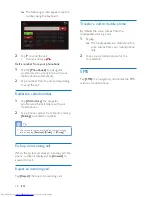
Call a number

Tap 

[Dialing]

.

Summary of Contents for PNS400

Page 1: ...www philips com welcome User manual Always there to help you Register your product and get support at PNS400 410BT PNS500 510BT Question Contact Philips ...

Page 2: ......

Page 3: ...on or off 8 Use the bracket 8 Use the touch pen 8 For the first time use 8 4 Navigation 9 Access navigation mode 9 Choose a destination 9 Start navigation 11 Settings 13 Plan a route 15 Map Mode 16 Additional information 16 5 Use Bluetooth devices 17 Connect a device 17 Make a call 17 SMS 18 6 Adjust settings 19 7 Product information 20 8 Troubleshooting 21 About the Bluetooth device 21 ...

Page 4: ...ghted candles Hearing safety A pleine puissance l écoute prolongée du baladeur peut endommager l oreille de l utilisateur Warning To prevent possible hearing damage do not listen at hight volume levels for long periods The maximum output voltage of headphone is not greater than 150 mV Listen at a moderate volume Using headphones at a high volume can impair your hearing This product can produce sou...

Page 5: ...ioning may be affected by weather and location tall buildings tunnels underpasses trees Most GPS do not work indoors because the signal cannot pass through buildings or metallic solar film on car windows The quality of reception varies according to individual hardware characteristics This system is not capable of determining variances in positioning results due to hardware differences This navigat...

Page 6: ...cannot be disposed with normal household waste Please inform yourself about the local rules on separate collection of batteries because correct disposal helps to prevent negative consequences for the environmental and human health Always bring your product to a professional to remove the built in battery The Bluetooth word mark and logos are registered trademarks owned by Bluetooth SIG Inc and any...

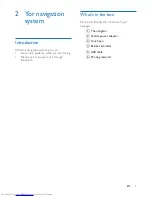
Page 7: ...em you can Get a clear guidance while you are driving Make a call or answer a call through Bluetooth What s in the box Check and identify the contents of your package a The navigator b Vehicle power adaptor c Touch pen d Bracket holder e USB cable f Printing material ...

Page 8: ... the navigator b Indicator light Light up when the navigator is charging c Touch screen d Speaker e RESET Restore default settings f MINI USB socket for power charging and data transfer g Micro SD SDHC card slot h Headphone socket i Touch pen a d c b e i h g f ...

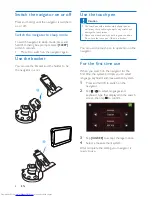
Page 9: ...______________ Connect power The navigator has a built in battery that can be charged through the USB socket of a computer or the vehicle power adapter Charge through USB socket Note Rechargeable batteries have a limited number of charge cycles Battery life and number of charge cycles vary by use and settings Turn off the navigator and connect the supplied USB cable to The MINI USB socket of the n...

Page 10: ... sharp and rough objects may scratch and damage the touch screen Please use a touch pen with a nib in good condition Do not use the touch pen if the nib is broken You can use the touch pen to operation on the navigator For the first time use When you switch on the navigator for the first time the system prompts you to select language keyboard and measurement system 1 Press and hold to switch on th...

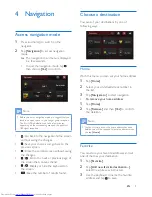
Page 11: ...ing the changes Go to the next or previous page of the screen that contains the list Display or hide the keyboard on the screen Give the number of results found Choose a destination You can set your destinations by one of following ways Home With this menu you can set your home address 1 Tap Home 2 Select your city street street number in the list 3 Tap Navigate to to start navigation To remove yo...

Page 12: ...To go back to the previous screen tap To hide the keyboard and display the list tap Address search option The system provides other ways during search for the destination address Search by Zip code 1 On the city search screen tap Zip 2 Type zip code on the keyboard then select the zip code from the list Search by Point of Interest POI 1 On the street search screen tap POI 2 Select the POI category...

Page 13: ... add a POI in navigation mode 1 Tap 2 Use the keyboard to name the POI 3 Tap to confirm To add a POI in map mode 1 Move the map with your finger and place your desired POI under the cross at the center of the screen 2 Tap 3 Use the keyboard to name the POI 4 Tap to confirm GPS Coordinates This option allows you to set your destination with latitude and longitude coordinates 1 Tap GPS Coordinates 2...

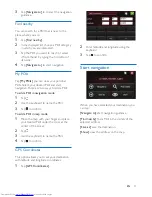
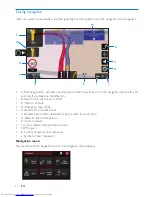
Page 14: ... modification B Save the current position as POI C Mute or unmute D Change to map mode E Name of the current street F Estimated time left to destination Tap to switch to arrival time G Distance left to destination H Current speed I current selected transportation mode J GPS signal K Symbol of second next maneuver L Symbol of next maneuver Navigation menu Tap anywhere of the navigation screen the n...

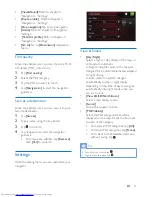
Page 15: ... to start the navigation guidance To remove the address tap Remove then Yes to confirm Settings With the setting menu you can customize your navigator View Sound Day Night Select a night or day display of the map or set mode to automatic In Night mode the colors of the map are designed for a comfortable display adapted to night driving In Auto mode the system changes automatically to day or night ...

Page 16: ...on the side of the number or the opposite side This option is only effective when the destination is a two way street Unpaved roads No unpaved roads Enable or disable the unpaved roads tarred By default it allows unpaved roads Border crossing Enable or disable the crossing of a country border The No border crossing will not be taken into account if the destination is in another country Language an...

Page 17: ... no speed change is applied But if the value is set for instance at 50 for one the categories the speed for the roads in this category will be divided by two This will give travel time estimates for these roads that are twice as long and these roads will only be factored in as a last resort in your route search If on the other hand the value is set at 150 for a category the roads in this category ...

Page 18: ...e current navigation route blue F Route sheet lists maneuvers turns for the calculated route G Save the position under the central cursor as POI H View the total route and the vehicle s position on it I View the remaining route starting from the vehicle s current position J Go back to the navigation mode Additional information Tap copyright on the navigation home menu to display the software that ...

Page 19: ...h device can reduce the operational range Keep away from any other electronic device that may cause interference Connect a device 1 Enable the bluetooth function on your mobile phone 2 Tap Open to active the Bluetooth function and tap Pair Connect 3 Tap Search and then tap Re search to search the Bluetooth devices that can be paired You can tap Stop to stop searching 4 In the device list tap your ...

Page 20: ... from the list and tap Dialing to redial the number Tip You can check received calls dialed calls and missing calls by tapping Received Dialed or Missing Pick up an incoming call When the system receives an incoming call the phone number is displayed Tap Answer to answer the call Reject an incoming call Tap Reject the reject an incoming call Transfer a call to mobile phone By default the voice com...

Page 21: ... on screen display languages GpsInfo View the GPS information DateTime Set date and time Calibration Follow the on screen instructions to calibrate the touch screen Navi Path View the navigation path Power View the built in battery power status Restore Set Restore to default settings System Info View the system information USB Select USB mode MASS STORAGE MS ACTIVESYNC ...

Page 22: ...11 8 mm PNS400 PNS410BT 133 9 x 84 4 x 11 5 mm PNS500 PNS510BT Dimensions of holder W x H x D 80 0 x 110 0 x 130 0 mm Weight main unit 0 13 kg PNS400 PNS410BT 0 16 kg PNS500 PNS510BT Weight holder 0 10 kg LCD Screen size 4 3 inches PNS400 PNS410BT 5 0 inches PNS500 PNS510BT Display resolution 800 x 480 dots Contrast ratio 500 Brightness 450 cd m Bluetooth For PNS410BT and PNS510BT only Communicati...

Page 23: ... be unreachable depending on the selected transportation mode for instance a pedestrian street is not reachable in Car mode The system will nonetheless attempt to guide you to the nearest reachable point to your destination About the Bluetooth device Cannot connect with the system The device does not support the profiles required for the system The Bluetooth function of the device is not enabled R...

Page 24: ...Specifications are subject to change without notice 2013 Koninklijke Philips Electronics N V All rights reserved PNS400 410BT 500 510BT_12_UM_V1 0 ...

Reviews: