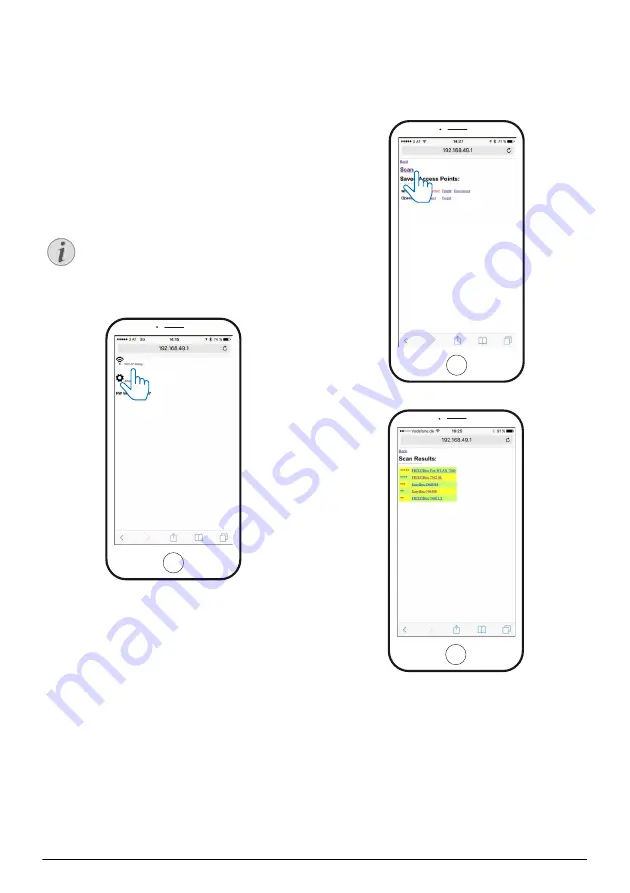
Connecting the phone to the Wi-Fi network created by the projector
13
7 Connecting the phone to the Wi-Fi
network created by the projector
Enter the IP address
192.168.49.1
in the browser
address of your smartphone to set up the wire-
less environment. This will enable smartphone
internet browsing with wireless projection.
1
Switch to iOS mode by pressing the
B
button for
one
second.
2 Connect the phone to the hotspot created by
the projector.
This function depends on type and
model of your phone.
3 Enter
192.168.49.1
in your favourite browser.
4 Select
Wi-Fi AP Setting
.
5 Select
Scan
.
6 Select your wireless network
.
Notice
Summary of Contents for PicoPix PPX5110
Page 15: ...14 Philips PPX5110 7 Enter a password and press Submit ...
Page 37: ...14 Philips PPX5110 7 Geben Sie ein Passwort ein und drücken Sie Submit ...
Page 60: ...14 Philips PPX5110 7 Introduzca una clave y pulse Submit Enviar ...
Page 82: ...14 Philips PPX5110 7 Entrez un mot de passe et pressez Submit ...
Page 104: ...14 Philips PPX5110 7 Adja meg a jelszót és nyomja meg a Submit gombot ...
Page 126: ...14 Philips PPX5110 7 Inserire una password e premere Submit ...
Page 148: ...14 Philips PPX5110 7 Geef wachtwoord in en druk op Verzenden Submit ...
Page 170: ...14 Philips PPX5110 7 Wprowadzić hasło i nacisnąć Submit wyślij ...
Page 193: ...14 Philips PPX5110 7 Insira uma palavra passe e prima Submit enviar ...


