background image

10

English

Setting Up your System
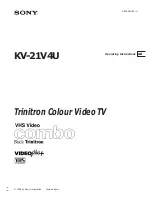
Setting the clock

If the display shows an incorrect time or ' --:-- ', the time and
date must be reset manually.
If a TV channel that transmits TXT/PDC (teletext/PDC) is
stored under programme number 'P01', time/date will automat-
ically be taken from the TXT/PDC information. (SMART
CLOCK)

1

Press VCR, then DISC/VCR MENU.

2

Press 

K

/

L

to select 'INITIAL SET UP' , then press 

B

.

3

Press 

K

/

L

to select 'CLOCK' , then press 

B

.

4

Check the time in 'TIME'. If
required, please change the time
with numerical key pads.

5

Check 'DAY', 'MONTH' and 'YEAR'
in the same way.

6

Choose ‘SMART CLOCK’ ON or
OFF with 

B

.

7

To end, press
DISPLAY/STATUS/EXIT.

TIME --:--

DATE --/--/--

SMART CLOCK [ON]

END=EXIT

Setting the RF out channel (for VCR fea-
tures)

In some reception locations it is possible that a TV channel will
be sent on the same or similar frequency as the System.
Result: As soon as the System is switched on, the reception
quality for this or several other TV channels will decrease.
The following steps will show you how to change the pre-set
'transmission' (RF out channel) frequency on the System.

1

Press VCR, then DISC/VCR MENU.

2

Press 

K

/

L

to select 'INITIAL SET UP' , then press 

B

.

3

Press 

K

/

L

to select 'RF OUT' , then press 

B

.

4

Press 

B

.

5

Press 

K

/

L

or numerical key pads to select a free (not allocat-

ed) channel between channel 22 and 69 in your area.

6

Press 

B

.

7

To end, press
DISPLAY/STATUS/EXIT.

SELECT 

K L

CHOOSE 

B

RF OUT CH     36

END=EXIT

What is RF out channel?

This electronic component in the System allows the device to
transmit audio and video signals via the aerial cable.These signals
can be received on a TV set just like TV channels.

What is RF out channel frequency?

This frequency or channel indicates the channel on which the
audio or video signal is transmitted.

If you cannot get an interference-free picture and sound, switch
the built-in modulator off.
Press 

L

repeatedly until "--" appears next to "RF OUT CH" on

the TV  screen.
Then confirm with 

B

. In that case, please connect your VCR to

your TV with a Scart cable.
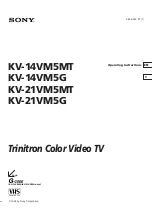
5

Press 

K

/

L

to select 'MANUAL

TUNING'.Then press 

B

.

6

Press 

K

/

L

to select 'DECODER'.

7

Press 

B

to select 'ON' (Decoder

switched on).

8

To end, press DISPLAY/STATUS/EXIT.
The decoder has now been allocated to this TV channel.

How can I switch off the decoder?

Use 

B

to select 'OFF' (Decoder switched off).

MANUAL TUNING

PROG.

P55

CHANNEL

055

DECODER

[OFF]

SKIP

[OFF]

SELECT 

K L

CHOOSE 

B

END=EXIT

Decoder allocation (for VCR features)

Some TV channels transmit encoded TV signals which can only
be viewed with a purchased or rented decoder.You can con-
nect such a decoder to this System.The following function will
automatically activate the connected decoder for the desired
TV channel.

1

Switch the TV on. If applicable, select the programme number
for the System operation.

2

Press 

K

/

L

or numerical key pads to select the TV channel

which you would like to allocate the decoder to.

3

Press DISC/VCR MENU.The main menu will appear.

4

Press 

K

/

L

to select 'TUNER SET UP'.Then press 

B

.

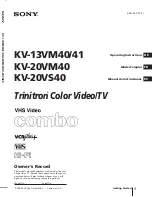
Sorting and clearing TV channels manually

After you have performed the automatic channel search you
may not agree with the sequence in which the individual TV
channels have been allocated to the programme positions (pro-
gramme numbers) of the System.You can use this function to
individually sort the TV channels already saved or to delete
unwanted TV channels or those with poor reception.

1

Press VCR, then DISC/VCR MENU.

2

Press 

K

/

L

to select 'TUNER SET

UP' , then press 

B

.

3

Press 

K

/

L

to select 'MOVE' , then

press 

B

.

4

Press 

K

/

L

to select the saved TV

channel that you want to change.

5

Confirm with 

B

.

6

Move the selected channel with 

K

/

L

to the programme num-

ber you want to assign.

7

Confirm with 

B

.

8

To assign other TV channels to a programme number, repeat
steps 4 to 7.

9

Confirm the assignment of the TV channel with MOVE menu.

10

To exit the MOVE menu, press DISPLAY/STATUS/EXIT.

The clock resets automatically

If you save a TV channel that transmits TXT/PDC on programme
number ‘P01’, date and time will constantly be updated. As a result,
time changes, i.e. daylight savings time, will be set automatically.

MOVE

P01:

02

P06:

90

P02:

03

P07:

99

P03:

05

P08:

121

P04:

10

P09:

124

P05:

74

P10:

130

SELECT 

K L

CHOOSE 

B

END=EXIT

Setting the language (for VCR features)

You have the option of setting one of the displayed languages
for the on-screen menu (OSD). However, the System display
will only display English text regardless of this setting.

1

Press VCR, then DISC/VCR MENU.

2

Press 

K

/

L

to select 'INITIAL SET

UP' , then press 

B

.

3

Press 

K

/

L

to select 'LANGUAGE',

then press 

B

.

4

Select the desired language with

K

/

L

.

5

To end, press
DISPLAY/STATUS/EXIT.

SELECT 

K L

ENGLISH
FRANÇAIS
ESPAÑOL
DEUTSCH
ITALIANO
SVENSKA
NEDERLANDS

END=EXIT

 E9015ED_EN.qx3  03.7.29  6:32 PM  Page 10

Summary of Contents for MX5100VR/00

Page 1: ...1 AAA AAA 1 Digital Video Disc Player Video Cassette Recorder FM MW RadioTuner MX5100VR MX5100VR R E9015ED_EN qx3 03 7 29 6 32 PM Page 1 ...

Page 2: ...our player to extreme of temperature or humidity If the System is brought directly from a cold to a warm location or is placed in a very damp room moisture may condense on the lens of the disc unit inside the System player Should this occur the System would not operate normally Leave the player on for about one hour with no disc in the System until normal playback is possible The mechanical parts ...

Page 3: ...eceiver RECORD LINK 12 Direct Record 12 Switching Direct Record on or off 12 Direct dubbing 13 Recording From DVD To VCR 13 3 English Contents Programming a Recording TIMER General information 13 Programming a recording with the SHOWVIEW system 13 Programming a recording without the SHOWVIEW system 14 OTR One Touch Recording 14 How to check or delete a programmed recording TIMER 14 How to change a...

Page 4: ...DPHONE PLAY RECORD STOP PLAY TUNER DIRECT DUBBING VCR DVD SOURCE STANDBY ON TIMER REC IR AUDIO JAZZ STOP EJECT POP SURR CLASSIC OPTIMAL VOL OPEN CLOSE 19 30 23 33 34 22 29 24 21 20 36 35 27 26 28 25 31 32 1 2 3 5 4 11 10 9 8 7 6 12 13 14 15 16 17 18 Front Panel 20 VCR Appears when a videotape is loaded 21 REPEAT DVD Stays on when the repeat function is on 22 B DVD VCR Stays on when the inserted di...

Page 5: ...play title menu of a disc DVD 7 MODE SYSTEM to set up programmed or random playback DVD Audio CD not use VCR 8 DVD press to put the System in DVD mode and before using the remote control for DVD features 9 DISC VCR MENU to display the menu of the DVD disc or to access VCR menu 10 STOP C to stop a DVD disc playback DVD to stop playback recording VCR to erase a preset TUNER 11 REW h to view DVD pict...

Page 6: ...fier or receiver for DVD features only 2 Use SCART Output DVD VCR AV1 TV for better sound quality for DVD and VCR features Warning Never make or change connections with the power switched on Connect the System directly to your TV instead of eg a VCR to avoid distortion because DVD video discs are copy protected If you use the Euro audio video cable it is not necessary to use other audio cables ANT...

Page 7: ...AL DIGITAL AUDIO IN AUDIO RECEIVER Antenna Connections MW Antenna 1 Fix the antenna holder as shown 2 Connect the supplied MW antenna to the MW jack then posi tion it to receive the clearest sound ANTENNA 75Ω ANTENNA 75Ω FM 75Ω DIGITAL AUDIO OUT COAXIAL S VIDEO OUT MW FL FR C SL SR W SPEAKER 4Ω RF OUT AERIAL VCR DVD VCR TV ANTENNA AV2 DECODER AV1 TV FM Antenna 1 Connect the supplied FM antenna to ...

Page 8: ... used for a long time Do not use old and new or different types of batteries in combination Batteries contain chemical substances so they should be disposed off properly and kept away from children External Input Mode for VCR features To receive the signal from an external input decoder satellite receiver video camera another VCR etc connect to the AV2 DECODER socket and enter 002 with numerical k...

Page 9: ... WAIT START FINISH 5 Select programme number 1 on the TV 6 Confirm with B on the System remote control The System compares the TV channels on the TV and the System If the System finds the same TV channel as on the TV then it stores it at P01 7 Wait until the next number e g P 02 appears in the display 8 Select the next programme number on the TV e g 2 9 Confirm with B 10 Repeat steps 7 to 9 until ...

Page 10: ...select OFF Decoder switched off MANUAL TUNING PROG P55 CHANNEL 055 DECODER OFF SKIP OFF SELECT K L CHOOSE B END EXIT Decoder allocation for VCR features Some TV channels transmit encoded TV signals which can only be viewed with a purchased or rented decoder You can con nect such a decoder to this System The following function will automatically activate the connected decoder for the desired TV cha...

Page 11: ... the System must first calcu late the time played Therefore appears first and only after the tape has been running for a few seconds the correct playing time will be shown Searching for a tape position with picture scanning 1 While a cassette is playing press REWh rewind or FFg forward one or more times 2 Press PLAY B to resume playback Still picture slow motion 1 During playback press PAUSE k to ...

Page 12: ... it a short blank flicker can appear between the old and the new recording or the picture itself can flicker To help reduce these from occurring proceed as follows 1 Find the tape position of the old recording where you want to insert the new recording 2 Look at the last minute of the old recording playback 3 Press PAUSE k at the tape position where the new recording is to go and press REC I 4 Now...

Page 13: ...sched uled the System will turn on and off at the correct time What do I need to know about VPS PDC Usually the VPS or PDC time is the same as the start time But if your TV guide shows a VPS or PDC time which is different from the programme s scheduled start time e g 20 10 VPS PDC 20 14 you must enter the VPS PDC time exact to the minute If you want a start time different from the VPS PDC time you...

Page 14: ... the System as usual until the time for the recording press TIMER SET so that the TIMER REC light dis appears Press the System to choose VCR DVD or TUNER modes then continue with the other features as described in this manual PRESS TIMER SET BUTTON FOR TIMER RECORDING appears on the screen Press TIMER SET on several minutes before the start of a pro grammed recording Error message FULL If this err...

Page 15: ...he speakers and Subwoofer correctly The Center and Rear Surround speakers only operate when Surround is On The Discs or TV programs must be recorded or broadcast in Surround Sound 1 Press SURROUND to set Surround to On or Off When Surround is On the SURR Surround light will appear on the front of the System When Surround is Off the SURR Surround light will be off Programs broadcast in Stereo will ...

Page 16: ...VD main menu and press OK to confirm Note Unless stated all operations described are based on remote control use Some operations can be carried out using the menu bar on the TV screen DVD V CD Pause 1 During playback press PAUSE k Playback will pause and sound will be muted 2 To continue playback press PLAY B B DVD V CD Disc Menus 1 Press DVD then DISC VCR MENU The DVD main menu will appear 2 If t...

Page 17: ...h during playback 2 Enter the desired chapter title number using numerical key pads 2 Time Search 1 During playback press SEARCH INDEX 3 three times CD VCD twice to display the Time Search on the TV screen 2 Within 30 seconds enter a desired disc time using numerical key pads Playback will start at the specified time 3 Press CLEAR to erase the incorrect input DVD V DVD V VCD VCD VCD CD Repeat REPE...

Page 18: ...EG files are accompanied by icon Maximum of 255 folders can be recognized Maximum of 256 files can be recognized Up to 8 hierarchies can be created This DVD system recommends the use of files recorded at the below specifications Sampling frequency 44 1kHz or 48kHz Constant bit rate 112kbps 320kbps 3 MP3 OK PLAY JPEG MP3 FOLDER On Screen Information You can check the MP3 files during playback 1 Pre...

Page 19: ...viewing that exceed your set tings with a password or playback will stop This feature allows you to prevent discs with alternative scenes from being played by your children Parental Level Parental Level allows you to set the rating level of your DVD discs Playback will stop if the disc s ratings exceed the level you set 1 Press SYSTEM MENU PROG in STOP mode 2 Press B to select CUSTOM then press OK...

Page 20: ...he Center speaker than the Front speakers increase the Center delay time to improve the Surround Sound effect If you plan to sit closer to the Rear speakers than the Front speakers increase the Rear delay time 1 Press DVD to put the DVD system in DVD mode The red DVD light will be on the front of the DVD system Press STOP C to stop Disc playback if necessary 2 Press SYSTEM MENU PROG The QUICK SETU...

Page 21: ...zech 4965 Danish DAN 5047 Dutch DUT 6058 English ENG 5160 Esperanto 5161 Estonian 5166 F H Faroese 5261 Fiji 5256 Finnish FIN 5255 French FRE 5264 Frisian 5271 Galician 5358 Georgian 5747 German GER 5051 Greek GRE 5158 Greenlandic 5758 Guarani 5360 Gujarati 5367 Hausa 5447 Hebrew 5569 Hindi 5455 Hungarian HUN 5467 I K Icelandic ICE 5565 Indonesian 5560 Interlingua 5547 Interlingue 5551 Inupiak 555...

Page 22: ...rk for every situation There may be interference from other electrical appliances or weak MW signals Preset Radio Stations Automatic Presetting You can store up to 40 preset radio stations automatically by following these steps 1 Press TUNER to select Tuner mode The red TUNER light will appear on the front of the System 2 Press and hold SYSTEM MENU PROG until AUTO appears on the System s display p...

Page 23: ...enna for better reception Increase the distance between the System and your other electronics equipment Problem No power No picture Distorted picture Completely distorted picture or black white picture with DVD No sound or distorted sound No audio at digital output No DTS audio at analog output No sound and picture Picture freezes momentarily during playback Disc can t be played No return to start...

Page 24: ...W RUSSIA Phone 095 937 9300 PHILIPS INFO CENTER Fegistrasse 5 8957 Spreitenbach SUISSE Tel 0844 800 544 PHILIPS CUSTOMER CARE CENTER Twee Stationsstraat 80 80 Rue des Deux Gares 1070 BURSSEL BRUXELLES BELGIUM for BENELUX Tel 070 222303 PHILIPS Österreichische Philips Industrie GmbH Triesterstrasse 64 1101 Wien AUSTRIA Tel 0810 001 203 PHILIPS INFO CENTER Alexanderstrasse 1 20099 Hamburg GERMANY Te...

Reviews: