21
EN
Before you start
•
Install a DLNA-compliant media server
application on your device. Make sure
that you download an application that
works best for you. For example,
•
Windows Media Player 11 or
higher for PC
•
Twonky Media Server for Mac or
PC
•
Enable media sharing of files. For ease
of use, we have included the steps for
the following applications:
•
'Microsoft Windows Media Player
•
'Microsoft Windows Media Player
•
'Macintosh OS X Twonky Media
Note
•
For additional help on these
applications or other media servers,
check the user manual of the media
server software.
Set up media server software
To enable media sharing, set up the media
server software.
Before you start
•
Connect your home theater to a
home network. For better video
quality, use wired connection
whenever possible.
•
Connect the computer and other
DLNA-compatible devices to the
same home network.
•
Make sure that your PC firewall allows
you to run Media Player programs (or
the firewall’s exemption list has the
media server software included).
•
Switch on your computer and the
router.
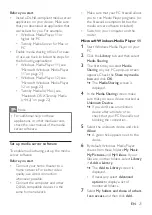
Microsoft Windows Media Player 11
1
Start Windows Media Player on your
PC.
2
Click the
Library
tab, and then select
Media Sharing.
3
The first time you select
Media
Sharing
on your PC,a pop-up screen
appears. Check the
Share my media
box
and click
OK
.
»
The
Media Sharing
screen is
displayed.
4
In the
Media Sharing
screen, make
sure that you see a device marked as
Unknown Device
.
»
If you don't see an unknown
device after a minute or so,
check that your PC firewall is not
blocking the connection.
5
Select the unknown device and click
Allow.
»
A green tick appears next to the
device.
6
By default, Windows Media Player
shares from these folders:
My Music
,
My Pictures
, and
My Videos
. If your
files are in other folders, select
Library
>
Add to Library
.
»
The
Add to Library
screen is
displayed.
•
If necessary, select
Advanced
options
to display a list of
monitored folders.
7
Select
My folders and those of others
I can access
, and then click
Add.


