


7.6
Data Storage
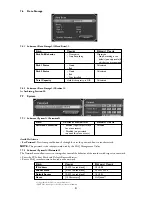
7.6.1
Submenu <Data Storage><<Hard Drive>>
7.6.2
Submenu <Data Storage><<Archive>>
See
Archiving
,
Section 10
.
7.7
System
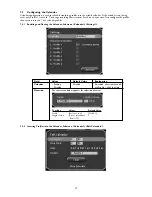
7.7.1
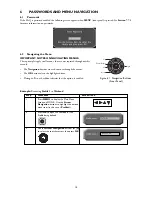
Submenu <System><<Password>>
Available Actions:
•
Set Password.
Press front panel buttons
1
through
4
to set the password (four to ten characters).
NOTE:
This password is the same password used by the Hi-Q Management Utility.
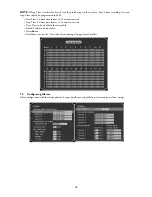
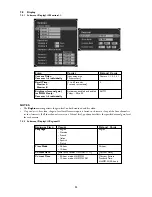
7.7.2
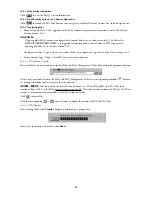
Submenu <System><<Network>>
The Network menu allows access to settings that control the behavior of the recorder with respect to a network.
• Enter the IP, Subnet Mask, and Default Router addresses.
• Enter a Hi-Q recorder name to be used on the network.
* See Appendix D for Hi-Q on-screen character set.
** XXXX is the last 4 digits of the Hi-Q recorder serial number.
21
F
IELD
V
ALUES
D
EFAULT
V
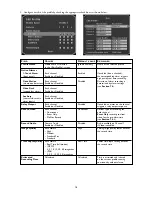
ALUE
Disk Full Behavior
• Overwrite
Overwrite
• Stop Recording
• Stop Recording is the
default (non-adjustable) if
a disk array is recognized
Disk 1 Status
• Good
Calculated
• Bad
Disk 2 Status
• Good
Calculated
• Bad
• Not Installed
Total Capacity
Hard disk capacity, in GB
Calculated
F
IELD
V
ALUES
& D
EFINITION
D
EFAULT
V
ALUE
Password Protection
• Enabled (requires password
Disabled
for menu access)
• Disabled (no password
required for menu access)
F
IELD
V
ALUES
D
EFAULT
V
ALUE
IP Address
[0 –255 in each block]
10.10.0.0
Subnet Mask
[0 –255 in each block]
255.255.255.0
Default Router
[0 –255 in each block]
10.10.0.1
Name
[12 Characters]*
Hi-Qxxxx**


