EN - 36
Alternate recording (USB-HDD only)
In the following cases, the Unit will Detect and Automatically
Record to the HDD even when USB-HDD is selected as the
Recording Media.
–
If USB-HDD is Not Connected.
–
If the USB-HDD does Not have enough Space to
complete the Recording.
–
The Unit Cannot Record to the Connected USB-HDD
(USB-HDD is Unregistered).
This Feature is Only available for Timer Recording and not
available for One-Touch Timer Recording.
7.
When all items are entered, select “OK”,
then press
[ OK ]
again.
Timer Programming
WED OCT 23 2013 1:30 PM
Date
Start
End
CH
REC To
OCT 23
1:30 PM
2:00 PM
28.1
HDD
ABCDE
Remains 30h25m
OK
Back
You can set Daily Programs and Weekly Programs by
Pressing the Up/Down button after selecting a Recording Date.
Your Program Setting is now stored.
• To Set another Program, Repeat Step
2
to
7
.
• Press
[ (home) ]
Repeatedly to Exit.
• When 2 or more programs are overlapped, “Timer
program overlapped. Timer program may not be
recorded” appears, and the overlapped program will
be displayed in Blue with a
Icon on the left side.
• To correct the Timer Program, refer to ‘Checking,
Cancelling or Correcting the Timer Programming
information’ on this page.
Note(s)
• If you have Not Set the Clock yet:
Entry screen for the Clock Setting will appear instead of
the Timer Programming list at Step
1
. Continue with the
Steps in ‘Clock Setting (Manual)’ or ‘Clock Setting (Auto)’
on page 28 before Setting a Timer Programming.
• Use
[ / ]
to Move the Cursor to the left and the right
in the Entry Screen for the Timer Programming.
• You Cannot make a Timer Recording program that
exceeds 8 hours.
To Stop the Timer Recording in Progress
1.
Press
[
(Stop) ]
on the Remote Control.
2.
Confirmation Message will appear. Select “Yes”, then
press
[ OK ]
.
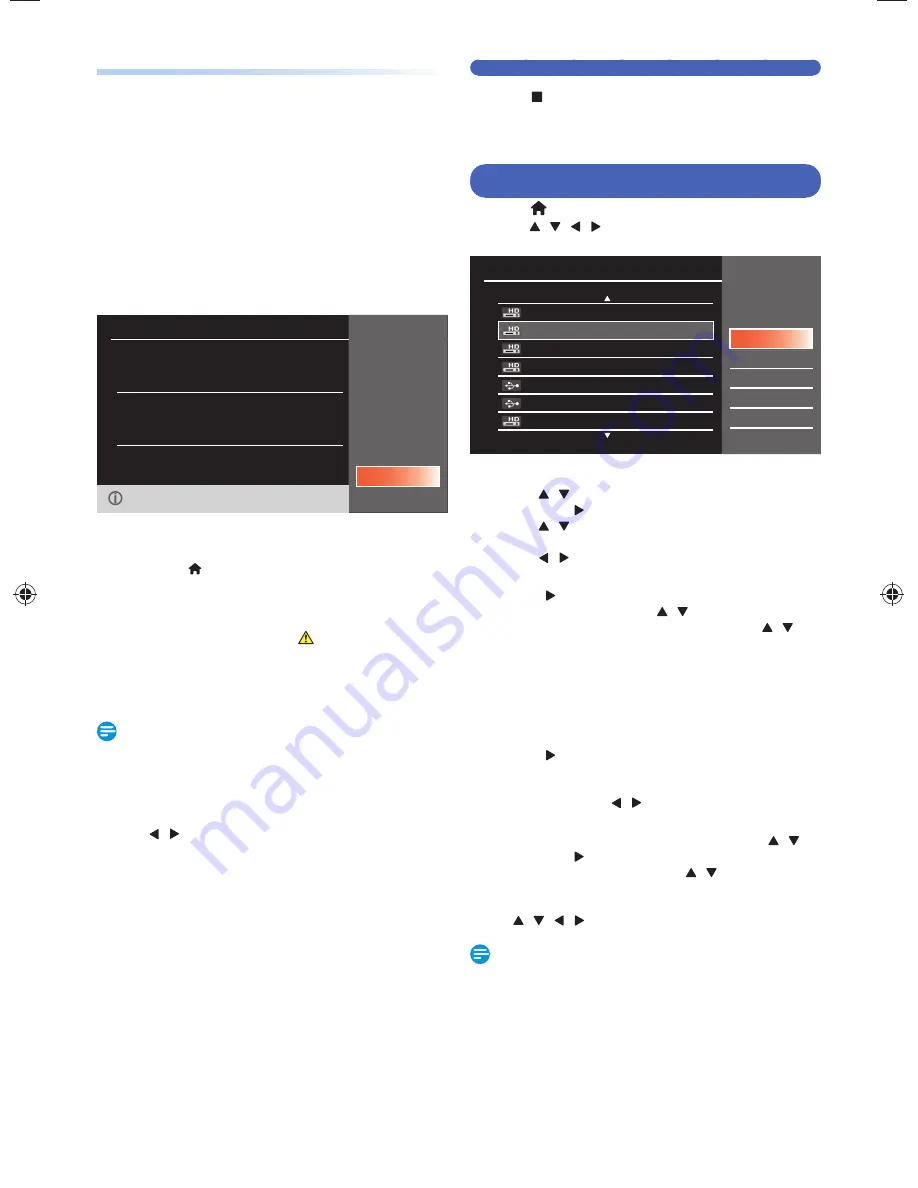
Checking, Deleting or Correcting the Timer
Programming information
1.
Press
[ (home) ]
, then select “Timer Programming”
using
[ / / / ]
and press
[ OK ]
.
2.
Check the information.
Timer Programming
WED OCT 23 2013 1:30 PM
OCT 23 2013 10:00 PM 23.1
WED OCT 23 1:00 PM – 2:00 PM 23.1 ABC-A
OCT 23 2013 10:00 PM 23.1
WED OCT 23 1:00 PM – 2:00 PM 23.1 ABC-A
OCT 23 2013 10:00 PM 23.1
WED OCT 23 1:00 PM – 2:00 PM 23.1 ABC-A
OCT 23 2013 10:00 PM 23.1
WED OCT 23 1:00 PM – 2:00 PM 23.1 ABC-A
OCT 23 2013 10:00 PM 23.1
WED OCT 23 1:00 PM – 2:00 PM 23.1 ABC-A
OCT 23 2013 10:00 PM 23.1
WED OCT 23 1:00 PM – 2:00 PM 23.1 ABC-A
OCT 23 2013 10:00 PM 23.1
WED OCT 23 1:00 PM – 2:00 PM 23.1 ABC-A
Program Change
Delete
Delete Multi Prog.
New Program
Skip
Back
3. A:
To Delete the Timer Program:
1
Use
[ / ]
to Select the Program you wish to Delete,
then press
[ (Cursor)]
.
2
Use
[ / ]
to Select “Delete”, then press
[ OK ]
.
• Confirmation Message will appear.
3
Use
[ / ]
to Select “Yes”, then press
[ OK ]
.
3. B:
To Delete Multiple Timer programs:
1
Press
[ (Cursor)]
to Move to Sub Menu then select
“Delete Multi Prog.” using
[ / ]
, then press
[ OK ]
.
2
Select the Program you wish to Delete using
[ / ]
,
then press
[ OK ]
.
• Check Icon will appear for the Timer Program
selected for Deletion.
3
Repeat Step
2
until you Select All the Programs you wish
to Delete.
• To Remove the Check Icon for Deletion, move the
Cursor to the Selected Program and press
[ OK ]
.
4
Press
[ (Cursor)]
to Select “OK” on the Screen, then
press
[ OK ]
.
• Confirmation Message will appear.
5
Select “Yes” using
[ / ]
, then press .
[ OK ]
3. C:
To Correct the Timer Program:
1
Select the program you wish to Correct using
[ / ]
,
then press
[ (Cursor)]
.
2
Select “Program Change” using
[ / ]
, then press
[ OK ]
.
3
Correct the Timer Program Information using
[ / / / ]
, then press
[ OK ]
.
Note(s)
• With the Timer Recording in Progress (which is shown in
Red in the Timer Program list), you can only Edit the End
Time.
Continued on next page.
EEC30UH̲Philips̲SmartDVR̲v1̲EN.indb 36
EEC30UH̲Philips̲SmartDVR̲v1̲EN.indb 36
2013/09/13 15:38:31
2013/09/13 15:38:31


