background image

4

5

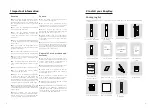
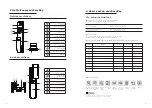
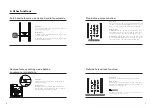
1.Use proper installation kit according to the door thickness.
2.The default installation kit is applicable to doors of 38-60 mm thickness. If the thickness 

of your door is not within this range, please contact us.

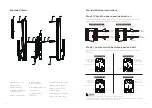
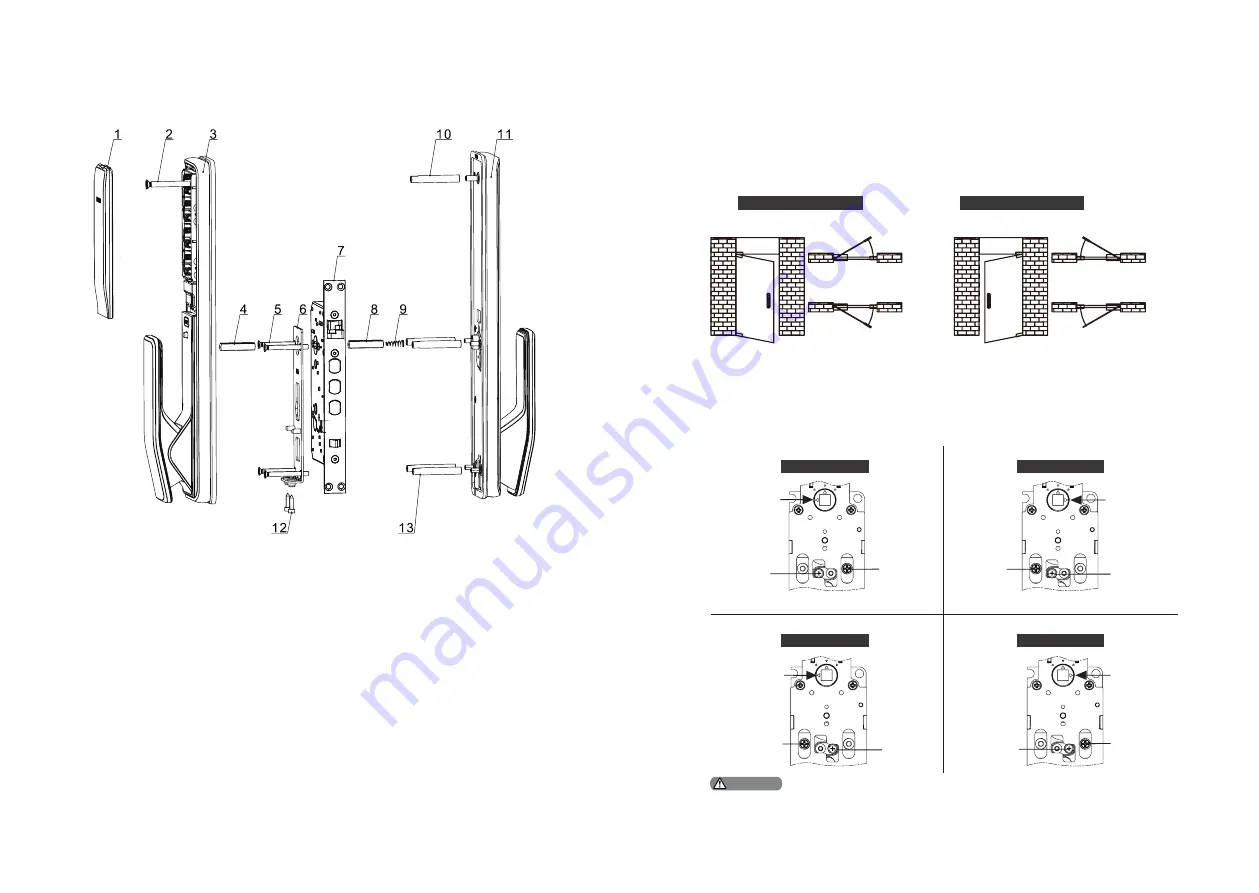
1. Battery cover (x1)

2. M6 chamfer 

head screw (x1)

3. Inside escutcheon 

component (x1)

4. Square shaft (x2)

5. M5 chamfer 

head screw (x4)

6. Mounting plate (x1)

7.  Mortise (x1)

8. 35mm square 

shaft (x1) 

9. Compressed Spring (x1)

10. M6 screw tube (x1)

11. Outer escutcheon 

component (x1)

12. M4 hexagon screw(X2)

13. M5 screw tube (x4)

Exploded Views

Pre-installation instructions

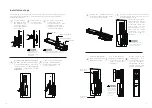
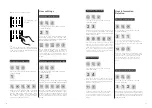
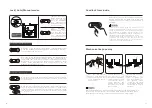
Step 1 | Check the door opening direction

This product can be installed on doors of 4 types of opening directions: 

left-out pull, right-in push, right-out pull and left-in push.

Left-in 

push

Right-

in push

Indoor

Indoor

Indoor

Indoor

Outdoor

Outdoor

Outdoor

Outdoor

Left-

out pull

Right-

out pull

Left-handle open

Right-handle open

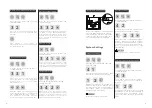
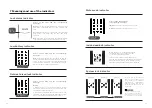
Step 2 | How to switch between push and pull 

Please fix the screws in proper locations according to the door opening 
direction. 

Right-in push

Direction of 

square shaft 

driving block

Direction of 

square shaft 

driving block

Direction of 

square shaft 

driving block

Direction of 

square shaft 

driving block

Inside escutcheon

Inside escutcheon

Inside escutcheon

Inside escutcheon

Screw

Screw

Screw

Screw

Screw

Screw

Screw

Screw

Right-out pull

Left-in push

Left-out pull

Right pull

Left push

Right pull

Left push

Right pull

Left push

Right pull

Left push

Right push

Left pull

Right push

Left pull

Right push

Left pull

Right push

Left pull

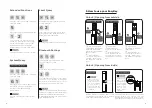
Attention

Summary of Contents for EasyKey 9200

Page 1: ......

Page 2: ...replace batteries Unlock Unlock from outside With a PIN code With a fingerprint With a card Unlock from inside With handle With Close button Lock Auto Manual modes Lock from outside Lock from inside Inside Deadlock Mechanical key opening 1 Important information 02 2 Install your EasyKey 03 3 Get to know your EasyKey 08 4 How to set up your EasyKey 09 Security Caution Disposal of used Products and ...

Page 3: ...lock by yourself Keep the relevant sealed stickers properly Do not easily disclose the password information Please modify the default master PIN code immediately after finishing installing and debugging and keep the mechanical key properly Please replace all the batteries immediately if there is a low battery alarm Please make sure to correctly match the poles when installing the batteries Caution...

Page 4: ... directions left out pull right in push right out pull and left in push Left in push Right in push Indoor Indoor Indoor Indoor Outdoor Outdoor Outdoor Outdoor Left out pull Right out pull Left handle open Right handle open Step 2 How to switch between push and pull Please fix the screws in proper locations according to the door opening direction Right in push Direction of square shaft driving bloc...

Page 5: ...ghten the 4 anchor screws on the mortise Tightenthe M6chamfer head screws and the 2 M4 hexagon screws M6 Chamfer Head Screws M4 Hexagon Screws Put in the batteries and close the battery cover Then fix the striker to finish the installation Please check if all components are connected properly such as the push pull handle the safe handle switch and the mechanical key Install the connecting screw tu...

Page 6: ...re setup Instructions There are 2 operating modes in the EasyKey General mode and dual verification mode General mode Dual verification mode Unlock with any registered identity information Unlock with any two of PIN code card and fingerprint User Number You can delete a single user information by its user number without having to delete everything You can record the user information in the followi...

Page 7: ...enter user PIN code deletion Press 1 again to delete a single user PIN code Enter the 2 digit user number 00 09 of the user PIN code that is to be deleted and press to confirm After hearing a voice prompt of Succeeded press several times until you exit master mode Press enter master PIN code and confirm with Press 2 to enter user adding then press 4 to enter card registration The system will autom...

Page 8: ...eeded For Chinese press 1 for English press 2 After hearing a voice prompt of Succeeded press several times until you exit master mode Press 4 to enter system settings then press 1 to enter language settings The default language is English The default volume is higher volume 4 Language Settings or 2 1 1 Adjust the volume as needed For higher volume press 1 for lower volume press 2 for mute mode pr...

Page 9: ...r Push or pull to open the door Push or pull to open the door Push or pull to open the door Touch keypad Fingerprint sensor With handle With Close button Attention Attention Press 7 to enter Bluetooth settings To disable Bluetooth press 3 After hearing a voice prompt of Settings succeeded press back to previous menu until you exit master mode 7 3 2 Press 6 to enter system query then press 2 to get...

Page 10: ...a voice prompt of Door closed Lock from inside the door Push 1 2 3 Deadlock from inside After the door is locked long press the CLOSE button The button will flash once in red and there will be a voice prompt of Inside deadlock enabled Under inside deadlock mode all functions of the outside escutcheon will be locked If you try to wake up the system manually the keypad area will display the combinat...

Page 11: ... function Outside forced lock function Function Use only one button to mute the lock by turning off the voice guide Applicable to the scenes where you don t want to disturb your family How to use 1 Mute When the system is awake long press the Mute button for 2 seconds to enter one time mute mode The button will glow green 2 Unmute When the system is awake long press the Mute button for 2 seconds t...

Page 12: ...abled the outside forced lock function the light will light up after the system wakes up indicating this function is in use 7 Meanings and use of the indicators Outside forced Low battery Mute mode indicator Colors of the light and the corresponding meanings 1 White Indicates the mute mode is off 2 Green Indicates the mute mode is on Inside deadlock indicator System lock indicator When the door is...

Page 13: ...light with 2 flashes Indicates the door has been locked 2 Green light with 2 flashes Indicates the door has been unlocked 3 Red light with 1 flash Indicates the door has been dead locked Types of alarms and alarm modes Triggering If the lock is under outside forced lock mode unlocking from inside will trigger the alarm Alarm mode Continuous repeated alarms Turning off The alarm can be turned off b...

Page 14: ... crash and it s impossible to open the door from outside please press the Reset button and then release to let it reboot automatically How to apply an emergency power The lock is powered by four 1 5V alkaline batteries There are two sets of working power inside the battery cabinet Eight batteries can be put in to extend the battery life and reduce battery replacement frequency The battery cabinet ...

Page 15: ...klijke Philips N V and are used under license This product has been manufactured by and is sold under the responsibility of Shenzhen Conex Intelligent Technology Co Ltd and Shenzhen Conex Intelligent Technology Co Ltd is the warrantor in relation to this product Version 2 0 ...

Reviews: