background image

12

Set the default volume level when you play a disc.

1. Press 

OK

.

2. Press 

 to set the volume.

3. Press 

OK

 to confirm and exit.

[Sound Mode]

Select a preset sound effect to enhance the audio 
output.
• 

[3D]

 - Select a virtual surround sound effect 

that is produced from the left and right audio 
channels.

• 

[Movie Mode]

 - Select a sound effect for 

movies.

• 

[Music Mode]

 - Select a sound effect for 

music.

[CD Upsampling]

For better sound quality in stereo mode, convert 
the music CD to a higher sampling rate.
• 

[Off]

 - Turn off CD-upsampling.

• 

[88.2kHz]

 - Convert to twice the original 

sampling rate.

• 

[176.4kHz]

 - Convert to four times the original 

sampling rate.

[Night Mode]

Make loud sound level softer and soft sound level 
louder so that you can watch the DVD movies at a 
low volume, without disturbing others.
• 

[On]

 - Enjoy quiet viewing at night.

• 

[Off]

 - Enjoy surround sound with a full 

dynamic range.

Note

Applicable only to Dolby Digital encoded DVDs.


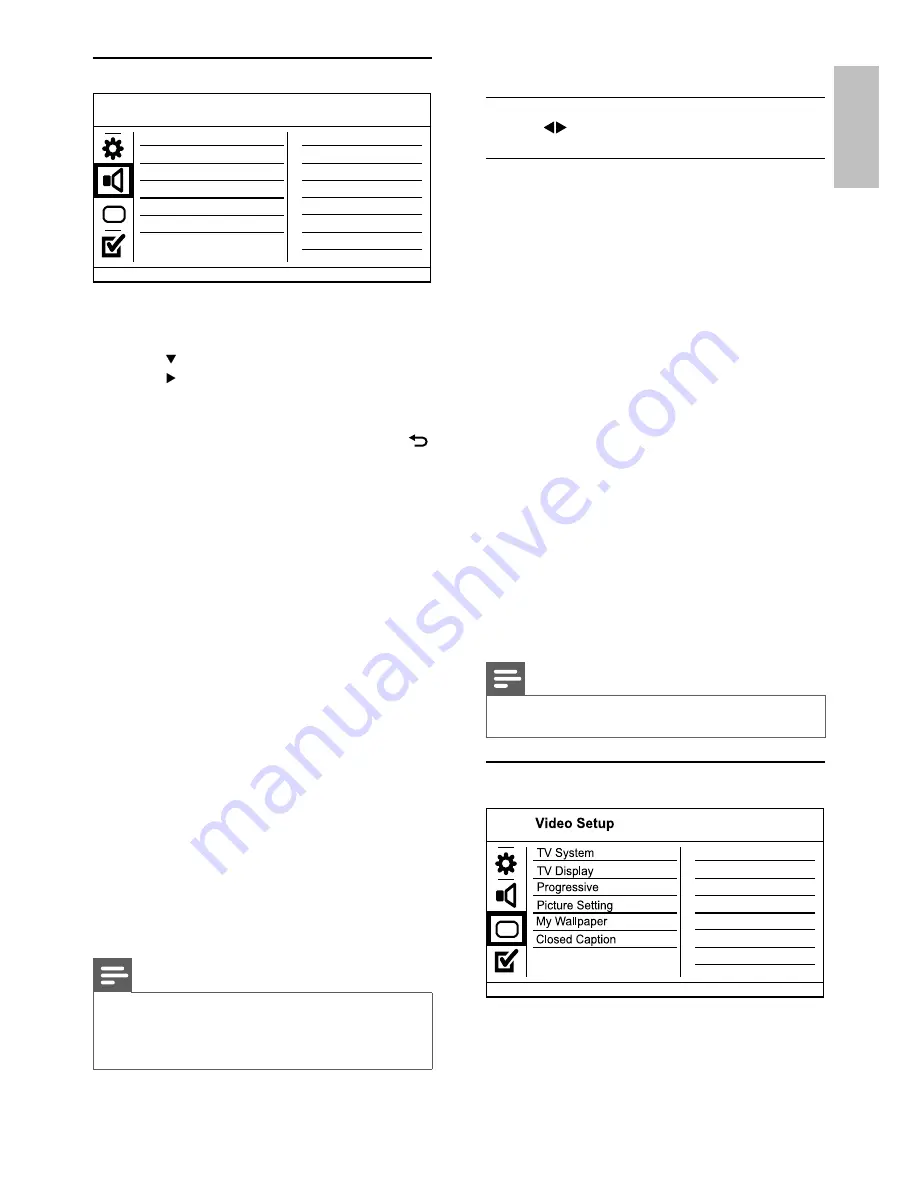
Video setup


1

 Press 

SETUP

.


»

[General Setup]

 menu is displayed.

Audio setup


1

 Press 

SETUP

.


»

[General Setup]

 menu is displayed.

2

 Press  to select 

[Audio Setup]

, and then 

press   to enter the submenu.

3


Select an option, and then press 

OK

.

4


Select a setting, and then press 

OK

.

To return to the previous menu, press

• 


BACK

 .

To exit the menu, press 

• 

SETUP

.

[Analogue Output]

Select an analogue setting based on the audio 
device that is connected through the analogue 
audio jack.
• 

[LT/RT]

 - For the surround sound output 

through two speakers.

• 

[Stereo]

 - For the stereo output.

[Digital Audio]

Select a digital setting based on the digital amplifier/
receiver that is connected through the digital jack 
(coaxial/digital).
• 

[Digital Output]

 - Select a type of digital 

output.
• 

[All]

 - Support multi-channel audio 

formats.

• 

[Off]

 - Disable digital output.

• 

[PCM Only]

 - Downmix to two-channel 

audio format.

• 

[LPCM Output]

 - Select the LPCM (Linear 

Pulse Code Modulation) output sampling rate.
• 

[48kHZ]

 - For discs recorded at sampling 

rate of 48 kHz.

• 

[96kHZ]

 - For discs recorded at sampling 

rate of 96 kHz.

Note


[LPCM Output]

 setting is only available if the 

[Digital 

Output]

 is set to 

[PCM Only]

.

The higher the sampling rate, the better the sound 


quality.

[Volume]

Sound Mode
CD Upsampling

Digital Audio 

Analogue Output

Volume

Audio Setup 

Night Mode

English

EN

Summary of Contents for DVP3522/55

Page 1: ...DVP3522 Register your product and get support at www philips com welcome EN User manual ...

Page 2: ...r 6 4 Get started 6 Prepare the remote control 6 Find theTV input channel 6 Select menu display language 7 Turn on progressive scan 7 5 Play 7 Play a disc 7 Play video 7 Play music 9 Play photo 9 Play from a USB flash drive 10 6 Other features 10 Create MP3 files 10 7 Adjust settings 11 General setup 11 Audio setup 12 Video setup 12 Preferences 13 8 Additional information 14 Update software 14 Care ...

Page 3: ...ng or splashing Never place any object or items that can damage this unit e g liquid filled objects lighted candles Never place this product on other electrical equipment Keep away from this product during lightning storms Where the mains plug or an appliance coupler is used as the disconnect device the disconnect device shall remain readily operable Visible and invisible laser radiation when open ...

Page 4: ... Congratulations on your purchase and welcome to Philips To fully benefit from the support that Philips offers register your product at www philips com welcome Playable media This product can play DVD DVD Video DVD R RW DVD R RW DVD R R DL Dual Layer Video CD SVCD Audio CD CD R CD RW MP3 media WMA media JPEG files USB flash drive Region codes You can play discs with the following region codes DVD reg...

Page 5: ...r next title chapter or track g Switch to the USB mode h Numeric buttons Select an item to play i SUBTITLE Select a subtitle language on a disc j ZOOM Fit the picture display to the TV screen Zoom the picture in or out k REPEAT Select various repeat play modes l REPEAT A B Repeat play for a specific section m AUDIO CREATE MP3 Select an audio language or channel on a disc Access the menu of creating...

Page 6: ... time remove the batteries Do not mix batteries old and new or carbon and alkaline etc Batteries contain chemical substances so they should be disposed of properly Find the TV input channel 1 Press to turn on this product 2 Turn on the TV and switch to the video input channel refer to the TV user manual on how to select the A V input channel Connect to digital amplifier receiver 1 Connect a coaxial...

Page 7: ... compartment and start disc play Note Check the types of discs supported see Your DVD player Playable media If the password entry menu is displayed enter the password before you can play the locked or restricted disc see Adjust settings Preferences Parental Control Play video Note Some operations may not work with some discs See the information accompanying the disc for details Select menu display...

Page 8: ... to then press OK Display play time 1 During play press INFO The disc status menu is displayed 2 Select Time Disp and then press The display options vary from disc type 3 Select an option and then press OK Control video play 1 Play a title 2 Use the remote control to control the play Button Action Start pause or resume disc play Stop disc play Skip to a previous next title or chapter Search fast b...

Page 9: ...ers are not supported Folders files that exceed the supported limit of this product cannot be displayed or played Play photo Play photo as slideshow You can play JPEG photos files with jpeg or jpg extensions 1 Insert a disc or USB that contains the JPEG photos For USB press Slideshow begins for Kodak disc or a contents menu for JPEG disc is displayed View DVD play from different angles 1 During play...

Page 10: ... and then press OK to start slideshow For a photo recorded with the exif format the display orientation is automatically optimized To display photos in color Fun Mode or in black and white Simple Mode press DISC MENU To preview the photos in thumbnail press INFO To select a photo press the Navigation buttons To enlarge the selected photo and start slideshow press OK To return to the menu press BAC...

Page 11: ...t a conversion option in the OPTIONS panel and then press OK repeatedly to select an item Option Description Speed Select a copying speed Bitrate Select a quality level Higher bitrate for better sound quality and bigger file size CRT ID3 Copy track information into the MP3 file Device The created files can only be saved in a USB flash drive 6 Press to access the TRACK panel 7 Select an audio track and...

Page 12: ... General Setup menu is displayed 2 Press to select Audio Setup and then press to enter the submenu 3 Select an option and then press OK 4 Select a setting and then press OK To return to the previous menu press BACK To exit the menu press SETUP Analogue Output Select an analogue setting based on the audio device that is connected through the analogue audio jack LT RT For the surround sound output t...

Page 13: ...OK 4 Select a setting and then press OK To return to the previous menu press BACK To exit the menu press SETUP TV System Change this setting if the video does not appear correctly By default this setting matches the most common setting for TVs in your country PAL For a PAL system TV Multi For TV that is compatible with both PAL and NTSC NTSC For an NTSC system TV TV Display Select a display format...

Page 14: ... language for disc play Subtitle Select a subtitle language for disc play Disc Menu Select a disc menu language Note If the language you have set is not available on the disc the disc uses its own default language For some DVDs the subtitle audio language can only change from the disc menu To select the languages that are not listed in the menu select Others Then check the Language Code list at th...

Page 15: ... numbers here Model No __________________________ Serial No ___________________________ Caution Power supply must not be interrupted during software upgrade 1 Press SETUP 2 Select Preferences Version Info and then press OK 3 Write down the file name and then press SETUP to exit the menu 4 Visit www philips com support to check for the latest software version using the file name for this product 5 Re...

Page 16: ...is product from the power outlet for a few minutes then connect again No reaction to the remote control Connect this product to the power outlet Point the remote control at the IR sensor located on the front panel of this product Insert the batteries correctly Insert new batteries in the remote control Picture No picture See the TVs user manual on how to select the correct input on the TV Change t...

Page 17: ...o Refers to an audio compression technology developed by Microsoft Corporation WMA data can be encoded with Windows Media player version 9 or Windows Media player for Windows XP Files are recognized by their file extension wma EN ...

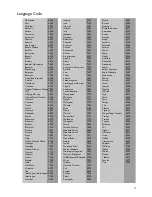
Page 18: ...85 Lao 7679 Latina 7665 Latvian 7686 Letzeburgesch 7666 Limburgan Limburger 7673 Lingala 7678 Lithuanian 7684 Luxembourgish 7666 Macedonian 7775 Malagasy 7771 Magyar 7285 Malayalam 7776 Maltese 7784 Manx 7186 Maori 7773 Marathi 7782 Marshallese 7772 Moldavian 7779 Mongolian 7778 Nauru 7865 Navaho Navajo 7886 Ndebele North 7868 Ndebele South 7882 Ndonga 7871 Nederlands 7876 Nepali 7869 Norsk 7879 N...

Page 19: ... 2010 Koninklijke Philips Electronics N V All rights reserved DVP3522_55_UM_V2 0_1020 ...

Reviews: