background image

English

13

Basic Functions

IMPORTANT:
Before you operate the system, complete
the preparation procedures.

Plug and Play 

(for tuner installlation)

Plug and Play allows you to store all available

radio stations automatically.

First time setup/power up

1

When you turn on the main supply,  "

AUTO

INSTALL PRESS 

PLAY KEY

" is displayed.

2

Press 

ÉÅ

 on the system to star t installation.

"

PLUG AND PLAY

" .... "

INSTALL

" is

displayed, followed by "TUNER" and "AUTO".

PROG

 starts flashing.

The system will automatically store the radio

stations (FM only ) with sufficient signal strength.

When all the available radio stations are

stored or the memory for 40 presets are used,
the last preset radio station will be played.

To reinstall Plug and Play

1

In standby mode, press and hold

ÉÅ

on the

system until "

AUTO INSTALL PRESS 

PLAY

KEY

" is displayed.

2

Press 

ÉÅ

again to start installation.

All previously stored radio stations will be

replaced.

To exit without storing the Plug and Play

Press 

9

 on the system.

If you do not complete the Plug and Play

installation, the function will be restarted when
you next turn on the main supply again.

Notes:
– If no stereo frequency is detected during Plug
and Play, "PLEASE CHECK ANTENNA" will be
displayed.

PG 001-028_BTM177_12-Eng

2/29/08, 16:01

13

Summary of Contents for BTM177

Page 1: ...ss Micro System User manual Manuel d utilisation Manual de usuario Benutzerhandbuch Gebruikershandleiding Manuale dell utente Användarhandbok Brugervejledning Register your product and get support at www philips com welcome ...

Page 2: ... N or coloured black Connect the brown wire to the terminal marked L or coloured red Do not connect either wire to the earth terminal in the plug marked E or e or coloured green or green and yellow Before replacing the plug cover make certain that the cord grip is clamped over the sheath of the lead not simply over the two wires Copyright in the U K Recording and playback of material may require c...

Page 3: ...3 2 1 3 4 5 6 7 8 0 29 2 3 4 5 6 7 8 9 0 1 9 ...

Page 4: ...ider gränsen för laserklass 1 Observera Stömbrytaren är sekundärt kopplad och bryter inte strömmen från nätet Den inbyggda nätdelen är därför ansluten till elnätet så länge stickproppen sitter i vägguttaget SF Luokan 1 laserlaite Varoitus Laitteen käyttäminen muulla kuin tässä käyttöohjeessa mainitulla tavalla saattaa altistaa käyttäjän turvallisuusluokan 1 ylittävälle näkymättömälle lasersäteilyl...

Page 5: ...5 Nederlands Italiano Dansk English Français Español Deutsch Nederlands Italiano Svenska Dansk Index English 6 Français 29 Español 54 Deutsch 79 Nederlands 104 Italiano 128 Svenska 153 Dansk 176 ...

Page 6: ...ls 15 Playing an MP3 WMA disc 15 Information display during playback 16 Different play modes SHUFFLE and REPEAT16 Programming track numbers 16 Reviewing the programme 16 Erasing the programme 16 Radio Reception Tuning to radio stations 17 Programming radio stations 17 Automatic programming 17 Manual programming 17 Tuning to preset radio stations 17 RDS 17 USB Connection Using USB connectivity 18 R...

Page 7: ...or the environment and human health Safety Information Before operating the system check that the operating voltage indicated on the typeplate or the voltage indication beside the voltage selector of your system is identical with the voltage of your local power supply If not please consult your dealer Place the system on a flat hard and stable surface Where the MAINS plug or an appliance coupler i...

Page 8: ...mal can actually be loud and harmful to your hearing To guard against this set your volume to a safe level before your hearing adapts and leave it there To establish a safe volume level Set your volume control at a low setting Slowly increase the sound until you can hear it comfortably and clearly without distortion Listen for reasonable periods of time Prolonged exposure to sound even at normally...

Page 9: ... circuit has been built in Therefore your system may switch to Standby mode automatically under extreme conditions If this happens let the system cool down before reusing it not available for all versions Antenna Connection FM Antenna The wire antenna supplied can only be used to receive nearby stations For better reception we recommend using a cable antenna system or an outdoor antenna 1 Extend t...

Page 10: ...By connecting a USB mass storage device to the Hi Fi system you can enjoy the device s stored music through the powerful speakers of Hi Fi system Insert the USB device s USB plug into the socket on the set Connecting other equipment to your system Use the supplied Aux in cable to connect the AUX jack 3 5mm located on the top panel to an AUDIO OUT or headphone jack on an external device such asTV L...

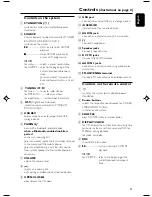
Page 11: ...s and hold during a call transfers sound from system speakers to the mobile phone or conversely 7 VOLUME adjusts the volume level 8 rejects an incoming call exits pairing and disconnects all paired devices 9 OPEN CLOSE0 opens closes the CD door 0 USB port connects to external USB mass storage device iR SENSOR infrared sensor for remote control AUX IN jack connects an external source 3 5 mm socket ...

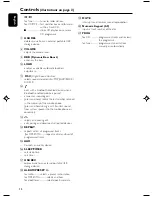
Page 12: ...ast number retained in the memory of the mobile phone press and hold during a call transfers sound from system speakers to the mobile phone or conversely rejects an incoming call exits pairing and disconnects all paired devices REPEAT repeats a disc all programed tracks for MP3 WMA repeats a disc an album all programmed tracks AUX Connets an auxiliry device SLEEP TIMER sets sleep time sets timer U...

Page 13: ...dio stations FM only with sufficient signal strength When all the available radio stations are stored or the memory for 40 presets are used the last preset radio station will be played To reinstall Plug and Play 1 In standby mode press and holdÉÅ on the system until AUTO INSTALL PRESS PLAY KEY is displayed 2 Press ÉÅ again to start installation All previously stored radio stations will be replaced...

Page 14: ...e will be turned off automatically When LOUDNESS feature is on the DBB will be turned off and the DSC setting will be changed to CLASSIC automatically To listen through the headphone Connect the headphone plug to the n socket on the rear of the set The speakers will be muted Switching the system on Press STANDBY ON or SOURCE or 2on the remote control The system will switch to the last selected sou...

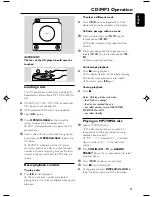
Page 15: ...s í ë once or repeatedly until the desired track number appears in the display To find a passage within a track 1 Press and hold down on í ë on the remote control à á The disc is played at high speed and low volume 2 When you recognise the passage you want release í ë on the remote control à á Normal playback continues To interrupt playback Press 2 during playback The display freezes and the elaps...

Page 16: ...ack if in the STOP position If you have selected SHUFFLE playback starts automatically 3 To return to normal playback press SHUFFLE or REPEAT until the various SHUFFLE REPEAT modes are no longer displayed You can also press 9 to cancel your play mode Note The SHUFFLE and REPEAT functions cannot be used simultaneously Programming track numbers Programme in the STOP position to select and store your...

Page 17: ...ridden 2 Press PROG on the remote control for more than 2 seconds to activate programming AUTO is displayed and available stations are programmed in order of waveband reception strength The first preset automatically stored will then be played Manual programming 1 Tune to your desired station seeTuning to radio stations 2 Press PROG on the remote control to activate programming 1 flashes in the di...

Page 18: ...B Connection Playing a USB mass storage device 1 Make sure that your BTM177 is being powered on 2 Plug a compatible USB mass storage device to BTM177 s USB port marked If needed use a suitable USB cable to connect between the device and BTM177 s USB port The device will automatically power on If the device is not powered on turn on the power manually then re connnect it 3 Press SOURCE repeatedly o...

Page 19: ...f PRESS STOPTO RELEASE on the display panel You can continue enjoying music during ripping However music playback will be interrupted during speedy ripping This function can also be combined with the programme function In this case selection of REC ALL in DISC mode will record all programmed tracks from the starting point to the USB mass storage device Never unplug the USB mass storage device befo...

Page 20: ...h as CD player orVCR 2 Press SOURCE or AUX on the remote control repeatedly until AUX 1 is displayed Using AUX IN 2 white red jacks 1 Use the audio cables white red not supplied to connect AUX IN 2 L R jacks of the main unit located on the back panel to the corresponding AUDIO OUT jacks on an external device such asTV orVCR 2 Press SOURCE or AUX on the remote control repeatedly until AUX 2 is disp...

Page 21: ...nge may be substantially reduced if the signal passes through a solid object Human bodies brick and concrete walls and heavy furniture or bookcases will reduce the operational range of your Bluetooth devices Glass dry wall or wood paneled walls and office partitions may have a less severe but noticeable effect You should position your Bluetooth devices closer to each other if you observe communica...

Page 22: ...vice will reconnect to the system whenever it comes into the communication range If an eighth device is paired the pairing information of the first paired device will be overwritten FAILED will appear on the display panel of the system if no pairing is made within one minute In this case please refer to the related items in Troubleshooting for a solution to the problem Operating a connected Blueto...

Page 23: ... system or the remote control to transfer sound from system speakers to the mobile phone or conversely The display panel of the system will show TRANSFER Holding a call through the system for a connected mobile phone supporting the HFP and HSP profiles During a call you can press MUTE on the remote control to mute the microphone speakerphone so that the other party cannot hear your voice The displ...

Page 24: ...lay Viewing clock The clock if it is set is shown in normal standby mode To view the clock in any sound source CD or FM for example Press briefly DISPLAY CLOCK Setting the clock 1 In standby mode press DISPLAY CLOCK 12 hour or 24 hour mode is displayed 2 Press ALBUM PRESET to select between 12 hour and 24 hour display 3 Press DISPLAY CLOCK again to confirm The hour digits flash 4 Press ALBUM PRESE...

Page 25: ...stem software application etc 2 Bluetooth standard profiles indicate the purpose of Bluetooth communication between devices Wireless range 10m 30ft line of sight range may vary depending on actual conditions BluetoothR device with A2DP Advanced Audio Distribution Profile enabled SPEAKERS Bass reflex system Dimensions w x h x d 160 x 250 x 180 mm GENERAL INFORMATION AC Power 100 240V 50 60 Hz Dimen...

Page 26: ...rVCR Remove and reconnect the AC power plug and switch on the system again Adjust the volume Disconnect the headphones Check that the speakers are connec ted correctly Check if the stripped speaker wire is clamped Make sure the MP3 CD was recorded within 32 256 kbps bit rate with sampling frequencies at 48 kHz 44 1 kHz or 32 kHz Check the speaker connections and location WARNING Under no circumsta...

Page 27: ...trol directly towards the IR sensor Set the clock correctly Press SLEEP TIMER to switch on the timer If recording or tape dubbing is in progress stop recording Power has been interrupted or the power cord has been disconnected Reset the clock timer It is not set in the USB mode Select USB mode The device is not securely connected to BTM177 s USB port Re connect the device and make sure that the de...

Page 28: ...ired for the system You have not enabled the Bluetooth function of the device Please refer to the user manual of the device for how to enable the function The system is not in the pairing mode Select the Bluetooth source and press and hold PAIRING for more than 3 seconds until PAIRING appears on the display panel The system is already connected with another Bluetooth enabled device Disconnect that...

Page 29: ...English Français Português Español Deutsch Nederlands Italiano Svenska Dansk Suomi Polski Printed in China CLASS 1 LASER PRODUCT BTM177 PDCC ZYL 0809 Meet Philips at the Internet http www philips com ...

Reviews: