background image

9

EN

AUDIO IN

FM/DAB A

ERIAL

(75   )


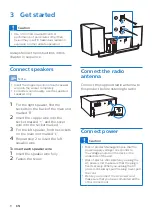
Connect the power cord to the wall 
socket.

Prepare the remote 

control

Caution


Risk of product damage! When the remote 
control is not used for long periods, remove 
the batteries.


Batteries contain chemical substances, so 
they should be disposed of properly.

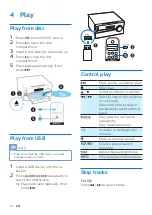
To insert the remote control battery:

Open the battery compartment.

Insert the supplied AAA batteries 
with correct polarities (+/-) as 
indicated.

Close the battery compartment.


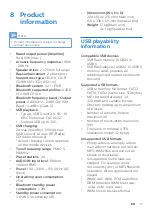
Power on

Press  .


»

The product switches to the last 
selected source.

Switch to standby mode

Press   again to switch the product to 
standby with no clock display, or to 
standby with clock display.


»

The red standby indicator lights up.

• 

In standby, you may press and hold 


to toggle clock display on 

or off.

Note


The product switches to standby mode 
after 15 minutes of inactivity.


To achieve the efficient energy saving 
performance, unplug any external 
electronic device from the USB port when 
the device is not in use.

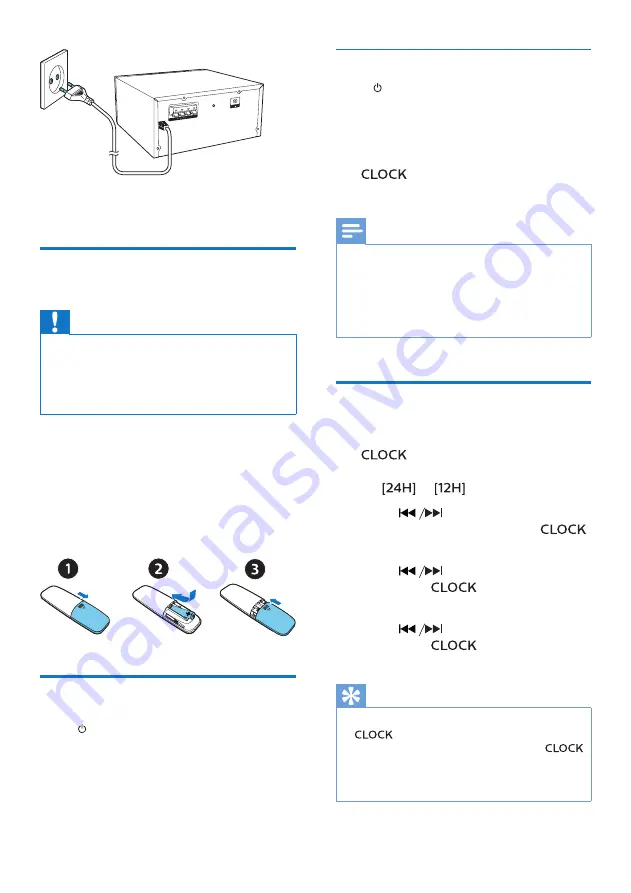
Set the clock

In power on mode, press and hold 

 for more than 2 seconds to 

enter the clock setting mode.


»

 or 

 is displayed.

Press 


 to select 

24H

 or 

12H 

hour format, and then press 

.


»

The hour digits begin to blink.

Press 


 to set the hour, and 

then press 

.


»

The minute digits begin to blink.

Press 


 to set the minute, and 

then press 

.


»

The clock is set.

a

Tip


To view clock in power on mode, press 


briefly.


In standby, you may press and hold 


to toggle clock display on or off.


If clock display is turned on in standby, 
power consumption increases.

Summary of Contents for BTB2515

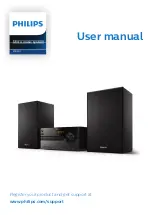
Page 1: ...Register your product and get support at www philips com support User manual Micro music system Micro music system Micro music system BTB2515 ...

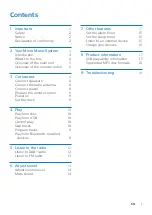
Page 2: ...wer on 9 Set the clock 9 4 Play 10 Play from disc 10 Play from USB 10 Control play 10 Skip tracks 10 Program tracks 11 Play from Bluetooth enabled devices 11 5 Listen to the radio 12 Listen to DAB radio 12 Listen to FM radio 13 6 Adjust sound 14 Adjust volume level 14 Mute sound 14 7 Other features 15 Set the alarm timer 15 Set the sleep timer 15 Listen to an external device 15 Charge your devices...

Page 3: ... or adaptor to disconnect the apparatus from the power The device shall not be exposed to dripping or splashing Do no place any source of danger on the device e g liquid filled objects lit candles Where the MAINS plug or an appliance coupler is used as the disconnect device the disconnect device shall remain readily operable Make sure that there is enough free space around the product for ventilat...

Page 4: ...environment and human health Removing the disposable batteries To remove the disposable batteries see battery installation section Environmental information All unnecessary packaging has been omitted We have tried to make the packaging easy to separate into three materials cardboard box polystyrene foam buffer and polyethylene bags protective foam sheet Your system consists of materials which can ...

Page 5: ... Introduction With this unit you can enjoy audio from discs USB devices Bluetooth devices and other external devices listen to FM and and Digital Audio Broadcasting DAB radio The unit supports these media formats What s in the box Check and identify the contents of your package Main unit 2 x speakers 1 x AC power cord 1 x radio antenna Remote control with two AAA battery Printed materials ...

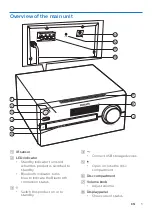
Page 6: ...n or close the disc compartment f Disc compartment g Volume knob Adjust volume h Display panel Show current status a IR sensor b LED indicator Standby indicator turns red when this product is switched to standby Bluetooth indicator turns blue to indicate the Bluetooth connection status c Switch this product on or to standby ...

Page 7: ...ISC USB TUNER AUDIO IN BT In Bluetooth mode press and hold for more than 2 seconds to disconnect the currently connected device and enter pairing mode Start or pause play Stop play Erase a program Skip to previous next track Search within a track disc Tune to a radio station Adjust time j k socket Connect with the speakers l Connect external audio devices m antenna Improve FM radio reception ...

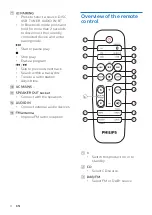
Page 8: ... timer Set alarm timer i Set the clock View clock information In standby press and hold to toggle clock display on or off j Program tracks Program radio stations Auto store radio stations k Mute or restore volume l Select a preset sound effect m volume Adjust volume n Adjust display brightness o Stop play or erase a program Enter or exit DAB menu p Press to start pause or resume play Confirm or se...

Page 9: ...eaker find the sockets on the main unit marked L 4 Repeat step 2 to insert the left speaker wire To insert each speaker wire 1 Insert the speaker wire fully 2 Fasten the screw AUDIO IN FM DAB AERIAL 75 Connect the radio antenna Connect the supplied radio antenna to this product before listening to radio AUDIO IN FM DAB AERIAL 75 FM DAB AERIAL 75 Connect power Caution Risk of product damage Ensure ...

Page 10: ...ay The red standby indicator lights up In standby you may press and hold to toggle clock display on or off Note The product switches to standby mode after 15 minutes of inactivity To achieve the efficient energy saving performance unplug any external electronic device from the USB port when the device is not in use Set the clock 1 In power on mode press and hold for more than 2 seconds to enter th...

Page 11: ...ce into the socket 2 Press repeatedly to select the USB source Play starts automatically If not press BTB2515 Control play Start pause or resume play Stop play Select an album or a folder Press to skip to the previous or next track Press and hold to search backward forward within a track Play a track or all tracks repeatedly Play tracks randomly Increase or decrease the volume Mute or unmute sound...

Page 12: ...tional range The effective operation range between this unit and your Bluetooth enabled device is approximately 25 meters 82 feet The unit can memorize up to 8 previously connected Bluetooth devices Philips BTB2515 BTB2515 1 Press to select the Bluetooth source Bluetooth is displayed The Bluetooth indicator flashes blue 2 On your device that supports Advanced Audio Distribution Profile A2DP enable...

Page 13: ...ption fully extend and adjust the position of the antenna Listen to DAB radio Digital Audio Broadcasting DAB is a way of broadcasting radio digitally through a network of transmitters It provides you with more choice better sound quality and more information Store DAB radio stations automatically Note New stations and services are added in DAB broadcast from time to time To make new DAB stations a...

Page 14: ...ations Tune to a DAB station manually Remove invalid stations from the station list Adjust system settings 3 To select an option press 4 If sub option is available repeat steps 2 3 Display DAB information While listening to DAB radio press repeatedly to display various information if available such as frequency signal strength time etc Listen to FM radio Tune to an FM radio station 1 Press repeate...

Page 15: ...io station In FM mode press to select a preset number While listening to FM radio you may press OK to toggle stereo and mono sound Display RDS information RDS Radio Data System is a service that allows FM stations to show additional information 1 Tune to an FM radio station 2 Press repeatedly to display various RDS information if available such as station name program type time etc 6 Adjust sound ...

Page 16: ...X indicates the volume level of alarm 5 Press to set the alarm volume and then press to confirm Activate deactivate alarm timer In standby mode press repeatedly to activate or deactivate timer If timer is activated is displayed In standby you may press and hold to toggle clock display on or off Set the sleep timer This music system can switch to standby automatically after a set period of time Whe...

Page 17: ...system you can charge your external devices such as your cell phone MP3 player or other mobile devices 1 Use a USB cable to connect the USB socket of this product with the USB socket of your devices 2 Connect the product to power Once the device is recognized the charging starts Note Compatibility of this product with all devices is not guaranteed ...

Page 18: ... consumption 2W Standby power consumption 0 5W clock display off Dimensions W x H x D 220 x 104 x 231 mm Main unit 150 x 238 x 125 mm Speaker box Weight 1 7 kg Main unit 2 x 1 kg Speaker box USB playability information Compatible USB devices USB flash memory USB2 0 or USB1 1 USB flash players USB2 0 or USB1 1 memory cards requires an additional card reader to work with this unit Supported USB form...

Page 19: ...by and the model number and serial number are available No power Make sure that the AC power cord of the device is connected properly Make sure that there is power at the AC outlet As a power saving feature the system switches off automatically 15 minutes after track play reaches the end and no control is operated No sound or poor sound Adjust the volume Check that the speakers are connected corre...

Page 20: ...antenna You may purchase a replacement antenna cable with a L shape plug on one end as shown below Connect the L shape plug to this product and fit the plug on the other end into your wall socket Music playback is unavailable on this unit even after successful Bluetooth connection The device cannot be used to play music through this unit wirelessly The audio quality is poor after connection with a...

Page 21: ...cate any malfunction of this unit Timer does not work Set the clock correctly Switch on the timer Clock timer setting erased Power has been interrupted or the power cord has been disconnected Reset the clock timer How to keep clock display on or off in standby In standby press and hold to toggle clock display on or off EN ...

Page 22: ...y and is sold under the responsibility of Gibson Innovations Ltd and Gibson Innovations Ltd is the warrantor in relation to this product The Philips trademark and the Philips Shield Emblem are registered trademarks of Koninklijke Philips N V used under license BTB2515_12_UM_V1 0 ...

Reviews: