


2
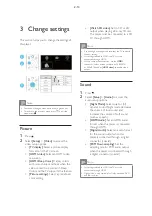
Perform the network installation.
1)
Press
.
2)
Select
[Setup]
, and press
OK
.
3)
Select
[Network]
>
[Network
installation]
, and press
OK
.
4)
Follow the instructions on the TV screen to
complete the installation. If necessary, use the
alphanumeric buttons on the remote control
to enter a password.
Caution
Before you connect to a network, familiarize yourself
with the network router, and networking principles. If
necessary, read documentation accompanying network
components. Philips is not responsible for lost, damaged
or corrupt data.
Smartphone control
Use a smartphone to browse, control and play
PHGLDÀOHVIURPWKLVSOD\HU
What you need
An iPhone (iOS 3.1.3 and above) or
Android based device (Android 2.1 and
above)
On your smartphone, download
Philips
MyRemote
application
PC (DLNA)
For iPhone, search for the application
in
App Store
For Android based device, search for
the application in
Android Market
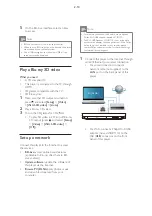
Before you start
Connect this player to a home network
VHH6HWXSDQHWZRUN
Connect your smartphone to the same
home network (see the user manual of the
smartphone for details).
Turn on this player
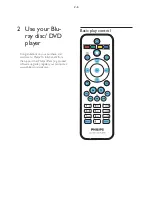
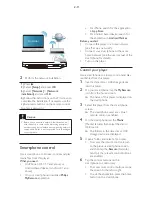
Control your player
Use a smartphone to browse, control and play
PHGLDÀOHVIURPWKLVSOD\HU
1
Insert a data disc or USB storage device
into this player.
2
On your smartphone, tap the
MyRemote
icon from the home screen.
»
The name of this player is displayed on
the smartphone.
3
Select this player from the smartphone
screen.
»
The smartphone used as a virtual
remote control is enabled.
4
On the smartphone, tap the
Media
(Media) tab, and then select the disc or
USB source.
»
The folders in the data disc or USB
storage device are displayed.
5
2SHQDIROGHUDQGVHOHFWDÀOHWRSOD\
To access the remote control, return
to the previous smartphone screen,
and then tap the
Remote
(Remote)
tab. Only the relevant control buttons
are enabled.
6
Tap the control buttons on the
smartphone to control play.
To access more control buttons, swipe
the screen to the left or right.
To exit the application, press the home
button on the smartphone.
2-11
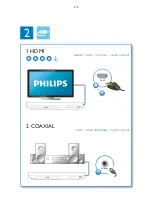
Summary of Contents for BDP2105
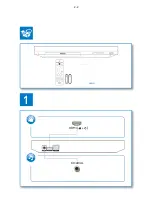
Page 11: ...4 3 5 SOURCE 1 2 TV 2 4 ...
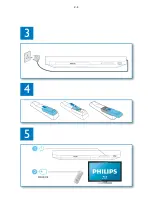
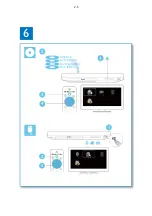
Page 12: ...6 USB DVD VCD CD BD BD 3D DivX Plus HD MKV MP3 JPEG 2 3 4 1 1 2 3 2 5 ...
Page 40: ...7 6 7 6 Front Board Print layout bottom side for BDP2180 12 05 ...
Page 41: ...7 7 7 7 Front Board Print layout bottom side for BDP2180X 78 ...
Page 42: ...7 8 7 8 Front Board Print layout bottom side for BDP2180X 78 ...
Page 43: ...7 9 7 9 Power Board Print layout bottom side for BDP2180 12 05 X78 ...
Page 46: ...PIN ASSIGNMENT 9 2 ...