background image

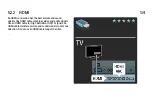
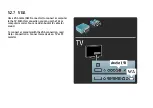
5.2.2   HDMI

1/4

An HDMI connection has the best picture and sound

quality. One HDMI cable combines video and audio signals.

Use an HDMI cable for High Definition (HD) TV signals. An

HDMI cable transfers picture and sound signals in only one

direction. Do not use an HDMI cable longer than 5m.

. . .

Summary of Contents for 32PFL8605H

Page 1: ...www philips com welcome Register your product and get support at EN User manual 32PFL8605H 32PFL8605K 37PFL8605H 37PFL8605K 40PFL8605H 40PFL8605K 46PFL8505H 46PFL8505K 52PFL8605H 52PFL8605K ...

Page 2: ...00 002 050 Kostenlos Gratuit Gratuito Sverige 08 5792 9100 Lokalsamtal Suomi 09 2311 3111 paikallispuhelu United Kingdom 0800 331 6015 Toll Free Estonia 6008600 Local Lithuania 67228896 Local Latvia 527 37691 Local Kaзaкcтaн 007 727 250 66 17 Local Бълария 3592 489 99 96 Местен разговор Hrvatska 01 6403 776 Lokalni poziv Česká republika 800 142840 Bezplatný hovor Polska 022 3491504 połączenie loka...

Page 3: ...1 1 1 The remote control 1 12 To adjust the volume ...

Page 4: ...1 1 1 The remote control 2 12 To switch TV channels ...

Page 5: ...1 1 1 The remote control 3 12 To open or close the Home menu h In the Home menu you can start or stop a TV activity Like watching TV or watching a movie from a connected DVD player ...

Page 6: ...1 1 1 The remote control 4 12 To open or close the Browse menu e In the Browse menu you can open Text the Channel list or the TV programme guide ...

Page 7: ...ol 5 12 To open or close the Options menu o In the Options menu you can select settings related to what is shown on screen While you watch a channel mark it as a favourite or stop the slideshow of your photos shown on screen ...

Page 8: ...1 1 1 The remote control 6 12 To open or close the Adjust menu s In the Adjust menu you can quickly adjust some picture and sound settings ...

Page 9: ...1 1 1 The remote control 7 12 Back b With Back you go back to the previous TV channel or go one step back in a menu ...

Page 10: ...1 1 1 The remote control 8 12 Red With the red key you select the red option or open digital Interactive TV services or some TV demonstration clips ...

Page 11: ...1 1 1 The remote control 9 12 Green With the green key you select the green option or the Eco settings ...

Page 12: ...1 1 1 The remote control 10 12 Yellow With the yellow key you select the yellow option or the Help menu ...

Page 13: ...1 1 1 The remote control 11 12 Blue With the blue key you select the blue option or open the Widgets ...

Page 14: ...1 1 1 The remote control 12 12 Read more about the remote control in Help Use your TV Remote control Overview Or go to the Search page to look for any topic Press u to select the next TV tour ...

Page 15: ...1 1 2 The menus 1 6 You can operate the TV with the 4 menus Discover and learn their specific uses the Home menu the Browse menu the Options menu the Adjust menu ...

Page 16: ... 6 To open or close the Home menu h Open the Home menu as a starting point to operate the TV In the Home menu you can start or stop a TV activity Like watching TV Watch TV or watching a movie from a connected DVD player ...

Page 17: ... menus 3 6 To open or close the Browse menu e With an activity started in the Home menu open the Browse menu to find the activity content While watching TV you can find a channel in the Channel list or open Text ...

Page 18: ... To open or close the Options menu o Open the Options menu to select a setting related to what is shown on screen While you watch a channel mark it as a favourite but also open the DVD disc menu while watching a DVD movie ...

Page 19: ... open or close the Adjust menu s Open the Adjust menu to quickly adjust the picture and sound settings You can set the Smart picture setting to Game which is ideal for gaming or change the Surround setting of the TV speakers ...

Page 20: ...1 1 2 The menus 6 6 Go to the Search page to look for any topic in Help ...

Page 21: ...connect a DVD Blu ray Disc player or game console use the HDMI connection The HDMI connection offers the best picture and sound quality and if your device has EasyLink HDMI CEC the TV can add the device in the Home menu automatically ...

Page 22: ...o watch its programme If the device has no EasyLink or you do not use the HDMI connection you must add the connected device in the Home menu using Add your devices Read more about Add your devices in Help Use your TV Menus Home menu Read more about EasyLink in Help Setup EasyLink HDMI CEC ...

Page 23: ...1 1 3 Connecting devices 3 3 In the chapter Help Connections drawings like these help you to connect most common devices ...

Page 24: ...ot watching HD programmes the picture quality will be that of a normal TV Watch HD TV programmes from a Blu ray Disc player a Digital HD receiver connected with HDMI and with a subscription to HD programmes Over the air HD broadcasts DVB T MPEG4 channels offering HD on a DVB C network an HD game console connected with HDMI and playing an HD game ...

Page 25: ...quality of HD TV you can start the High Definition video clip from the Home menu Press Home Setup Watch demos on the second page of the Setup menu Contact your dealer for more information Go to www philips com support to find FAQs featuring the list of HD channels or providers in your country ...

Page 26: ... 5 PC network and Net TV 1 2 PC network You can connect the TV to your PC network Enjoy your pictures videos and music files from your PC on a big TV screen Read more about PC Network in Help Setup Network ...

Page 27: ... TV 2 2 Net TV If you have an Internet connection on your home network you can connect to Net TV Net TV offers you online movies pictures music infotainment games and much more Read more about Net TV in Help Use your TV Net TV ...

Page 28: ...Next to the DVB T and DVB C reception this TV has a built in satellite DVB S receiver You can connect a satellite dish antenna and receive digital satellite channels Read more about satellite channels in Help Setup Satellite channels ...

Page 29: ...he 2 in 1 stand that comes with the TV can be used as a table top stand or as a wall mount bracket Instructions to mount the 2 in 1 stand are also included in the printed Start guide Read the instructions on the following pages ...

Page 30: ...rformed by qualified personnel The TV wall mounting should meet safety standards according to the TV s weight Read also the safety precautions before positioning the TV Koninklijke Philips Electronics N V bears no responsibility for improper mounting or any mounting that results in accident or injury ...

Page 31: ...1 2 1 Wall mounting 3 12 Unmount the TV from the stand if necessary To wall mount the TV you need the 2 screws used to fix the TV onto the TV stand and the 2 mounting discs as shown ...

Page 32: ...1 2 1 Wall mounting 4 12 Unscrew the bolt in the middle of the bar with the supplied hex key ...

Page 33: ...1 2 1 Wall mounting 5 12 Turn the bar as shown ...

Page 34: ...1 2 1 Wall mounting 6 12 Reposition the bar on the stand and fix the bolt with the hex key ...

Page 35: ...1 2 1 Wall mounting 7 12 Fix the stand to the TV ...

Page 36: ...nting 8 12 The TV is mounted at the correct height if your eyes are level with the centre of the screen when you sit down Distance between the 2 fixing points 81cm 32 260mm 94cm 37 300mm 102cm 40 300mm 117cm 46 340mm ...

Page 37: ...1 2 1 Wall mounting 9 12 Fix the 2 mounting discs Use screws with a diameter of max 6mm ...

Page 38: ...1 2 1 Wall mounting 10 12 Slide the bottom plate of the stand onto the mounting discs ...

Page 39: ...1 2 1 Wall mounting 11 12 To level the TV pull the bottom of the TV towards you slightly and let it slide on the discs ...

Page 40: ...1 2 1 Table top stand 12 12 Unscrew the bolt and turn the bar in the position shown ...

Page 41: ...l mount bracket not included VESA codes to purchase the bracket 81cm 32 VESA MIS F 100 100 M6 94cm 37 VESA MIS F 200 300 M6 102cm 40 VESA MIS F 200 300 M6 46PFL8605 VESA MIS F 200 300 M6 46PFL9705 VESA MIS F 300 300 M6 Use a screw length as shown in the drawing ...

Page 42: ...safety precautions before positioning the TV Position the TV where light does not shine directly on the screen Dim lighting conditions in the room for best Ambilight effect Position the TV up to 25 cm away from the wall for the best Ambilight effect ...

Page 43: ...picture or any picture without straining your eyes Find the sweet spot right in front of the TV for the best possible TV experience and relaxed viewing The ideal distance to watch TV from is three times its diagonal screen size When seated your eyes should be level with the centre of the screen ...

Page 44: ...d by failure to follow instructions Risk of electric shock or fire Never expose the TV or remote control to rain water or excessive heat Never place liquid containers such as vases near the TV If liquids are spilt on or into the TV disconnect the TV from the power outlet immediately Contact Philips Consumer Care to have the TV checked before use ...

Page 45: ... naked flames away from this product at all times Never insert objects into the ventilation slots or other openings on the TV Ensure power plugs do not come under heavy force Loose power plugs can cause arcing and are a fire hazard Never place the TV or any objects on the power cord When disconnecting the power cord always pull the plug never the cord ...

Page 46: ...y use the supplied stand Secure the stand to the TV tightly Place the TV on a flat level surface that can support the weight of the TV When mounting the TV on a wall ensure that the wall mount can safely bear the weight of the TV set Koninklijke Philips Electronics N V bears no responsibility for improper wall mounting that results in accident injury or damage ...

Page 47: ...on a surface covered by a cloth or other material that can be pulled away Ensure that no part of the TV hangs over the edge of the mounting surface Never place the TV on tall furniture such as a bookcase without anchoring both the furniture and TV to the wall or a suitable support Educate children about the dangers of climbing on furniture to reach the TV ...

Page 48: ... the power outlet and antenna before lightning storms During lightning storms never touch any part of the TV power cord or antenna cable Risk of hearing damage Avoid using earphones or headphones at high volumes or for prolonged periods of time Low temperatures If the TV is transported in temperatures below 5 C unpack the TV and wait until the TV temperature reaches room temperature before connect...

Page 49: ...alcohol chemicals or household cleaners on the TV To avoid deformations and colour fading wipe off water drops as soon as possible Avoid stationary images as much as possible Stationary images are images that remain onscreen for extended periods of time Stationary images include onscreen menus black bars time displays etc If you must use stationary images reduce screen contrast and brightness to a...

Page 50: ...1 3 1 Power switch 1 2 Switch the TV on or off with the power switch at the bottom of the TV When switched off the TV does not consume any energy ...

Page 51: ...f switch on the TV with the power switch If the red indicator is on standby indication press O on the remote control to switch on the TV Alternatively you can switch on the TV from standby with any key on the TV It takes a few seconds for the TV to start up ...

Page 52: ...1 3 2 Volume Press V Volume or to adjust the volume Or use the or keys on the remote control ...

Page 53: ... Ambilight to switch Ambilight on or off While the TV is on standby you can switch Ambilight on and create an Ambilight LoungeLight effect in your room Read more about LoungeLight in Help Use your TV Use Ambilight LoungeLight ...

Page 54: ... open the Home menu on screen You can navigate the Home menu with the Volume or left or right and the Channel or down or up keys on the TV To confirm your choice press h again Read more about Home in Help Use your TV Menus h Home ...

Page 55: ...1 3 5 Channel Press CH Channel or to switch channels Or use the W or X keys on the remote control ...

Page 56: ...ster your TV and enjoy a range of benefits including full support including downloads privileged access to information about new products exclusive offers and discounts the chance to win prizes and even participate in special surveys about new releases Go to www philips com welcome ...

Page 57: ...Help You can open Help from the Home menu In most cases you can also press the Yellow key on your remote control to open or close Help directly For some activities like Text the colour keys have specific functions and cannot open Help ...

Page 58: ...p When you press the Yellow key again Help will open on the page where you closed it Search In Help use Search to find a topic you need Select a topic from the list with the navigation keys and press OK The topic you are looking for might not be present on the first page but a few pages further on Press x to go to the next page ...

Page 59: ...oduct model number Go to www philips com support On the support site you can find your country s telephone number to contact us as well as answers to frequently asked questions FAQs You can download new TV software or the manual to read on your PC You can email a specific question or in some countries chat online with one of our collaborators ...

Page 60: ...one number on the printed documentation that came with the TV Or consult our website www philips com support TV model number and serial number You might be asked to provide the TV product model number and serial number Find these numbers on the packaging label or on the type label on the back or bottom of the TV ...

Page 61: ... 1 Remote control overview 1 5 1 Standby O To switch the TV on or back to standby 2 Home h To open or close the Home menu 3 Navigation key To navigate up down left or right 4 OK key To activate a selection ...

Page 62: ... overview 2 5 5 Browse e To open or close the Browse menu 6 Next W To switch to the next channel page or chapter 7 Previous X To switch to the previous channel page or chapter 8 Options o To open or close the Options menu ...

Page 63: ...ous channel To exit a menu without changing a setting To go back to the previous Text or Net TV page 10 Adjust s To open or close the most used settings like picture sound or Ambilight 11 Volume V To adjust the volume level 12 Mute m To mute the sound or to restore it ...

Page 64: ...o open interactive TV or to select a Text page 14 Green colour key To open the Eco settings or to select a Text page 15 Yellow colour key To open and close Help or to select a Text page 16 Blue colour key To open or close Widgets or to select a Text page ...

Page 65: ... keys and text keypad To select a TV channel directly or to enter text 18 Subtitles j To switch Subtitles on or off 19 Picture format f To change the Picture format To learn how to use the remote control read Help To begin TV tour Remote control ...

Page 66: ...t have EasyLink HDMI CEC and have it switched on The device must also be connected with an HDMI cable Operate an EasyLink device To operate such a device with the TV remote control select the device or its activity in the h Home menu and press OK The commands of all keys except the h key is forwarded to the device ...

Page 67: ...emote control you can show extra keys on screen with Show remote control Show remote control keys To show the device keys on screen press o Options and select Show remote control Select the key you need and press OK To hide the remote control keys of the device press b Back ...

Page 68: ...2 1 2 EasyLink Remote Control 3 4 In general these keys open the following device menus 1 Home menu 2 Setup menu 3 Disc menu disc content 4 Pop up menu 5 Options menu 6 Programme guide 7 Media selection ...

Page 69: ...2 1 2 EasyLink Remote Control 4 4 Read more about EasyLink in Help Setup Devices EasyLink HDMI CEC ...

Page 70: ...2 1 3 IR sensor Always make sure you point the remote control at the remote control infrared sensor on the front of the TV ...

Page 71: ... the batteries of the remote control slide open the small tray at the bottom of the remote control Use 2 coin shaped batteries Type CR2032 3V Make sure the side of the batteries top side point upwards The small tray has 2 indicators ...

Page 72: ...2 1 4 Batteries 2 2 Remove the batteries if you are not using the remote control for a long time Dispose of batteries according to the end of use directives Read Help To begin Setting up End of use ...

Page 73: ...ng Your remote control is treated with a scratch resistant coating To clean the remote control use a soft damp cloth Never use substances such as alcohol chemicals or household cleaners on the TV or remote control ...

Page 74: ...watching TV or a movie disc or start any other activity You can add an activity when you connect a device to the TV Press h to open the Home menu To start an activity select it with the navigation keys and press OK To close the Home menu press h again ...

Page 75: ...e a selected device The TV remote control can operate a device if the device is connected with HDMI and has EasyLink HDMI CEC Read more about EasyLink Remote control in Help Use your TV Remote control EasyLink Remote control ...

Page 76: ...d several activities The device must be connected with an HDMI cable If your connected device does not show itself in the Home menu EasyLink on the device may be switched off If your connected device does not have EasyLink HDMI CEC or is not connected with an HDMI cable you need to manually add your device with Add your devices in the Home menu ...

Page 77: ...e TV asks you to select the device and the connection to which the device is connected The device or its activities are now added to the Home menu Rename a device To rename an added device or activity press o Options and select Rename Use the keypad on the remote control as you do for SMS text messaging to enter the new name ...

Page 78: ...he item and press o Options and then select Remove this device If a device or activity keeps appearing in the Home menu after you deleted it switch off the EasyLink setting on the device to prevent this automatic pop up appearing again Read more about EasyLink in Help Setup EasyLink HDMI CEC ...

Page 79: ...and activities Reorder the sequence of them or Restore activities if you deleted one of several activities of a device Reorder To reorder a device or an activity in the Home menu select it and press o Options 1 Select Reorder 2 With the navigation keys reposition the device or activity where you want it You can only reorder the sequence of the added devices and activities ...

Page 80: ...ice or activity and reposition it To stop Reorder press o Options and select Exit reorder Restore activities To recall a deleted activity from a device with several activities select the device or one of its activities and press o Options Select Restore activities and press OK All deleted activities of this device appear again ...

Page 81: ...d the channel you want to watch from the Channel list a future programme from the onscreen Programme guide or a Text page Press e to open the Browse menu Select your choice with the navigation keys and press OK To close the Browse menu press e again ...

Page 82: ...ching TV open the Browse menu to open the Channel list the Programme guide or Text When other activities are selected in the Home menu like Browse PC or Browse USB use the Browse menu to find a picture music or video stored on your computer or USB ...

Page 83: ...ct Channel list Navigate to a channel or station and press OK to watch or listen to the selected channel or station Press b Back to leave the channel list without changing the channel Channel list options With the Channel list on screen you can press o Options to select the following options Select list Mark as favourite Reorder Rename Hide channel Show hidden channels ...

Page 84: ... shown in the Channel list The list you select here determines which channels you look through with W and X while watching TV Mark as favourite When a channel is highlighted in the Channel list you can set it as a favourite channel Read Use your TV Watch TV Favourite channels ...

Page 85: ...hlight a channel and press OK 3 Reposition the channel where you want it with the navigation keys Alternatively enter the new position directly with the number keys 4 Press OK to confirm the position You can insert the channel or swap it You can highlight another channel and do the same To stop Reorder press o Options and select Exit reorder ...

Page 86: ...l in the Channel list 1 In the channel list highlight the channel you want to rename 2 Press o Options and select Rename to start renaming You can enter text directly with the remote control keypad or open a full keyboard on top of the text entry menu ...

Page 87: ... a character Use the 1 key to select a special character Select Clear to delete a character Select Done to end Rename Enter text with the on screen keyboard To open the on screen keyboard on top of the text entry menu press OK when the cursor in the text blinks On the keyboard use the navigation keys to position the highlight on a character and press OK to enter it To delete a character press b Ba...

Page 88: ... use the z and Z keys at both ends of the on screen spacebar To close the on screen keyboard highlight Done and press OK Hide channel You can hide a channel in the Channel list When looking through channels a hidden channel will be skipped 1 In the Channel list highlight the channel you want to hide 2 Press o Options and select Hide channel The channel is hidden as soon as you close the Channel li...

Page 89: ...ain 1 In the Channel list press o Options and select Show hidden channels The Channel list now shows all channels again 2 Press o Options and select Unhide all to unhide the previously hidden channels Or if you want to leave the previously hidden channels hidden press o Options and select Exit ...

Page 90: ... menu gives settings related to what is shown on screen Depending on what is shown the Options menu holds different settings Press o Options at any time to see which options are available To close the Options menu press o again ...

Page 91: ...s 1 5 With the Adjust menu you can adjust picture sound and Ambilight settings quickly Press s to open the Adjust menu Select your choice with the navigation keys and press OK To close the Adjust menu press s again ...

Page 92: ...ubtitles and select a preset setting for picture or for sound according to what you are watching If a Home Theatre System connected with EasyLink is forwarding its sound presets you can select these too In the Adjust menu you can adjust the following Ambilight On or Off Ambilight dynamics Picture format Smart picture presets Smart sound presets Speakers Surround Picture shift ...

Page 93: ...mbilight Picture format Read more about the Picture format settings in Help Use your TV Watch TV Picture format Smart picture Smart sound You can set the TV to the pre defined setting that best suits what you re watching Read more about Smart settings in Help Use your TV Watch TV Smart settings ...

Page 94: ...Select Amplifier if you want to hear the sound through a connected Home Theatre System or Amplifier These settings temporarily override any EasyLink settings Surround To switch the TV automatically to the best surround sound mode depending on the programme being broadcast close Help press s Adjust select Surround and select On ...

Page 95: ...ertical or a horizontal direction depending on the TV input For instance you can shift the picture up vertically to view subtitles fully While watching TV press s Adjust select Picture shift and press OK Shift the picture with the navigation keys Press OK to stop Picture shift ...

Page 96: ...2 3 1 Switch channels 1 6 To watch TV and switch TV channels make sure the Watch TV activity is selected in the Home menu To watch TV press h select Watch TV and press OK ...

Page 97: ...2 6 To switch TV channels press W or X on the remote control You can use the number keys if you know the channel number or you can use the Channel list to select a channel To switch back to the previous channel press b Back ...

Page 98: ... the Channel list while watching TV press e to open the Browse menu Select Channel list and press OK Select a channel with the navigation keys and press OK to switch to the channel To leave the Channel list without changing the channel press b Back ...

Page 99: ...ame channels or make a channel a favourite Read more about Channel list in Help Use your TV Menus Browse e Radio channels If digital broadcasting is available digital radio stations are installed during installation Switch to a radio channel just like you switch to a TV channel A DVB C channel installation usually places radio stations from channel number 1001 onwards ...

Page 100: ...ching TV channels press o Options to select an available option What s on This option shows information on the current and next programme on this channel Use the navigation keys to scroll through text or to go to the next column Status Depending on the broadcast the Status page will show relevant information You can use this information to improve the channel signal or to check if certain services...

Page 101: ...deo signals multifeed broadcasts different camera viewpoints or angles of the same event or different programmes on one TV channel The TV shows a message to advise if any such TV channels are available When available press o Options and select Video selection to select your choice ...

Page 102: ...channels 1 2 In the Channel list you can mark a channel as a favourite You can set the Channel list to only show your favourite channels To open the Channel list while watching TV press e Browse on your remote control ...

Page 103: ...In the Channel list the favourite channel is marked with a F You can unmark a favourite channel with Unmark favourite Only watch your favourite channels You can set the Channel list to show only your favourite channels With the list on screen press o Options and select Select list Select Favourites from the list and press OK With the Favourites list selected you will only see your favourite channe...

Page 104: ...The Programme guide is an on screen guide for scheduled TV programmes You can set a reminder to tell you when a programme is due to start or select programmes by genre The Programme guide is provided by the broadcaster or Net TV ...

Page 105: ...ide and press OK To leave the Programme guide without changing a setting press b Back First use The first time you open the Programme guide the TV scans all TV channels for programme guide information This can take several minutes This data is stored in the TV Read also Update Programme guide in the Programme guide options ...

Page 106: ...der To set an on screen reminder for when a programme is due to start select Set reminder and press OK The programme is marked with To cancel this reminder select Clear reminder and press OK Change day View the previous or next day s programmes More info Shows the programme details and summary Search by genre View all programmes selected by genre ...

Page 107: ...e TV stores the programme guide data If you update or reinstall channels or reorder the Channel list you will need to update this data To update this data select Update Programme guide Reminders are cleared and the new data is stored Specifics Dependant of the amount of channels carrying programme guide data the TV stores guide information for up to eight days ...

Page 108: ...gramme guide Select From the network or From the broadcaster From the network Until you link up with Net TV programme guide information comes from the broadcaster Once you are connected with Net TV the TV switches automatically to the Internet for programme guide information From the broadcaster Guide information comes from the broadcaster operator ...

Page 109: ...und settings 1 4 For easy picture or sound adjustment you can select a preset setting for each While watching TV press s to open the Adjust menu and select Smart picture or Smart sound Make a selection from the list and press OK ...

Page 110: ... viewing You can adjust a specific setting like Brightness or Contrast Bass or Treble of a chosen smart setting The smart setting will remember the adjustments you made Adjust smart settings To adjust a specific setting of a smart setting select the smart setting and press OK Then press h and select Setup Select TV settings navigate to the individual setting and adjust it ...

Page 111: ...press h Setup TV settings select Reset press OK and confirm Read more about adjusting separate settings in Help Setup Picture Sound and Ambilight Smart picture list Personal Your choices made in Personalise picture and sound Vivid Ideal for daylight viewing Natural Natural picture settings Cinema Ideal for watching movies Game Ideal for gaming Energy saving Energy conscious settings ...

Page 112: ... Custom A smart picture setting free for any setting you wish Smart sound list Personal Your personal choices made in Personalise picture and sound Standard Factory standard News Ideal for speech Movie Ideal for watching movies Game Ideal for gaming Drama Ideal for TV soaps Sports Ideal for sports programmes ...

Page 113: ... 3 If black bars appear on the screen you can adjust the picture format to a format that fills the screen While watching TV press s to open the Adjust menu and select Picture format Select a format from the list and press OK ...

Page 114: ...cture to fill the screen Minimal picture distortion subtitles remain visible Not fit for PC input Auto zoom Automatically zooms the picture in to fill the screen as much as possible without distortion Black bars may be visible Not fit for PC input Super zoom Removes the black bars on the side of 4 3 broadcasts The picture is adjusted to fit the screen ...

Page 115: ...rmat 3 3 Movie expand Scales the picture to a 16 9 format Wide screen Stretches the picture to a 16 9 format Unscaled Expert mode for HD or PC input Pixel for pixel display Black bars may appear with pictures from a PC ...

Page 116: ... switch to standby The red standby key indicator is on Although the TV consumes very little power when in standby energy does continue to be consumed When the TV is not in use for an extended period of time we recommend you switch the TV off completely with the power switch ...

Page 117: ...2 4 1 Switch satellite channels 1 3 To watch satellite channels press h select Watch satellite and press OK ...

Page 118: ...s 2 3 To switch satellite channels press W or X on the remote control You can use the number keys if you know the channel number or you can use the channel list to select a channel To switch back to the previous channel press b Back ...

Page 119: ... 3 Channel list for satellite When a satellite installation is performed the satellite channels are stored in a specific channel list for satellite Read more about using the channel list in Help Use your TV Watch satellite Channel list ...

Page 120: ...el list while watching satellite broadcast press e to open the Browse menu Select Channel list and press OK Select a channel with the navigation keys and press OK to switch to the channel To leave the Channel list without changing the channel press b Back ...

Page 121: ...nnel list can have several pages To view the next or previous Channel list page press W or X Options With the Channel list on screen press o Options to select TV Radio Select list Sort Mark as favourite Rename Reorder Show hidden channels Hide channel Channel lock ...

Page 122: ...or Radio channels Select list Select the list of channels from all satellites or from one specific satellite Or show a list of only your favourite satellite channels The list you select here determines which channels you look through with W and X while you are watching TV ...

Page 123: ...s of Free to Air and Scrambled channels Free scrambled Mark as favourite In the Channel list navigate to a channel you want to mark as favourite and press o Options Select Mark as favourite In the list the favourite channel is marked with a F You can unmark a favourite channel with Unmark favourite ...

Page 124: ...een press o Options and select Select list Select Favourites from the list and press OK With the Favourites list selected you will only see your favourite channels when you look through the channels Reorder and Rename You can reposition channels within the list or rename a channel Read more about Reorder and Rename in Help Use your TV Menus e Browse ...

Page 125: ...u can hide a channel in the Channel list Read more about Hide channel in Help Use your TV Menus e Browse Show hidden channels You can recall all hidden channels and unhide them again Read more about Show hidden channels in Help Use your TV Menus e Browse ...

Page 126: ... to unlock You can lock as many channels you like To lock a channel in the Channel list press o Options and select Channel lock Enter your 4 digit child lock code Select any channel in the list press o again and select Lock channel A locked channel is marked with a k Now you can select another channel to lock or unlock To exit Channel lock press o and select Exit ...

Page 127: ...e 8 8 Change the child lock code To change this 4 digit code press h and select Setup Satellite settings and select Child lock Change code Read more about Child lock and Parental rating in Help Use your TV Watch satellite Child lock ...

Page 128: ...reate a list with only your favourites to look through Mark as favourite In the Channel list navigate to a channel you want to mark as favourite and press o Options Select Mark as favourite In the list the favourite channel is marked with a F You can unmark a favourite channel with Unmark favourite ...

Page 129: ...s With the list on screen press o Options and select Select list Select Favourites from the list and press OK With the Favourites list selected you will only see your favourite channels when you look through the channels Read more about the options in the Channel list for satellite in Help Use your TV Watch satellite Channel list ...

Page 130: ...hildren from watching a channel or a programme you can lock channels or block age rated programmes Lock a channel To lock a channel use the Channel lock option in the Channel list Read more about Channel lock in Help Use your TV Watch satellite Channel list ...

Page 131: ...have programmes rated When the rating is equal or higher than the rating you have set for your child s age the programme will be blocked To watch a blocked programme you must enter the Child lock code The satellite parental rating is set for all satellite channels ...

Page 132: ...lock code If no child lock code is set yet you can set the code now When the code is entered you can select the age rating When the rating of a programme is equal or higher than the rating you have set for your child s age the programme will be blocked The TV will ask for the code to unblock the programme For some operators the TV only blocks programmes with a higher rating ...

Page 133: ... the current code press h and select Setup Channel settings and select Child lock Change code Enter the current code and then enter the new code twice The new code is set Forgotten your code To override the code in case you forget it enter 8888 ...

Page 134: ...e menu you can easily select it To select and watch a connected device or activity press h to open the Home menu and select the device or its activity and press OK Make sure the device is switched on Read more about Add your devices in Help Use your TV Menus Home menu ...

Page 135: ...mote control The TV remote control can operate a device if the device is connected with HDMI and has EasyLink HDMI CEC Read more about EasyLink Remote control in Help Use your TV Remote control EasyLink Remote control ...

Page 136: ...xperience and improved perceived picture quality Dim the lighting conditions in the room and position the TV up to 25cm away from the wall for the best Ambilight effect To prevent poor infrared remote control reception position your devices out of sight of Ambilight ...

Page 137: ...2 6 2 Adjust Ambilight 1 3 You can use the Adjust menu to set the most used Ambilight settings While watching TV press s to open the Adjust menu To close the Adjust menu press s again ...

Page 138: ...d press OK Switch Ambilight On or Off Ambilight dynamic In the Adjust menu select Ambilight dynamic and press OK Adjust the speed at which Ambilight responds to onscreen images Ambilight brightness In the Adjust menu select Ambilight brightness and press OK Adjust the light output of Ambilight ...

Page 139: ...select Ambilight colour and press OK Select Dynamic if Ambilight should respond to onscreen images or select one of the fixed colours Select Custom if you want to set a specific fixed colour Read more about Ambilight settings in Help Use your TV Use Ambilight Setup ...

Page 140: ...t switch off after you switched off the TV To open the Ambilight menu press h and select Setup TV settings Ambilight Custom colour To set a Ambilight colour of your own select Custom in the Ambilight Colour menu With Custom selected you can open the Custom colour menu Select Palette to choose your own colour Ambilight Custom colour is a fixed non dynamic colour setting ...

Page 141: ...of the TV select Separation Separation Off gives a dynamic but uniform Ambilight colour TV switch off To set Ambilight to fade out and switch off a few seconds after you have switched off the TV select TV switch off Allow Ambilight to fade out and switch off completely before you switch the TV back on again ...

Page 142: ...Scenea lounge light and select Off Wall colour The colour of the wall behind your TV can influence the colour effect of Ambilight To correct this influence select Wall colour and select a colour that matches the wall colour Ambilight will correct its colours to mix best with the colour of the wall behind the TV ...

Page 143: ...2 6 3 Ambilight setup 4 4 Lounge light mood Read more about Lounge light mood in Help Use your TV Use Ambilight Lounge light mood ...

Page 144: ...2 6 4 Lounge light mood 1 2 When the TV is on standby you can switch Ambilight on and create a Lounge light mood in your room To switch Ambilight on while the TV is on standby press J on the TV ...

Page 145: ...ain To switch off Lounge light mood press and hold J on the TV for 3 seconds You can also set up the colour scheme in the Setup menu With the TV switched on press h and select Setup Select TV settings Ambilight Lounge light mood Select the colour scheme with which Lounge light mood will start up ...

Page 146: ...sites look at infotainment rent a movie from a video store watch a TV show you missed or open practical widgets on your TV screen Net TV pages The most popular websites in your country have tailored their web pages for use on TV Read the newspaper headlines watch the latest video hit or check the weather forecast ...

Page 147: ...et to gather its information Video stores With Net TV you can rent your favourite movie from an online rental video store Missed a programme If a broadcaster offers this service you can catch up with a favourite programme you missed Watch this programme when it suits you Read more about Net TV in the following chapters ...

Page 148: ... newly added services Specifics The availability of Net TV services vary per country With Net TV you can also link up to the Internet You can view any website you like but remember that most Internet websites are not tailored to be viewed on a TV screen and certain plug ins e g to view pages or videos are not available on your TV ...

Page 149: ...2 7 1 What is Net TV 4 4 Net TV online services can be added changed or stopped Net TV shows one page at a time and full screen You cannot download and save files or install plug ins ...

Page 150: ...2 7 2 What you need 1 2 To enjoy Net TV you need to connect the TV to a router with a high speed connection to the Internet Read Help Setup Network ...

Page 151: ...2 7 2 What you need 2 2 Once the connection is made select Browse Net TV in the Home menu to start the Net TV on screen setup Read Help Use your TV Net TV First use ...

Page 152: ...gister for Net TV 3 Switch on Parental control Net TV is ready for use How to register To register you need an email address and a PC connected to the Internet If you skip the registration at first use you can register from the Net TV Start page later on ...

Page 153: ... field highlighted Enter the characters one by one Select Register and press OK A message will appear if a registration email has been send to your email address Open the email on your PC and click the link to the registration form Complete the form and click the button to submit On the TV select OK and press OK to open the Net TV Start page ...

Page 154: ...V Start page you can switch on Parental control If you switch on Parental control you need to enter a personal lock unlock code Enter a 4 digit code as your Net TV lock unlock code Use the number keys on the remote control Enter the same code again to confirm Net TV is ready to use ...

Page 155: ...ages are stored as a back up Also the last 16 web addresses URLs you visit are stored You can share these pages with another Net TV television if you register that TV with the same email address When registered you can restore these selected pages after an accidental reset of Net TV with Clear history ...

Page 156: ...r categories of services some services that are not suitable for children are locked from the start but can be unlocked Parental control specifics Only services on the Net TV pages can be locked Advertisements and Internet websites cannot be locked Services are locked per country Categories are locked for all countries ...

Page 157: ... 7 4 Browse Net TV 1 12 To open Net TV close this Help and press h select Browse Net TV and press OK The TV links up to Net TV and opens the Start page To exit Net TV press h and select another activity ...

Page 158: ...d some recommended services You can browse Net TV from this page To return to the F Start page press e Browse Open a Net TV service Select a Net TV service with u or v w or x keys To open a selected service press OK A closing lock animation means that the page you have opened is a secure page ...

Page 159: ...o browse the service Some services indicate how to browse their service To go back one page press b Back All services To view the available services for your country select Services and press OK On this page you can view all services or view them by category e g News or Entertainment To view the services by category select a category in the column at the left and press OK ...

Page 160: ...remote control Reload page Zoom page Security info Clear Net TV memory Lock service To lock a Net TV service select its icon and press o Options Select Lock service and press OK The service icon is marked with a k To open a locked service you must enter your 4 digit code Once you have opened a locked service you can delete the lock ...

Page 161: ... 12 services as favourites All of your favourite services are shown in the F Start page In Services favourite services are marked with a star F Only Net TV services can be marked as favourites Advertisements and Internet websites cannot be marked Unmark favourites To Unmark a favourite select the icon of a favourite service and press o Options and select Unmark favourite ...

Page 162: ...git code to disable Parental control Show remote control Keys like Play x Rewind T and Fast Forward Q can be called up with Show remote control Press o Options and select Show remote control With these keys on screen you can operate audio or video players Select a key and press OK to carry out its function Press b Back to hide these on screen keys ...

Page 163: ...age you can try and reload it Press o Options and select Reload page Zoom page To zoom an Internet page in or out press o Options and select Zoom page Use the slider bar to set the enlargement To scroll through an Internet page use the navigation keys to jump from highlight to highlight ...

Page 164: ...ion press o Options and select Security info Clear Net TV memory Warning this option resets Net TV completely To clear the Net TV memory completely including your Favourite the Parental control code passwords cookies and history press o options and select Clear Net TV memory ...

Page 165: ...es available To switch to the services of another country select Country at the bottom right of the page and press OK Select a country and press OK Koninklijke Philips Electronics N V bears no responsibility regarding the content and the quality of the content provided by the content service providers ...

Page 166: ...TV screen and certain plug ins e g to view pages or videos are not available on your TV Open an Internet site To go to an Internet page select fi Internet and press OK Using the on screen keyboard you can enter the web address you need Select a character and press OK to enter it in the address line at the top of the page Once you entered the address select Go and press OK to load the Internet websi...

Page 167: ...able links on an open Internet page press OK to go to the link Internet history Net TV will automatically add every site you visit to the history list Later you can select a site icon in the list and press OK to open it To scroll through the history list use the navigation keys ...

Page 168: ...2 7 4 Browse Net TV 12 12 Clear Net TV history With a site icon selected in the history list you can clear the whole list Press o Options and select Clear history ...

Page 169: ... 2 Select a video 3 Make the online payment 4 Download the video 5 Start watching What you need To rent and download a video you need a high speed Internet connection to the TV Read more about connecting to the network in Help Setup Network You also need an SD memory card to insert in the TV SD card slot ...

Page 170: ...SD memory card as video memory insert the SD card in the SD slot The TV will automatically start formatting the SD card The TV could reject the SD card if the write speed is insufficient for video transfer Once formatted leave the card permanently in the slot ...

Page 171: ...o stores 3 6 View a video store To view a video store press h select Net TV Video stores and press OK The Video stores page shows the available stores for your country To view a store select its icon and press OK ...

Page 172: ...you select and rent a video varies from store to store Payment The store will ask you to log in or to open a new log in account if you don t already have one The login might consist of your email address and a personal PIN code When you are logged in you can select the payment method a credit card or a value code in most cases Consult the video store website for more information on their payment t...

Page 173: ...eo stores 5 6 To enter a number code PIN use the numbers on the remote control To enter an email address select the text field on the page and press OK Select a character on the keyboard and press OK to enter it ...

Page 174: ...he TV notifies you that the video is ready to play If you cancel a download you can still download the video until the rental period expires Start watching To start watching a downloaded video press h select Net TV Video stores and press OK With your log in enter the store were you rented the video and select the video from the list of downloaded videos Select the video and press OK to play ...

Page 175: ...of subjects like breaking news scheduled movies or airport info Widgets come from the Internet and new widgets are added regularly Widgets do not have sound or video What you need To show Widgets on screen you need a high speed Internet connection to the TV Read more about connecting to the network in Help Setup Network ...

Page 176: ...s 2 6 Show Widgets To open the Widgets press h select Show Widgets and press OK Also you can open or close the Widgets directly with the Blue key on the remote control The Widgets appear at the bottom of the screen ...

Page 177: ...th other Widgets Select a Widget To select a Widget press w or x to position the selection highlight Although only 4 Widgets are shown on screen more Widgets can be added Open a Widget To open a Widget as a full page on screen select the Widget and press OK ...

Page 178: ...ollowing Setup Widget Add Widget Remove Widget Move Widget Switch view Setup Widget To set up a Widget select the Widget and press o Options and select Setup Widget To enter text select the text field on the page and press OK Select a character on the keyboard and press OK to enter it ...

Page 179: ...a Widget press o Options and select Add Widget Scroll through the Widget collection with w or x to look for a Widget To add a Widget select the Widget and press OK Remove Widget To remove a Widget press o Options and select Remove Widget ...

Page 180: ...Widget Press w or x to reposition the Widget and press OK Switch view If Widgets hide subtitles or other information on screen you can move the TV image upwards To view the Widgets on top of the TV picture or underneath it press o Options and select Switch view The availability of Widgets varies by country ...

Page 181: ...V you can watch a programme you missed Link up with the broadcasters Online TV page to see what programmes are available What you need To link up with an Online TV service you need a high speed Internet connection to the TV Read more about connecting to the network in Help Setup Network ...

Page 182: ...ervices look for the icon of the TV channel that broadcasts the programme you want Select the service and press OK Open Online TV on a channel To open the Online TV service of a TV channel directly press the Red key If this service is available the TV will open the page of the broadcaster The availability of Online TV services varies by country ...

Page 183: ...3 1 1 Text pages 1 6 Open Text To open Text while watching TV press e Browse and select Text To close Text press b Back ...

Page 184: ...1 1 Text pages 2 6 Select a Text page To select a page Enter the page number with the number keys Press W or X Press u or v Press a colour key to select a colour coded subject at the bottom of the screen ...

Page 185: ...er can hold several subpages The subpage numbers are shown on a bar next to the main page number To select a subpage press w or x T O P Text pages Some broadcasters offer T O P Text To open T O P Text within Text press o Options and select T O P overview ...

Page 186: ...s a practical way to look for a specific subject Open a Text page and press OK Select a word or number with the navigation keys Now press OK again to jump immediately to the next occurrence of this word or number Press OK again to jump to the subsequent occurrence To stop the search press u until nothing is selected ...

Page 187: ...ve TV channels can also offer Text To open Text from a connected device press h select the device and press OK While watching a channel press o Options select Show remote control and select the B key and press OK Press b Back to hide the remote control keys To close Text press b Back ...

Page 188: ... services on their digital TV channels These services include normal Text using the number colour and navigation keys to select and navigate To close Digital text press b Back Digital text is blocked when subtitles are broadcast and Subtitle On is set in the Subtitle menu Select Subtitles Off to allow Digital text ...

Page 189: ... 3 In Text press o Options to select the following Freeze page Dual screen T O P overview Enlarge Reveal Cycle subpages Language Freeze page To stop the automatic rotation of subpages press o Options and select Freeze page ...

Page 190: ...press o Options and select Dual screen Select Full screen to switch back to full screen view T O P overview To open T O P Text press o Options and select T O P overview Enlarge To enlarge the Text page for more comfortable reading press o Options and select Enlarge To scroll down the page press v or u ...

Page 191: ...n on a page press o Options and select Reveal Cycle subpages To cycle subpage when these are available press o Options and select Cycle subpages Language To switch the group of characters that Text uses to display correctly press o Options and select Language ...

Page 192: ...guage Some digital TV broadcasters have several Text languages available To set your primary and secondary Text language press h Set up Channel settings and select Primary or Secondary Text and select your preferred Text languages ...

Page 193: ... 3 Text setup 2 2 Text 2 5 If available Text 2 5 offers more colours and better graphics Text 2 5 is activated as a standard factory setting To switch it off select h Setup TV settings Preferences Text 2 5 ...

Page 194: ...ainment or programmes on a digital TV channel Interactive TV is dependent on the country or broadcast Benefits range from enhanced text to online TV and much more For some iTV services you need a high speed connection to the Internet Read Help Setup Network ...

Page 195: ...2 Use iTV To open iTV press the Red key while watching a digital channel If interactive TV is available the Home page of the broadcaster opens To close iTV press b Back repeatedly until the iTV page closes ...

Page 196: ... from a USB memory device Insert a USB device in the USB connection on the left hand side of the TV while the TV is switched on The TV detects the device and opens a list showing its content If the list does not appear automatically press h select Browse USB and press OK ...

Page 197: ...ice View photos To view photos select a photo in the list and press OK If there are more photos in the folder the TV starts a slideshow of these photos To stop press o Options and select Stop To pause or play the slideshow again press OK To view the next photo press W To view the previous photo press X ...

Page 198: ...s o Options to select the following Show info Stop Play once Repeat Rotate Shuffle on off Slideshow speed Slideshow transition Set as Scenea Shuffle on Plays the files randomly Set as Scenea Sets the current photo as a wallpaper photo for Scenea ...

Page 199: ...e list and press OK If there are more music or video files in the folder the TV plays the files one after the other To stop press o Options To pause or play press OK To play the next file in the folder press W To play to the previous file press X To fast forward press x To rewind press w ...

Page 200: ... Stop Play once Repeat Shuffle on off Music with photos You can play music and show photos at the same time You must start the music first then the photos 1 Select a folder with music files and press OK 2 Select a folder with photo files and press OK To stop press o Options and select Stop ...

Page 201: ...sic you can mute the TV screen to save energy To mute the screen press the Green key select Mute screen and press OK To switch the screen back on press any key on the remote control See the list of compatible playback formats in Help Specifications Multimedia ...

Page 202: ...ideos from a PC in your home network What you need To browse these PC files you need to connect the TV to your home network You also need to set the PC media server software to share the files with the TV Read more about connecting to a network in Help Setup Network ...

Page 203: ...installed when you select Browse PC Network installation starts automatically Follow the instructions on screen To close Browse PC press h and select another activity To select view and play your files read Help More on Multimedia Browse USB See the list of compatible playback formats in Help Specifications Multimedia ...

Page 204: ...painting on your TV screen Select your favourite photo from your collection To open Scenea press h select Scenea and press OK If you did not yet select a photo of your own a preset photo is shown To close the Scenea photo press a key on the remote control ...

Page 205: ... must be in JPEG format 2 With the photo highlighted in the Browse USB or Browse PC list press o Options select Set as Scenea and press OK By agreeing to overwrite the current photo the new photo is set Scenea lounge light To switch off Ambilight when Scenea is on press s Adjust Or press J Ambilight on the front of the TV ...

Page 206: ... select Smart picture and press OK Select Energy saving Specifics With Scenea switched on the TV will automatically switch to standby after 4 hours You will be warned 1 minute before switch off This automatic switch to standby prevents unnecessary energy use in case you forget that Scenea is on ...

Page 207: ...3 3 3 Scenea 4 4 If the Sleep timer is set the TV will also switch to standby after the set time has elapsed Scenea has no sound ...

Page 208: ... a channel or a programme you can lock channels or block age rated programmes Parental rating Some digital broadcasters have programmes rated When the rating is equal or higher than the rating you have set for your child s age the programme will be blocked ...

Page 209: ...k code The parental age rating is set for all channels Set an age rating Press h and select Setup Channel settings and select Child lock Parental rating To select an age rating you must first enter your 4 digit child lock code If no child lock code is set you can set the code now ...

Page 210: ... your child s age the programme will be blocked The TV will ask for the code to unblock the programme For some operators the TV only blocks programmes with a higher rating Lock a channel To lock a channel press h and select Setup Channel settings and select Child lock Channel lock In the list of channel numbers select a channel and press OK to lock a channel ...

Page 211: ... lock or unlock The lock is activated as soon as you close the menu You cannot lock programmes from connected devices Change code To change the current code press h and select Setup Channel settings and select Child lock Change code Enter the current code and then enter the new code twice The new code is set ...

Page 212: ...3 4 1 Child locks 5 5 Forgotten your code To override the code if you forget it enter 8888 ...

Page 213: ... To set the sleep timer press h Setup TV settings Preferences Sleep timer With the slider bar you can set the time up to 180 minutes in increments of 5 minutes If set to 0 minutes Sleep timer is switched off You can always switch off your TV earlier or reset the time during the countdown ...

Page 214: ...nalogue or digital For digital channels a preferred subtitle language can be set For analogue channels To show subtitles of a channel switch to the channel and press e Browse select Text and press OK Enter the number of the page that shows subtitles usually 888 and press e Browse again to close Text Subtitles will be shown if available Each analogue channel must be set up separately ...

Page 215: ...an set a preferred primary and secondary subtitle language If these subtitle languages are not available for a channel you can select another available subtitle language To set the primary and secondary subtitle language press h and select Setup Channel settings and select Languages Primary and Secondary subtitles ...

Page 216: ...es 3 4 To select a subtitle language when none of your preferred languages is shown press o Options select Subtitle language and select a language you want temporarily Subtitle menu To open the subtitle menu press j ...

Page 217: ...3 5 1 Subtitles 4 4 In the Subtitle menu you can switch subtitles On or Off Select On during mute to show subtitles only when the sound is muted with m ...

Page 218: ...a program You can set the TV to switch to your preferred language if it is available To set your preferred audio language press h and select Setup Channel settings and select Languages Primary and Secondary audio The TV will automatically switch to the languages you set if the language is being broadcast ...

Page 219: ... is available press o Options and select Audio language You can select another audio language from the list Some digital TV channels broadcast special audio and subtitles adapted for people who are hearing or visually impaired Read More on Universal access ...

Page 220: ...s set for use for hearing and visually impaired people Switch on If you did not switch on Universal access at first use you can still switch it on in Setup To switch on Universal access press h Setup TV settings Preferences Universal access Select On and press OK ...

Page 221: ...n 2 2 With Universal access switched on in Setup the Universal access option is added in the Options menu With Universal menu in the Options menu you can set specific settings for hearing and visually impaired people ...

Page 222: ...s adapted for hearing impaired people With Hearing impaired switched on the TV automatically switches to the adapted audio and subtitles if available Switch on To switch on Hearing impaired press o Options select Universal access and press OK Select Hearing impaired select On and press OK ...

Page 223: ...aired audio language is available press o Options select Audio language and look for an audio language marked with a î If Universal access does not appear in the Options menu switch on Universal access in the Setup Read Help More on Universal access Switch on ...

Page 224: ...paired people The adapted audio has extra commentary Switch on To switch on Visually impaired press o Options select Universal access and press OK Select Visually impaired and select On or if available select the speakers the adapted audio should be played from If available the TV will play the visually impaired audio ...

Page 225: ... commentary To check whether a visually impaired audio language is available press o Options select Audio language and look for an audio language marked with a Ï If Universal access does not appear in the Options menu switch on Universal access in the Setup Read Help More on Universal access Switch on ...

Page 226: ...trol The volume of the beep is fixed Switch on To switch on Key beep press o Options select Universal access and press OK Select Key beep and select On If Universal access does not appear in the Options menu switch on Universal access in the Setup Read Help More on Universal access Switch on ...

Page 227: ... TV settings Adjust the brightness for a particular Smart picture or adjust the bass for a Smart sound To return to the original smart setting values undoing the adjustments you made first set up the TV in the smart setting you want to reset Then press h Setup TV settings select Reset press OK and confirm ...

Page 228: ...4 1 1 Smart settings 2 2 Read more about Smart picture and sound settings in Help Use your TV Watch TV Smart picture and sound settings ...

Page 229: ... adjust all picture settings individually To open the Picture settings press h Setup TV settings Picture Contrast Sets the contrast level of the picture Brightness Sets the brightness level of the picture Colour Sets the level of colour saturation ...

Page 230: ...l of sharpness of fine detail Noise reduction Filters out and reduces the image noise in the picture Tint Sets the colours to Normal Warm reddish or Cool bluish Select Custom to set up your own personal settings in the Custom menu Custom tint Use the slider bar to set the colour temperature of the picture ...

Page 231: ...moves motion judder and reproduces smooth movement especially in movies 200 Hz Clear LCD 100 Hz Clear LCD gives a superior motion sharpness better black level high contrast with a flicker free quiet image and a larger viewing angle Super resolution enables superior sharpness especially on lines and contours in the picture ...

Page 232: ...e and light areas of the picture Dynamic backlight sets the level at which power consumption can be reduced by dimming the brightness intensity of the screen Choose for the best power consumption or for the picture with the best brightness intensity MPEG artefact reduction smooths the digital transitions in the picture ...

Page 233: ... of details in bright colours PC mode Sets the TV to the ideal pre defined computer setting if a computer has been connected Light sensor Adjusts the picture and Ambilight settings automatically to the lighting conditions of the room Picture format Read Help Use your TV Watch TV Picture format ...

Page 234: ...4 1 2 Picture 6 6 Screen edges Slightly enlarge the picture to hide distorted edges Picture shift Move the picture up down or left right with the cursor keys ...

Page 235: ...st all sound settings individually To open Sound settings press h Setup TV settings Sound Bass Sets the level of low tones in the sound Treble Sets the level of high tones in the sound Surround Sets the surround sound effect from internal speakers ...

Page 236: ... headphone connection of the TV Auto volume levelling Reduces sudden volume differences like at the beginning of adverts or when switching from one channel to another Balance Sets the balance of the left and right speakers to best fit your listening position ...

Page 237: ...4 1 4 Ambilight Read the chapter Ambilight in Help Use your TV Ambilight ...

Page 238: ...co settings Active settings are marked with a ê Press again to close Energy saving This Smart picture setting sets the picture together with Ambilight in the most ideal energy conscious setting To switch on select Energy saving in Eco settings and press OK To switch off Energy saving select another Smart picture in the s Adjust menu ...

Page 239: ...Select Mute screen and press OK To switch the screen back on press any key on the remote control Light sensor The built in light sensor automatically adjusts the picture together with Ambilight to the lighting conditions of the room To switch on select Light sensor and press OK To switch off press OK again ...

Page 240: ...4 2 1 Reorder and rename You can reorder and rename channels in the Channel list To reorder or rename a channel read Help Use your TV Menus e Browse ...

Page 241: ...nel list with new channels You can also start an update of the Channel list yourself The update is for digital channels only Automatic channel update Once a day at 6 AM the TV updates the channels and stores new channels Empty channels are removed For new or removed channels a message is shown at TV start up The TV must be in Standby to automatically update channels ...

Page 242: ... press h Setup Channel settings and press OK Select Channel installation Channel update message and select Off To switch off the automatic channel update press h Setup Channel settings and press OK Select Channel installation Automatic channel update and select Off ...

Page 243: ...an update To start an update the channel list for new channels yourself press h Setup Search for channels and press OK Select Update channels and press OK Press Start The update can take a few minutes Follow the instructions on screen ...

Page 244: ...VB T and DVB C for your country you will have selected one or the other with the channel installation on first use If you want to change the DVB setting to start a new channel installation press h Setup Channel settings and press OK Select Channel installation Antenna or Cable DVB and press OK Select the DVB setting you want ...

Page 245: ...ovider gave you specific DVB C values like a symbol rate or a frequency enter these values when the TV asks for them during installation DVB T DVB C You can set up your TV for DVB T and DVB C Install one system followed by the other When both installations are complete the Channel list will show both DVB T and DVB C channels ...

Page 246: ...o reset your language country and install all available TV channels Full installation To reinstall the TV press h Setup Search for channels and press OK Select Reinstall channels and press OK Press Start The update can take a few minutes Follow the instructions on screen You can reorder and rename channels in the Channel list ...

Page 247: ... and signal strength of a channel If you use an antenna you can reposition the antenna to try and improve the reception To check the reception quality of a digital channel switch to the channel and press h Setup Channel settings and press OK Select Channel installation Digital reception test and press OK ...

Page 248: ... you can reposition your antenna To check the signal quality of this frequency again select Search and press OK To enter a specific digital frequency yourself select the frequency position the arrows on a number with x and w and change the number with u and v To check the frequency select Search and press OK ...

Page 249: ... use DVB C to receive channels the options Symbol rate mode and Symbol rate are available For Symbol rate mode select Automatic unless your cable provider gave you a specific symbol rate value To enter the symbol rate value use the number keys ...

Page 250: ...ogue channels 1 3 Analogue TV channels can be manually tuned in channel by channel To install analogue channels manually press h Setup Channel settings and press OK Select Channel installation Analogue manual installation and press OK ...

Page 251: ... press OK Select your country or part of the world where you are now 2 Find channel To find a channel select Find channel and press OK Select Search and press OK You can also enter a frequency yourself If the reception is poor press Search again If you want to store the channel select Done and press OK ...

Page 252: ... can fine tune the channel with u or v If you want to store the found channel select Done and press OK 4 Store You can store the channel on the current channel number or as a new channel number Select Store current channel or Store as new channel You can redo these steps until you find all available analogue TV channels ...

Page 253: ...n The daylight saving change might be ignored and the TV might show an incorrect time To correct the TV clock press h Setup TV settings Preferences Clock and select Country dependent Select Daylight saving and select the appropriate setting To set the time and date manually select Manual Then select Time or Date ...

Page 254: ... 2 As well as the DVB T and DVB C reception this TV has a built in satellite DVB S receiver With a satellite dish antenna connected you can receive digital satellite channels You do not need an external satellite receiver ...

Page 255: ... 1 Introduction 2 2 LNB An LNB Low Noise Block downconverter captures the signals from a satellite and is mounted at the end of the pole on the dish antenna The TV can receive signals from 4 different LNBs ...

Page 256: ...can install satellite channels on the TV You can install channels from 4 different satellites 4 LNBs 1 Install To search for satellites and install satellite channels press h Setup Search for satellite and press OK If you have already installed satellites select Reinstall channels and press OK ...

Page 257: ...umber of different satellites you can install For ease of use select the correct type for the number of satellites you want to install To set up the connection type select Settings and press OK Select Connection type and select One LNB if you have only one LNB select DiSEqC Mini for 2 LNBs or select DiSEqC 1 0 to install 3 or 4 LNBs Select Done to close the settings ...

Page 258: ...several minutes If no satellites are found check the antenna connections and the position of the dish antenna The signal quality shown is not always representative of the signal quality of all channels on that satellite To repeat the search for satellites select Restart and press OK If you are satisfied with the satellites found you can install all their channels ...

Page 259: ...the installation is finished you can find all channels in the satellite Channel list More settings For most satellites you do not need to change the LNB settings but if you are searching for a specific satellite on C band for instance you need to set the LNB you use for this satellite to Single Or if you are an expert user you might need a Custom setting for the LNBs you use ...

Page 260: ...e installation settings to factory settings select Reset in Settings and press OK Signal reception test The automatic channel install might have missed a specific channel or channels from a transponder You can add a transponder with Signal reception test Read Help Setup Satellite channels Signal reception test ...

Page 261: ...4 3 2 Install satellites 6 6 Dish antenna connection Read more about the antenna connection for satellite in Help Connections First connections Satellite antenna ...

Page 262: ...te to the installation You can install channels from 4 different satellites 4 LNBs 1 Connection type Check the Connection type setting before you add a satellite The setting One LNB receives only one LNB the setting DiSEqC Mini receives only 2 LNBs and the setting DiSEqC 1 0 can receive 3 or 4 LNBs ...

Page 263: ...ct Connection type and select the setting you need for the number of satellites you want to install Select Done to close the settings Press b to close Reinstall channels 2 Add a satellite To add a satellite press h Setup Search for satellite and press OK Select Add satellite and press OK The TV searches for a satellite on the first free LNB This can take several minutes ...

Page 264: ...you can remove a satellite first Read Remove satellite in Help Setup Satellite channels Remove channels 3 Install channels If you are satisfied with the added satellite you can install the channels To install all channels press Install The installation can take several minutes When the installation is complete you can find the added channels in the satellite Channel list ...

Page 265: ...atellite installation To remove a satellite press h Setup Search for satellite Select Remove satellite and press OK Select the satellite you want to remove and press OK To confirm select Yes and press OK The satellite and its channels are removed from the installation ...

Page 266: ...atellites To update the satellite channels press h Setup Search for satellite Select Update channels and press OK The TV scans the satellites for new channels and adds them to the list Empty channels are removed from the list The update can take several minutes per satellite When the update has finished the Channel list for satellite is updated ...

Page 267: ...a satellite or you can add a new satellite channel To start Signal reception test press h Setup Search for satellite Select Signal reception test and press OK 1 Select the LNB 2 If you know the frequency of the transponder which can hold several channels select Frequency and enter it 3 Select Search and press OK ...

Page 268: ...he TV finds a frequency and there is a store button shown a new transponder has been found 5 Press Store to add the new transponder with its channel or channels to the Channel list To add another transponder select Exit and repeat the steps ...

Page 269: ...orientation of the dish antenna Check the setting for the LNB that you use for this satellite Check the Connection type in the satellite installation settings Reset all Satellite settings if you lost track of the settings you changed Read Help Setup Satellite channels Installation ...

Page 270: ...channel is poor Check the orientation of the dish antenna Sometimes the reception is poor Check if the dish antenna is solidly mounted Strong winds can move the dish Snow and rain can degrade reception Read more about troubleshooting in Help Troubleshooting ...

Page 271: ...alled on the TV you can find and play the files from your PC on the TV screen Net TV If you connect the TV to a home network you can link up the TV to Net TV Net TV offers Internet services and websites tailored to your TV Play music and videos consult infotainment rent movies and much more Once the network is installed you can enjoy the best of the Internet for your TV ...

Page 272: ...2 What you need 1 3 To connect the TV to a home network and Internet you need a router in your home network The router must be set to DHCP server on Use a router with a high speed connection to the Internet ...

Page 273: ...use a computer with Microsoft Windows XP or Vista Intel Mac OSX or Linux as the operating system Find your PC files To select your PC files on screen you need recent media server software on your computer like Windows Media Player 11 or similar To find your files on the TV some media server software must be set up to share the PC files with the TV ...

Page 274: ...4 4 2 What you need 3 3 See the list of supported media server software read Help Specifications Multimedia ...

Page 275: ... the network installation To start the wireless network installation press h select Setup Connect to network and press OK Follow the instructions on screen The TV constantly searches for a network connection The router must be set to DHCP server on If asked for agree to the End User licence Agreement ...

Page 276: ...4 4 3 Wired installation 2 2 Read more about how to connect in Help Connections Network Wired ...

Page 277: ...k settings press h Setup Network settings and press OK You can view the network type IP and MAC address the signal strength speed and encryption method etc You can set DHCP and Auto IP the IP configuration settings DMR and the TV network name ...

Page 278: ...ndows Media Player v11on Windows Vista Set for network sharing In Windows Media Player select Library from the menu and select Media sharing In the Media Sharing window check the Share my media box Click OK If no network connection was found and you are unable to check this box click the Networking button to show the Network and Sharing Center window 1 2 1 2 ...

Page 279: ...window will show the TV as an Unkown Device Select the device and click Allow You can open the Settings window to change particular settings on sharing When the device icon the TV is checked with a green tick click OK Set folders for sharing In Windows Media Player select Library from the menu and select Add to Library In the Add To Library window select My folders and those of others that I can a...

Page 280: ...elect a folder with music photos or videos you want to share with other devices your TV Click OK In the Add To Library window the newly added folder is shown You can add more folders to share Click the OK button to add the files to the library Now everything is set to enjoy music photos and videos on your TV 1 1 2 ...

Page 281: ...ed On the Media sharing window will show the TV as an Unkown Device Select the device and click Allow You can open the Settings window to change particular settings on sharing When the device icon the TV is checked with a green tick click OK Set folders for sharing In Windows Media Player select Library from the menu and select Add to Library In the Add To Library window select My folders and thos...

Page 282: ... select a folder with music photos or videos you want to share with other devices your TV Click OK In the Add To Library window the newly added folder is shown You can add more folders to share Click the OK button to add the files to the library Now everything is set to enjoy music photos and videos on your TV 1 ...

Page 283: ...gs tab and click the Start Sharing button A pop up window tells you that the media server service is started Click OK Click the Sharing tab Set folders for sharing Click the green plus icon and select Add folder In the Add media pop up window click the Browse button 1 2 1 2 1 ...

Page 284: ...o enjoy music photos and videos on your TV Twonky Media v4 4 2 on Macintosh OS X Set for network sharing In Twonky Media click Basic Setup First steps In this window you can change the server name that appears on your TV Click Basic Setup Clients Security Check the box next to Enable sharing for new clients automatically 2 1 1 ...

Page 285: ...e to a folder with music photos or videos you want to share with other devices your TV Click Select to select the folder for sharing Now click Save Changes Then click Rescan content directories In some cases this might not make all files and folders available Click Support Troubleshooting and click Rebuild database to make sure everything works OK This rebuilt might take a while Now everything is ...

Page 286: ...ed with an HDMI cable Devices with EasyLink automatically show their activity in the Home menu The TV comes with EasyLink switched on With an EasyLink device connected EasyLink offers the following One touch play Insert a disc and press Play on the device The TV switches on from standby and starts playing the disc ...

Page 287: ...ndby Press O on the remote control to switch all EasyLink devices to standby Make sure that all HDMI CEC settings are properly set up on the device EasyLink and EasyLink Remote control might not work with devices from other brands ...

Page 288: ...on other brands The HDMI CEC functionality has different names on different brands Some examples of name are Anynet Aquos Link Bravia Theatre Sync Kuro Link Simplink and Viera Link Not all brands are fully compatible with EasyLink ...

Page 289: ...he device must have EasyLink HDMI CEC and have it switched on The device must also be connected with an HDMI cable With an EasyLink device connected select the device the activity and the TV remote control will now operate some or all of the functions of the device To switch back to TV select Watch TV in the Home h menu and press OK ...

Page 290: ...2 2 Switch off EasyLink Remote Control To switch off EasyLink Remote Control press Home h Setup TV settings and select EasyLink EasyLink Remote Control and select Off Read more about EasyLink in Help Setup Devices EasyLink HDMI CEC ...

Page 291: ...dd several activities The device must be connected with an HDMI cable If your connected device does not appear in the Home menu on the device EasyLink may be switched off If your connected device does not have EasyLink HDMI CEC or is not connected with an HDMI cable you need to manually add your device with Add your devices in the Home menu ...

Page 292: ...en The TV asks you to select the device and the connection to which the device is connected The device or its activities are now added to the Home menu Rename a device To rename an added device or activity press o Options and select Rename Use the keypad on the remote control as you do for SMS text messaging to enter the new name ...

Page 293: ...ivity from the Home menu select the item and press o Options and then select Remove this device If the device or activity keeps appearing in the Home menu after you deleted it switch off the EasyLink setting on the device to prevent this automatic pop up appearing again ...

Page 294: ...e audio from the TV through the audio system The TV speakers are muted automatically Surround mode With a recent Philips device selected in the Home menu you can change the surround sound setting of the device on the TV To change this setting press s Adjust select Surround mode and press OK On Next mode press OK to toggle through the available modes on the device ...

Page 295: ...this setting press s Adjust select Smart sound and press OK Select a sound mode from the list Screen off If a recent Philips device that is selected in the Home menu is only sending audio to the TV the device may suggest switching off the TV screen To switch off the screen when this message appears select Screen off and press OK To switch the screen back on press h ...

Page 296: ...in the Home menu You can also set the TV speakers to always or never play sound or set the TV to always start up the audio device and play sound from the device To set the TV speakers press h Setup TV settings EasyLink TV speakers Select EasyLink Autostart only if you always want to play sound from the audio device ...

Page 297: ... HTS should be synchronized A mismatch is visible in scenes with people talking When they finish sentences before their lips stop moving HDMI ARC Latest Home Theatre Systems with built in disc players adjust the audio to video sync automatically when they are connected to the HDMI ARC connections HDMI Audio Return Channel ...

Page 298: ...a match between picture and sound A delay value of 180ms may be required Read the user manual of the HTS With a delay value set up on the HTS you need to switch off Audio Out delay on the TV if the HTS has this delay set up for all its output connections To switch off Audio Out delay press h and select Setup TV settings Preferences Audio Out delay Select Off and press OK ...

Page 299: ... delay on the HTS or its maximum setting is insufficient you can switch off the Perfect Natural Motion picture processing of the TV To switch off Perfect Natural Motion press h and select TV settings Picture Perfect Natural Motion Select Off and press OK ...

Page 300: ...ent Philips player the TV can move the subtitles upwards Subtitles will then be visible whatever Picture format you select The TV comes with Auto subtitle shift switched on To switch off Auto subtitle shift press h Setup TV settings EasyLink Auto subtitle shift Select Off ...

Page 301: ...bad picture quality caused by interference with the TV processing the picture processing of these devices should be disabled The TV comes with Pixel Plus link switched on and disables the picture quality processing of a connected device To switch off Pixel Plus link press h Setup TV settings EasyLink Pixel Plus link Select Off ...

Page 302: ...4 6 1 Current software info To view the current TV software version press h Setup Software settings and press OK Select Current software info and read Version ...

Page 303: ...connected to the Internet you may receive a message from Philips to update the TV software You need a high speed Internet connection If you receive this message we recommend you carry out the update Select Update Follow the instructions on screen ...

Page 304: ...self To look for an update press h Setup Update software and press OK Follow the instructions on screen When the update is complete the TV switches itself off and back on again automatically Wait for the TV to switch itself back on Do not use the Power switch O on the TV ...

Page 305: ...he TV software You need a PC with an high speed Internet connection and a USB memory device to upload the software on the TV Use an USB memory device with 256Mb free space Make sure that write protection is switched off 1 Start 2 Identify 3 Download 4 Update TV ...

Page 306: ... 2 5 1 Start the update on TV To start the software update press h Setup Update now 2 Identify the TV Insert the USB memory on the side of the TV select Start and press OK An identification file is written on the USB memory ...

Page 307: ... available download the zip file After the download unzip the file and copy the file autorun upg onto the USB memory Do not place this file in a folder 4 Update the TV software Insert the USB memory in the TV again The update starts automatically The TV switches itself off for 10 seconds and then back on again Please wait Do not use the remote control remove the USB memory from the TV ...

Page 308: ...update will continue At the end of the update the message Operation succesful appears on screen Remove the USB memory and press O on the remote control Do not press O twice use the O switch on the TV The TV switches itself off for 10 seconds and then back on again Please wait The TV software has been updated You can use the TV again ...

Page 309: ...4 6 3 Update with USB 5 5 To prevent an accidental update of the TV software delete the autorun upg file from the USB memory ...

Page 310: ...5 1 1 Power cable 1 2 Insert the power cable in the power socket of the TV When disconnecting the power cable always pull the plug never the cable ...

Page 311: ... with the power switch to save energy if you do not use the TV for a long period of time Read more about the power switch in Help To begin Keys on the TV Power switch Make sure the power cable is securely inserted in the TV Make sure that the power plug in the wall socket is accessible at all times ...

Page 312: ...5 1 2 Antenna cable Locate the antenna connection at the back of the TV Insert the antenna cable securely in the Antenna a socket ...

Page 313: ...5 1 3 Satellite antenna cable Locate the F type Satellite antenna connection at the side of the TV Attach the satellite antenna cable to this connection ...

Page 314: ... device Connect the device to the TV with the highest quality connection available Good quality cables ensure a good transfer of picture and sound Read the other chapters of About cables The connections diagrams shown in Help Connections Connect devices are recommendations Other solutions are possible ...

Page 315: ... best picture and sound quality One HDMI cable combines video and audio signals Use an HDMI cable for High Definition HD TV signals An HDMI cable transfers picture and sound signals in only one direction Do not use an HDMI cable longer than 5m ...

Page 316: ...u can operate them with the TV remote control Read more about EasyLink in Help Setup Devices EasyLink HDMI CEC HDMI ARC If you have a Home Theatre System with an HDMI ARC Audio Return Channel connection you can connect this device with the TV with only a HDMI cable Use the HDMI1 ARC connection ...

Page 317: ...In The return audio connection in this HDMI ARC connector is built in You do not need a special HDMI cable You can leave the ARC channel switched on if you use the additional digital audio cable Still you can switch off HDMI ARC To switch off the ARC in the HDMI 1 connection press h Setup TV settings EasyLink HDMI 1 ARC select Off and press OK ...

Page 318: ...ions and add an Audio L R cable to Audio In VGA HDMI for sound on the back of the TV Copy protection A DVI and HDMI cable support HDCP High bandwidth Digital Contents Protection HDCP is a copy protection signal that prevents copying content from a DVD disc or Blu ray Disc Also referred to as DRM Digital Rights Managament ...

Page 319: ...video Use the Component Video YPbPr connection together with an Audio Left and Right connection for sound Match the YPbPr connector colours with the cable plugs when you connect YPbPr can handle High Definition HD TV signals ...

Page 320: ...5 2 4 Scart A scart cable combines video and audio signals Scart connectors can handle RGB video signals but cannot handle High Definition HD TV signals ...

Page 321: ... S Video If you have a device with only a S Video connection you need to use a S Video to Scart adapter not supplied You can add the Audio L R connections Connect the adapter to a Scart connection of the TV ...

Page 322: ...6 Video If you have a device with only a Video CVBS connection you need to use a Video to Scart adapter not supplied You can add the Audio L R connections Connect the adapter to a Scart connection of the TV ...

Page 323: ... to connect a computer to the TV With this connection you can use the TV as a computer monitor You can add an Audio L R cable for sound To connect a computer with the VGA connection read Help Connections Connect more devices TV as PC monitor ...

Page 324: ...5 3 1 SoundBar 1 3 Use an HDMI cable to connect the device to the TV ...

Page 325: ...5 3 1 SoundBar 2 3 If you use the HDMI ARC connections on both TV and device no other cable is needed If not read on ...

Page 326: ...5 3 1 SoundBar 3 3 If you do not use the HDMI ARC connection add a digital audio cable cinch coaxial ...

Page 327: ...5 3 2 Blu ray Disc DVD player Use an HDMI cable to connect the device to the TV ...

Page 328: ...5 3 3 Home Theatre System with disc player 1 4 Use an HDMI cable to connect the device to the TV ...

Page 329: ...5 3 3 Home Theatre System with disc player 2 4 If you use the HDMI ARC connections on both TV and device no other cable is needed If not read on ...

Page 330: ...5 3 3 Home Theatre System with disc player 3 4 If you do not use the HDMI ARC connection add a digital audio cable cinch coaxial ...

Page 331: ...on screen you can set a delay on most DVD Home Theatre Systems to match the sound and video Read more about Audio to Video sync in Help Setup Devices Audio to Video sync Do not connect the audio signal from a DVD player or other device directly to the Home Theatre System Always route the sound through the TV first ...

Page 332: ...5 3 4 Recorder 1 2 Use 2 antenna cables to connect the antenna to the device and the TV ...

Page 333: ...5 3 4 Recorder 2 2 Add an HDMI cable to connect the device to the TV ...

Page 334: ...5 3 5 Digital receiver or Satellite receiver 1 2 Use 2 antenna cables to connect the antenna to the device and the TV ...

Page 335: ...5 3 5 Digital receiver or Satellite receiver 2 2 Add an HDMI cable to connect the device to the TV ...

Page 336: ...5 3 6 Digital receiver and Disc Recorder 1 3 First use 3 antenna cables to connect the devices to the TV ...

Page 337: ...5 3 6 Digital receiver and Disc Recorder 2 3 Then use an HDMI cable to connect the digital receiver to the TV ...

Page 338: ...5 3 6 Digital receiver and Disc Recorder 3 3 Finally use an HDMI cable to connect the Disc Recorder to the TV ...

Page 339: ...5 3 7 Digital receiver Disc Recorder and Home Theatre System 1 5 First use 3 antenna cables to connect the devices to the TV ...

Page 340: ...5 3 7 Digital receiver Disc Recorder and Home Theatre System 2 5 Then use an HDMI cable to connect the digital receiver to the TV ...

Page 341: ...5 3 7 Digital receiver Disc Recorder and Home Theatre System 3 5 Then use an HDMI cable to connect the Disc Recorder to the TV ...

Page 342: ...5 3 7 Digital receiver Disc Recorder and Home Theatre System 4 5 Then use an HDMI cable to connect the Home Theatre System to the TV ...

Page 343: ...5 3 7 Digital receiver Disc Recorder and Home Theatre System 5 5 If you do not use the HDMI ARC connection on the TV and the device add a digital audio cable cinch coaxial ...

Page 344: ...5 3 8 Digital HD receiver 1 2 First use 2 antenna cables to connect the device to the TV ...

Page 345: ...5 3 8 Digital HD receiver 2 2 Use an HDMI cable to connect the device to the TV ...

Page 346: ... console only has Video CVBS and Audio L R output use a Video Audio L R to Scart adapter to connect to the Scart connection Picture delay To prevent picture delay while gaming close Help and press s Adjust and select Smart picture Game and press OK After gaming do not forget to select the Smart picture you normally use for watching TV ...

Page 347: ...5 4 1 Game console 2 3 Use an HDMI cable to connect the device to the side of the TV ...

Page 348: ...5 4 1 Game console 3 3 Or use a Scart adapter to connect the device to the TV ...

Page 349: ...5 4 2 HD Game console Use an HDMI cable or YPbPr and Audio L R cables to connect a High Definition game console to the TV To connect a HD Game console read Help Connections Connect more devices Game ...

Page 350: ...amera 1 2 To view pictures stored on your digital photo camera you can connect the camera directly to the TV Use the USB connection on the side of the TV to connect Switch on the camera after you made the connection ...

Page 351: ...a 2 2 If the list with the content of the camera does not appear automatically your camera might need to be set to transfer its content with PTP Picture Transfer Protocol Read the user manual of the digital photo camera ...

Page 352: ...f the TV You can use an HDMI YPbPr or Scart connection If your camcorder only has S Video Y C or Video CVBS and Audio L R output use a S Video or Video Audio L R to Scart adapter to connect to the Scart connection See the following pages to connect your camcorder ...

Page 353: ...5 4 4 Camcorder 2 3 Use an HDMI cable to connect the camcorder to the side of the TV ...

Page 354: ...5 4 4 Camcorder 3 3 Or use a Scart adapter to connect the device to the TV ...

Page 355: ...4 5 TV as PC monitor 1 4 You can connect the TV to your computer as a PC monitor Before connecting the PC set the PC monitor refresh rate to 60 Hz See the following pages for how to connect your computer ...

Page 356: ...5 4 5 TV as PC monitor 2 4 Use a VGA cable to connect the PC to the VGA connector and an audio L R cable to connect the VGA Audio L R to the back of the TV ...

Page 357: ...5 4 5 TV as PC monitor 3 4 Use a DVI to HDMI adapter to connect the PC to HDMI and an audio L R cable to connect the Audio L R to the back of the TV ...

Page 358: ...al TV setting Set the TV Picture format to Unscaled for the sharpest picture quality While watching TV press o select Picture format and select Unscaled For a list of supported resolutions see Help Specifications Display resolutions ...

Page 359: ...on the back of the TV You have to assign the TV channel as a channel to be decoded Then assign the connection where the decoder is connected To assign this TV channel press h Setup Channel settings Decoder Select Channel to set up the channel that you want to decode Select Status to set the connection you use for the decoder ...

Page 360: ...5 5 1 Wired network connection To set up the wired network connection read Help Setup Network Connect the router to the TV with a network cable Use a standard FTP or STP ethernet cable ...

Page 361: ...he wireless connection the free Wi Fi MediaConnect software can bring up project your PC screen on the TV You can project video music presentations etc playing on your laptop or desktop PC What you need To use Wi Fi MediaConnect you need to connect the TV to your home network You need a wireless router Read more about connecting to a network in Help Setup Network ...

Page 362: ...rowser and opens the Wi Fi MediaConnect download page www philips com wifimediaconnect On the website you can check the necessary PC system requirements 3 Enter the code printed on the CD ROM envelope 4 Click the Download now button to download the free Wi Fi MediaConnect software 5 Once downloaded start the file Wi Fi MediaConnect_setup exe Follow the instructions on screen ...

Page 363: ...ou have more then one TV in your home network you can rename this TV To rename this TV in the network press h Setup Network settings and select TV network name To enter the name press OK to open the on screen keyboard or use the remote control keypad ...

Page 364: ...d select Help Specifics You can project high definition HD or standard definition SD video depending on the processing power of your PC The content protection on most DVD or Blu ray Disc movies might restrict watching the movie on TV when the disc is playing on a PC The TV shows PC media files with a small delay Wi Fi MediaConnect is only available for PC ...

Page 365: ...ws 7 PC only Minimum PC requirements Intel Pentium Core 2 Duo 1 8GHz 512MB RAM 200MB free hard disk space Wi Fi 802 11g Internet connection Recommended PC requirements Intel Pentium Core 2 Duo 2 1GHz 1GB RAM 200MB free hard disk space Wi Fi 802 11n Internet connection ...

Page 366: ... memory card in the TV SD card slot Once formatted leave the card permanently in the slot SD memory size We recommend an SDHC High Capacity Class 2 card with a minimum of 4GB memory For HD movies a minumum of 8GB memory Read more about renting videos in Help Use your TV Net TV Video stores ...

Page 367: ...Make sure to unlock the SD memory card before you insert it To format the SD card switch on the TV and insert the SD card in the SD card slot The TV will automatically start formatting Leave the SD card permanently in the slot ...

Page 368: ...Digital TV service operators provide the CAM when you subscribe to their services Contact a digital TV service operator for more information and to see terms conditions Insert a CAM Switch off the TV before inserting a CAM Look on the CAM for the correct method of insertion Incorrect insertion can damage the CAM and the TV ...

Page 369: ...Look for the common interface slot on the back of the TV Gently insert the CAM as far as it will go and leave it in the slot permanently It can take a few minutes before the CAM is activated Removing the CAM will deactivate the service on TV ...

Page 370: ... paid the TV shows the programme from the digital TV service provider The applications their function the content and the onscreen messages all come from the CAM service CAM settings To set passwords or PIN codes for the CAM service press h Setup Channel settings Common Interface Select the CAM provider and press OK ...

Page 371: ...is TV can handle the CI conditional access CI allows service providers to offer premium HD digital programmes like movies and sports with a high level of copy protection To insert a CI CAM read the chapter CAM Conditional Access Module ...

Page 372: ...5 8 1 3D This TV is prepared for future 3D TV accessories ...

Page 373: ...ain Warning If your TV breaks down NEVER try to repair the TV yourself Consumer Care If the TV problem is not solved you can call the Philips Consumer Care hotline in your country Look up the TV model and serial number before you call Find the telephone number on the documentation that came with the TV Or consult our website www philips com support ...

Page 374: ...6 1 Contact information 2 2 TV model number and serial number Find these numbers on the packaging label or on the type label on the back or bottom of the TV ...

Page 375: ...with the switch on the bottom of the TV Check the power cable connection Try using the keys on the TV to switch on The TV does not switch on from standby Check that the batteries of the remote control are not empty or weak Check their orientation Try using the keys on the TV to switch on ...

Page 376: ...ontrol are not empty or weak Check their orientation Clean the remote control and TV sensor lens During start up which can take up to two minutes with connected devices the TV and some external devices do not immediately respond to commands from the remote control The device is functioning normally and is not broken ...

Page 377: ...gain with the switch at the bottom of the TV Check if there is enough space for ventilation Wait until the TV has cooled down If the TV does not restart from standby and the blinking occurs again call Consumer Care You forgot your code to unlock Child lock Read Help More on Locks and timers Child lock ...

Page 378: ...if the correct list is selected in the Channel list With the Channel list on screen press o Options and select the list you need with Select list A channel could be hidden in the Channel list Read more about Channel list in Help Use your TV Menus Browse ...

Page 379: ...6 3 TV channels 2 2 No digital channel found during installation Check if the TV supports DVB T or DVB C in your country Check the Digital TV Country Compatibility sticker on the back of the TV ...

Page 380: ...tness setting in h Setup TV settings Contrast or Brightness The picture is poor Bad weather can influence the picture quality Check if the antenna is connected properly Non earthed audio devices neon lights high buildings or mountains can influence the picture quality Try to improve the picture by changing the position of the antenna or placing devices away from the TV ...

Page 381: ...stallation menu If only a certain channel is poor try to fine tune this channel with the Fine tune menu Read Help Setup Channels Manual installation Analogue The picture has poor colour Check the colour settings in h Setup TV settings Or press s Adjust to select a Smart picture setting ...

Page 382: ...game console is connected To prevent picture delay press s Adjust select Smart picture Game The TV does not remember my settings when I switch it back on Check whether the TV is set to the Home location Press s Setup TV settings Preferences Location ...

Page 383: ...creen Press s Adjust Picture format and select Auto fill The picture position on screen is not correct To correct a shifted picture press s Adjust and select Picture shift Use the navigation keys to adjust the picture position Press OK to stop Picture shift ...

Page 384: ... the slider bar to enlarge the picture slightly There is a picture but no sound Check the volume is not set to 0 Check the sound has not been muted with m Check that all cables are connected properly If no sound signal is detected the TV automatically switches off sound This is proper operation and is not a malfunction ...

Page 385: ... poor Try any Smart sound setting press s Adjust Smart sound Check that the sound is set to Stereo The sound comes from one speaker only Check the Balance setting Press h Setup TV settings Sound Balance Use the slider bar to set the balance ...

Page 386: ...d 7 7 Sound delay If there is an audio to video sync mismatch when sound comes from a Home Theatre System an audio sync delay needs to be set up Read more about Audio to Video sync in Help Setup Devices Audio to Video sync ...

Page 387: ... no picture try switching from one device to another and back again to restart the HDCP procedure If sound interruptions occur persistently see the user manual of the device to check the output settings If that does not help connect an additional audio cable If a DVI to HDMI adaptor is used check that an additional audio connection is in place to complete the DVI connection ...

Page 388: ...operly set up Read the user manual that comes with the device Check if the HDMI cable is properly connected Check if EasyLink on the TV and device is switched on Make sure that the System audio control in your HDMI CEC audio devices is properly set up Read the user manual that comes with your audio device ...

Page 389: ...display The refresh rate of a PC connected to the TV with VGA or DVI to HDMI adapter should set to 60Hz Check that the correct resolution mode is selected on your PC See the list in Help Specifications Display resolutions ...

Page 390: ...wn Set your device camera to Mass Storage Class compliant The USB device may need specific driver software Unfortunately this software cannot be downloaded to your TV Not all audio and picture files are supported See the list in Help Specifications Multimedia ...

Page 391: ...ce of the USB device limits the transfer rate The files on my PC are not shown To look for files on your home network with Browse PC your PC media server software should be set up to share the files with the TV See the list of compatible Media server software in Help Specifications Multimedia ...

Page 392: ...6 7 Network Net TV does not work If the connection to the router is OK check the router connection to the Internet You need a high speed Internet connection for your router ...

Page 393: ...7 1 1 Software version To view the current TV software version press h Setup Software settings and press OK Select Current software info and read Version ...

Page 394: ...rming source distribution a complete machine readable copy of the corresponding source code on a medium customarily used for software interchange This offer is valid for a period of 3 years after the date of purchase of this product To obtain the source code write to Open Source Team Philips Electronics High Tech Campus Bld HTC 44 5600 AE Eindhoven The Netherlands E mail open source philips com ...

Page 395: ...7 1 2 Open source software 2 2 Read the Open Source Licences in Help To begin Open Source Licences ...

Page 396: ...cuses on lowering the environmental impact of its innovative consumer products We aim our efforts towards environmental improvements during manufacturing reduction of harmful substances energy efficient use end of life instructions and product recycling ...

Page 397: ... effort this TV has been awarded the European Ecolabel the flower www ecolabel eu You can find detailed information on standby energy consumption warranty policy spare parts and recycling of this TV on the Philips website for your country at www philips com ...

Page 398: ...surrounding light darkens Energy saving The Energy saving Smart picture setting combines several TV settings that result in saving energy Low standby power The class leading and highly advanced power circuitry brings down the power consumption of the TV to an extremely low level without losing out on the constant Standby functionality ...

Page 399: ...can check how your personal TV settings the level of brightness in current onscreen pictures and the surrounding light conditions determine the relative power consumption To check the relative power consumption press h Setup and press W Select Watch demos Active control and press OK Select a Smart setting to check the corresponding values ...

Page 400: ...7 2 3 End of use 1 5 Disposal of your old product and batteries Your product is designed and manufactured with high quality materials and components which can be recycled and reused ...

Page 401: ...7 2 3 End of use 2 5 When this crossed out wheeled bin symbol is attached to a product it means that the product is covered by the European Directive 2002 96 EC ...

Page 402: ...system for electrical and electronic products Please act according to your local rules and do not dispose of your old products with your normal household waste Correct disposal of your old product helps to prevent potential negative consequences for the environment and human health ...

Page 403: ...7 2 3 End of use 4 5 Your product contains batteries covered by the European Directive 2006 66 EC which cannot be disposed with normal household waste ...

Page 404: ... 2 3 End of use 5 5 Please inform yourself about the local rules on separate collection of batteries because correct disposal helps to prevent negative consequences for the environmental and human health ...

Page 405: ...r more specification details of this product see www philips com support Power Mains power AC 220 240V 10 Ambient temperature 5 C to 35 C Standby power consumtion 0 15W Power saving features Light sensor Eco mode Picture mute for radio Auto switch off timer Eco settings menu ...

Page 406: ... NTSC SECAM PAL DVB DVB Terrestrial DVB T MPEG4 DVB C MPEG4 DVB S MPEG4 HD MHEG DVB S HD support Astra see selected countries on the TV typeplate DVB video audio support ISO IEC 13818 2 ISO IEC 13818 3 QPSK demodulation DVB S2 MPEG4 EN300307 Reed Solomon decoder support complies to EN 300421 Tuner bands Hyperband S Channel UHF VHF ...

Page 407: ... Astra 28 2 E Hotbird 13 0 E TürkSat 42 0 E LNB 1 to 4 LNBs supported Band selection 22 kHz LNB current 300 mA max Polarity selection 14 18V Tone burst mode Input frequency range 950 to 2150 MHz Input level range 25 to 65 dBm Symbol rate 2 to 45 Msymbols SCPC and MCPC ...

Page 408: ... 52PFL8605 132cm 52 Picture enhancement Perfect Pixel HD Engine 32PFL8605 100Hz Clear LCD 37 40 46 52PFL8605 200Hz Clear LCD Display type LCD Full HD edge LED backlight Panel resolution 1920 x 1080p Color processing 2250 trillion colors 17bit RGB Brightness 500 cd m2 Dynamic contrast 500 000 1 Response time typical 1 BEW equiv ms ...

Page 409: ...7 4 Display and sound 2 2 Sound Output power RMS 2 x 10W Dolby Digital Plus Dolby Pulse Dolby and the double D symbol are registered trademarks of Dolby Laboratories Speaker types 2 woofers ...

Page 410: ... 1080i 50 Hz 60 Hz 1080p 24 Hz 25 Hz 30 Hz 1080p 50 Hz 60 Hz Computer formats Resolution Refresh rate 640 x 480p 60 Hz VGA HDMI 600 x 800p 60 Hz VGA HDMI 1024 x 768p 60 Hz VGA HDMI 1280 x 768p 60 Hz VGA HDMI 1360 x 765p 60 Hz VGA HDMI 1360 x 768p 60 Hz VGA HDMI 1280 x 1024p 60 Hz HDMI 1920 x 1080i 60 Hz HDMI 1920 x 1080p 60 Hz HDMI ...

Page 411: ...USB Ethernet LAN RJ 45 Supported USB memory device formats FAT 16 FAT 32 NTFS Playback formats MP3 AAC WMA v2 up to v9 2 Still pictures JPEG MPEG 1 MPEG 2 MPEG 4 H 264 MPEG 4 AVC WMV9 MPEG program and transport stream AVI MP4 MKV ASF ...

Page 412: ...ky Media PacketVideo 4 4 9 for PC and Intel MacOX 5 0 68 MacOX Sony Vaio Media Server for Microsoft Windows XP or Vista Sony PS3 media server for Windows XP Nero 8 Nero MediaHome for Microsoft Windows XP DiXiM for Windows XP Macrovision Network Media Server for Microsoft Windows XP Fuppes for Linux uShare for Linux Philips NAS SPD8020 v 1 2 9 47 ...

Page 413: ...7 6 Multimedia 3 3 TVersity 1 7 pro for Windows XP Nokia N82 N96 N95 Nokia N78 N80 N81 8GB N800 N810 N92 N93 N93i N96 Samsung SGH i780 ...

Page 414: ...r Audio L R VGA D sub 15 Audio In stereo mini jack 3 5mm HDMI 1 ARC in HDMI v1 4 HDMI 2 in HDMI v1 3 HDMI 3 in HDMI v1 3 Audio In DVI to HDMI stereo mini jack 3 5mm Audio Out L R display synchronised coaxial cinch S PDIF Headphones stereo mini jack 3 5mm Network RJ45 3D Out only for 40PFL8605 and 46PFL8605 ...

Page 415: ...7 7 Connectivity 2 2 TV Side HDMI Side in HDMI v1 3 USB Common interface slot CAM SD card slot SD High Capacity as Video stores memory ...

Page 416: ...tand Height 532 mm Depth 228 mm Weight 16 kg UMv 3104 327 0033 1 100415 37PFL8605 Width 900 mm Height 565 mm Depth 44 mm Weight 16 kg with TV stand Height 601 mm Depth 248 mm Weight 19 kg 40PFL8605 Width 965 mm Height 600 mm Depth 50 mm Weight 18 kg with TV stand Height 636 mm Depth 248 mm Weight 20 kg ...

Page 417: ...7 8 Dimensions and weights 2 2 46PFL8605 Width 1102 mm Height 675 mm Depth 51 mm Weight 25 kg with TV stand Height 711 mm Depth 268 mm Weight 28 kg ...

Page 418: ... the property of Koninklijke Philips Electronics N V or their respective owners Philips reserves the right to change products at any time without be ing obliged to adjust earlier supplies accordingly The material in the user manual is believed adequate for the intended use of the system If the product or its individual modules or procedures are used for purposes other than those specified herein c...

Page 419: ...enziali ed alle altre disposizioni pertinenti stabilite dalla direttiva 1999 5 CE Português Philips Innovative Applications N V declara que este televisor está conforme com os requisitos essenciais e outras disposições da Directiva 1999 5 CE Eλληνικά ΜΕ ΤΗΝ ΠΑΡΟΥΣΑ Η Philips Innovative Applications N V ΔΗΛΩΝΕΙ ΟΤΙ H ΤΗΛΕΌΡΑΣΗ ΣΥΜΜΟΡΦΩΝΕΤΑΙ ΠΡΟΣ ΤΙΣ ΟΥΣΙΩΔΕΙΣ ΑΠΑΙΤΗΣΕΙΣ ΚΑΙ ΤΙΣ ΛΟΙΠΕΣ ΣΧΕΤΙΚΕΣ ΔΙΑΤ...

Page 420: ...rvices Starting in late 2007 and ending in 2012 television services in the UK will go completely digital TV region by TV region Please see the next page to find out when your area switches to digital Digital UK is the independent non profit organisation leading the process of digital TV switchover in the UK Digital UK provides im partial information on what people need to do to prepare for the mov...

Page 421: ......
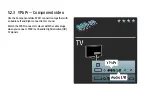
Page 422: ...Ethernet Flash Wifi CAM Platform 2K10 TV550 200Hz 8000 Platform 2K10 TV550 Basic Ambilight Audio Amp memory Matrix LCD Matrix LCD memory memory Tuner Video Chip HDNM chip HDNM chip Tuner DVB S CAM DVB T C HDMI Ethernet Flash Flash Wifi 32 9000 Diagramma elettronico Electronic diagram ...

Page 423: ...istered trademarks are property of their respective owners Specifications are subject to change without notice Trademarks are the property of Koninklijke Philips Electronics N V or their respective owners 2010 Koninklijke Philips Electronics N V All rights reserved www philips com www philips com tv ...

Reviews: