Changing the pr
ogramme number
of a television channel
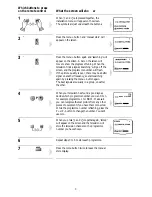
1
Press the
N
and
Q
buttons together to get the
installation menu on the screen.
2
Press the menu + button to get the manual store
menu on the screen.
3
Select the channel you want to change by
pressing the P+, P- or the 0 to 9 buttons.
4
Press the
N
and
Q
buttons together again to
make the programme number flash.
5
Press P+, P- or the 0 to 9 buttons to enter the
programme number you want to give to that
channel. You can’t use 0 because it is reserved for
the scart (AV) channel.
6
Press the
N
and
Q
buttons together once more
to make ‘stored’ appear. The television has now
stored the television channel on the programme
number you have chosen.
7
Repeat steps 3 to 6 if you want to change the
programme numbers of other channels.
8
Press the menu button twice to get back to
normal viewing. (You can turn off any of the
on-screen displays by pressing the menu button
several times.)
Picture interference from other
equipment
If you have used the aerial lead to connect a video
recorder, satellite receiver or other piece of equipment,
switch the equipment on one piece at a time and
check the picture on all your programmes. The pieces
of equipment that are not switched on must be on
stand-by. If any of your programmes have wavy lines
on the picture when the equipment is switched on,
you will have to change the output frequency of the
equipment. Please read the instruction book for the
equipment to find out how to do this. Change the
output frequency a little at a time (or in 8MHz steps)
and keep checking all your programmes.
When there are no wavy lines (or other interference)
on any of the pictures, re-tune the programme
number that you have chosen for your equipment (see
‘Tuning in the programmes’ on pages 2 to 3).
Do the same for each piece of equipment, but after
you’ve finished with each one, leave it switched on
while you check the next piece of equipment.
Continue until you have all the pieces of equipment
working together without interfering with each other.
If you cannot get rid of the interference, you may
have to connect the equipment with a scart cable, (see
‘How to connect scart cables’ on page 9).
Changing channels without leaving
the installation mode
As long as the programme number is not flashing,
you can change channels while the installation menu
is still on the screen.
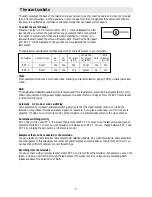
Please read ‘Switching the television on and off’ on page 2.
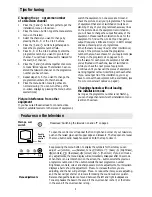
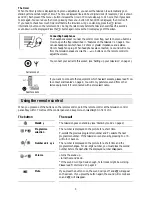
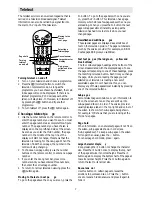
To open the control cover flap near the front right-hand corner of your television,
push on the raised pips near its upper edge and release it. The flap opens to reveal
the menu buttons and headphone socket. Push the flap to close it.
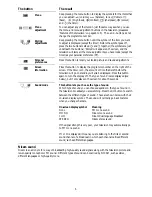
Keep pressing the menu button to display the symbols for the items you can
adjust:
a
(volume),
b
(balance), tone
l
(treble) or
m
(bass),
A
(brightness),
B
(contrast),
R
(sharpness),
C
(colour) and
C
(the timer). If you don’t make
any adjustments, the menu display will automatically disappear after 10 seconds.
When there is no symbol shown on the screen, the - button selects the previous
programme number and the + button selects the next programme number.
Brightness, contrast, colour and sharpness are picture adjustments. Your television
displays a bar to show the adjustment. Press + to increase the item you are
adjusting, and the bar will get longer. Press – to reduce the item you are adjusting,
and the bar will get shorter. Volume is for making the sound louder or quieter.
Balance changes the balance of sound between the left and right loudspeakers.
Tone emphasises the bass in the sound if the on-screen bar is short, or the treble
in the sound if the on-screen bar is long.
A
Main po wer
switch
Menu adjustments
4
Tips for tuning
F eatures on the television
Push to
open the
control
fla p
n


