Meridian 3
10
247E3LPH
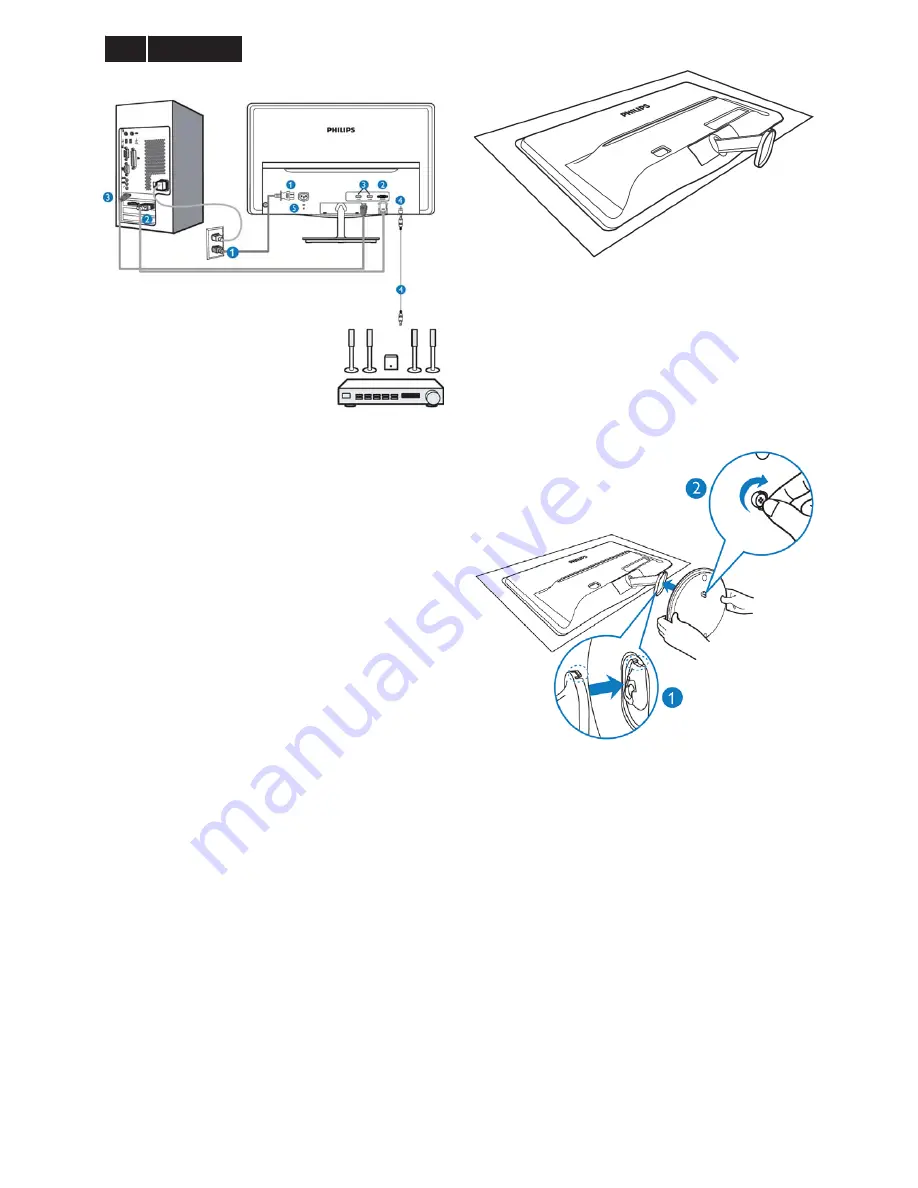
1. AC power input
2. VGA input
3. HDMI input
4. HDMI Audio Output
5. Kensington anti-theft lock
Connect to PC
1. Connect the power cord to the back of the monitor
firmly.
2. Turn off your computer and unplug its power cord.
3. Connect the monitor signal cable to the video
connector on the back of your computer.
4. Plug the power cord of your computer and your
monitor into a nearby outlet.
5. Turn on your computer and monitor. If the monitor
displays an image, installation is complete.
Install the base stand
1. Place the monitor face down on soft and smooth
surface taking care to avoid scratching or damaging
the screen.
2. Hold the base stand with both hands and firmly
insert the base stand into the base column.
1) Gently attach the base to the base column until
the latch locks the base.
2) Use your fingers to tighten the screw located at
the bottom of the base, and secure the base to
the column tightly.
3.3 OSD Menu
On-screen Display (OSD) is feature in all Philips LCD
monitors. It allows an end user to adjust screen
performance or select functions of the monitors directly
through an on-screen instruction window. A user
friendly on screen display interface is shown as below:
Summary of Contents for 247E3LHSU/00
Page 43: ...43 Meridian 3 247E3LPH Flash ROM VGA EEPROM HDMI EEPROM Scaler IC DC DC FFC Connector ...
Page 52: ... 52 Meridian 3 Click Finish to complete the USB serial port driver installation ...
Page 61: ...61 Meridian 3 2 Tick the Analog DVI and click Loadfile to set the parameters 247ELH 247ELPH ...


