background image

Product care

IMPORTANT

Please read thoroughly before commencing 
installation as an incorrect installation could be 
dangerous.

1.  This is a LATCH BASE CHILD RESTRAINT 

SYSTEM, it is approved to USA Federal Motor 
Vehicle Safety Standards (FMVSS). Please note 
that the LATCH base is not suitable for all types 
of cars.

2.  If in doubt, consult either phil&teds or the retailer.

Extreme Hazard

• 

Do not use in passenger seats equipped with 
airbags.

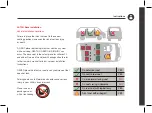
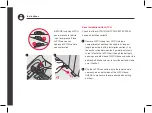
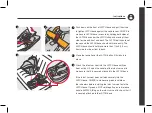
Cleaning the Buckle: 

• 

Food, drink or other debris may collect inside the 
harness buckle which can affect proper function.

• 

Wash in warm water until clean. When inserting the 
buckle tongues, be sure you can hear an audible click 
to make sure the buckle is working properly.

• 

Do not use detergents or lubricants.

The correct use and maintenance of your LATCH Base 
will ensure it gives long and trouble free use. When 
somebody else is using your LATCH Base, ensure 
that they also know how to use it and especially the 
correct way to adjust it. The safety of your child is your 
responsibility. 

Summary of Contents for LATCH BASE

Page 1: ... GERBRAUCHSANWEISUNG INSTRU K S J O N E R I N S T R U K T I O N E R READ KEEP FOR FUTURE REFERENCE FORYOUR CHILD S SAFETY THESE INSTRUCTIONS BEFORE USE CAREFULLY LATCH BASE protect alpha Store these instructions in the container provided within your LATCH base ...

Page 2: ...lies with requirements applicable in market of sale For rights remedies and important online product registration please visit www philandteds com register www mountainbuggy com register mountainbuggy com philandteds com ...

Page 3: ...Congratulations on choosing your new infant car seat latch base Product Care Safety Warnings Features Instructions ...

Page 4: ...ht which could damage or fade your product Store in a safe place when it is not being used Avoid placing heavy objects on top of it DO NOT allow to come into contact with corrosive substances e g battery acid Straps Wipe clean with damp cloth DO NOT SOAK straps in water as this may weaken them GENERAL INSTRUCTIONS Suitable for children from 4 35lbs 1 8kg 15 9kg LATCH BASE THIS DOCUMENT CONTAINS IM...

Page 5: ...seats equipped with airbags Cleaning the Buckle Food drink or other debris may collect inside the harness buckle which can affect proper function Wash in warm water until clean When inserting the buckle tongues be sure you can hear an audible click to make sure the buckle is working properly Do not use detergents or lubricants The correct use and maintenance of your LATCH Base will ensure it gives...

Page 6: ...ON A PASSENGER SEAT EQUIPPED WITH AN AIRBAG Owners of vehicles with side airbags should refer to their owner s manual for infant car seat installation instructions ACCORDING TO ACCIDENT STATISTICS children are safer when properly restrained in rear vehicle seating positions rather than in the front seating positions REGISTER YOUR INFANT CAR SEAT AND LATCH BASE with the manufacturer ...

Page 7: ...op or car crash FOLLOW ALL INSTRUCTIONS on this infant car seat and LATCH base in the written instructions located in the container provided within your LATCH base USE INFANT CAR SEAT AND LATCH BASE ONLY WITH children who weigh between 4 35lbs 1 8 15 9kg and whose height is 32 inches 81cm or less Child s head MUST be 1 2 5 cm or more below the top of the seat FOR LOW BIRTH WEIGHT INFANT you must a...

Page 8: ...or other difficulties in a child restraint Please consult a physician to determine what type of infant car seat should be used for your child before using this product SNUGLY ADJUST the belts provided with this infant car seat around your child NEVER LEAVE CHILD UNATTENDED in or around the vehicle Vehicle backovers can happen in any type of vehicle Vehicles have blind spots the areas around the ve...

Page 9: ... INFANT CAR SEAT with the vehicle s child restraint anchorage system LATCH if available or with a vehicle belt never both ALWAYS TIGHTLY INSTALL THE INFANT CAR SEAT AND LATCH BASE TO THE VEHICLE SEAT since in a crash an unsecured child restraint system may injure other occupants TO PREVENT EJECTION SECURELY ATTACH the infant car seat to the LATCH base and LIFT UP TO CHECK that it is attached MAKE ...

Page 10: ... WITHOUT LATCH BASE INTO THE VEHICLE check the RED level line beneath the handle to make sure that it is level with the ground DO NOT allow children to play with the vehicle seat belts A child within reach of a seat belt may become entangled if he or she pulls the seat belt all the way out and wraps the belt around his or her head neck or waist WHEN NOT USED IN A VEHICLE NEVER LEAVE child unattend...

Page 11: ...r undone Children have STRANGLED in loose or partially buckled harness straps Fully restrain the child even when carrier is used outside the vehicle FALL HAZARD Child s movements can slide infant car seat NEVER place infant car seat near edges of counter tops tables or other elevated surfaces DO NOT use on shopping carts NEVER USE INFANT CAR SEAT OR LATCH BASE IF IT HAS BEEN DAMAGED OR BROKEN OR A...

Page 12: ...AND LATCH BASE AFTER A CRASH OF ANY KIND EVEN IF IT WAS UNOCCUPIED A crash can cause unseen damage to the infant car seat that may not be visible DO NOT MODIFY YOUR INFANT CAR SEAT OR LATCH BASE or use any accessories or parts not supplied by the manufacturer of your infant car seat THE INFANT CAR SEAT AND LATCH BASE MAY BECOME VERY HOT IF LEFT IN THE SUN OR HOT AREAS Always make sure to check the...

Page 13: ... this manual to them NEVER use a second hand infant car seat or LATCH base or a infant car seat or LATCH base that you do not know its history DISCONTINUE USE of this infant car seat and LATCH base after 6 years from the manufacture date The manufacture date can be found on the underside of your infant car seat ...

Page 14: ...Features 1 8 6 7 3 9 2 13 12 11 10 ...

Page 15: ...3 Belt Lock Off 04 LATCH Anchor Strap Guides 05 LATCH Anchor Strap 06 LATCH Storage Compartment 07 Belt Path 08 BASE 09 Infant Car Seat to Base Indicators 10 Recline Foot 11 LATCH Release Button 12 LATCH Belt Connector 13 LATCH Adjustment Strap 4 5 ...

Page 16: ...o be used at the standard spacing of 11 from the center of one anchor point to the center of another anchor point Please refer to your vehicle owner s manual for information about using LATCH in certain seating positions If there are lower anchor points available in the rear passenger seat they must be used when in conjunction with the base LATCH may be used for spacing larger than 11 ONLY if your...

Page 17: ... children 12 and under Owners of vehicles with airbags should refer to their owner s manual for infant car seat installation instructions NEVER place the infant car seat on any vehicle seat that does not lock Folding seats can fall forward and could cause serious injury to your child in a vehicle crash On outer rear seat YES YES NO NO On a rearward facing seat On seats facing sidewards On rear sea...

Page 18: ... 2 guide lines shown in red Route the LATCH belt through the belt path openings on both sides of LATCH base and under the belt lock off Make sure not to twist the belt and make sure it lies flat Clip the LATCH connectors onto the lower vehicle seat anchors on both sides of the LATCH base CHECK to make sure they are attached by pulling on them 1 2 1 2 BEFORE installing LATCH base make sure vehicle ...

Page 19: ...de to side or front to back Close the lock off over the LATCH belt until it clicks into place Attach the infant car seat into the LATCH base until you hear a click Lift up on the handle of the infant car seat to make sure that it is securely attached in the LATCH base If the infant car seat does not latch securely into the LATCH base CHECK to make sure green is visible on the indicators before ins...

Page 20: ...er to the Adjusting the Recline section of this instruction To remove the infant car seat from the LATCH base pull up the red release handle located on the LATCH base Lift infant car seat away from the LATCH base To remove LATCH open lock off push button on adjuster to loosen LATCH then unhook from the anchor point Repeat steps as shown on the other side of the LATCH base Store LATCH strap in the ...

Page 21: ...Instructions ...

Page 22: ...vehicle If available LATCH can be used IN PLACE OF these vehicle belt types Refer to your vehicle owner s manual for LATCH locations Motorized Shoulder Belt with Lap Belt Motorized belts will not keep a infant car seat in its seating position in a sudden stop or crash has been installed correctly Lap or Shoulder Belt Mounted on Vehicle Door These belts are mounted to a door and will not keep a inf...

Page 23: ... Retractor ELR The lap belt is always loose until it locks in a sudden stop or crash Lap Shoulder Belts with 2 Retractors including inflatable seat belts Belts are attached to retractors at the ends of the lap and shoulder belt and attached to one latch plate ...

Page 24: ... LATCH can be used IN PLACE OF these vehicle belt types Refer to your vehicle owner s manual for LATCH locations Free end Lap Belt with Locking Latch Plate The vehicle belt is tightened by pulling on the free end of the strap until the belt is tight Lap Belt with Automatic Locking Retractor ALR The automatic locking retractor does not allow the lap belt to get longer once it is buckled The vehicle...

Page 25: ...Lap Shoulder Belt with Sliding Latch Plate The latch plate slides freely along the lap shoulder belt Vehicle belts with sliding latch plates are typically locked at the retractor by pulling all of the webbing out slowly to switch the retractor Check vehicle owner s manual for specific instructions The vehicle belt is tightened after switching the retractor by pulling up hard on shoulder belt and f...

Page 26: ...path openings on both sides of LATCH base and under the belt lock off Make sure not to twist the belts and make sure they lie flat Fasten the buckle until it clicks into place BEFORE installing LATCH base make sure vehicle is on level ground Place LATCH base on an approved vehicle seating location 1 2 1 2 ...

Page 27: ...ld not move easily The LATCH base should not move more than 1 inch 2 5 cm from side to side or front to back Attach the infant car seat into the LATCH base until you hear a click Lift up on the handle of the infant car seat to make sure that it is securely attached in the LATCH base If the infant car seat does not latch securely into the LATCH base CHECK to make sure green is visible on the indica...

Page 28: ...H base Check that the ball rests in the zone of your child s weight Refer to the Adjusting the Recline section of this instruction To remove the infant car seat from the LATCH base pull up the red release handle located on the LATCH base Lift infant car seat away from the LATCH base To remove LATCH base from vehicle open lock off and unbuckle the belt 6 7 6 7 8 ...

Page 29: ...nings on both sides of LATCH base and under the belt lock off Make sure not to twist the belt and make sure it lies flat Fasten the buckle until it clicks into place BEFORE installing LATCH base make sure vehicle is on level ground Place LATCH base on an approved vehicle seating location 1 2 1 2 ...

Page 30: ... cm from side to side or front to back Close the lock off over the lap belt until it clicks into places Attach the infant car seat into the LATCH base until you hear a click Lift up on the handle of the infant car seat to make sure that it is securely attached in the LATCH base If the infant car seat does not latch securely into the LATCH base CHECK to make sure green is visible on the indicators ...

Page 31: ...ase Check that the ball rests in the zone of your child s weight Refer to the Adjusting the Recline section of this instruction To remove the infant car seat from the LATCH base pull up the red release handle located on the LATCH base Lift infant car seat away from the LATCH base To remove LATCH base from vehicle open lock off and unbuckle the belt 6 7 6 7 8 ...

Page 32: ...eat location Make sure vehicle is on level ground Only use the level indicator on the LATCH base to make sure the infant car seat and LATCH base are level Recline LATCH base until ball rests in the zone of your child s weight If infant car seat is still not level refer to the Adjusting the recline section of this instruction 1 2 3 4 20lbs 1 8 9 1kg 20 35lbs 9 1 15 9kg NOT LEVEL ...

Page 33: ...ecline adjustment positions for the foot To raise the foot pull the foot out from the bottom of the LATCH base then push it up until it snaps into place To lower the foot pull foot down rotate under seat until it snaps into the bottom of the base 1 1 2 2 3 3 ...

Page 34: ...s in the red zone you may need to place a tightly rolled towel under the foot end of the LATCH base in order to get the infant car seat to become level NEVER place a rolled towel under the child s head end of the LATCH base If towel is used it must only be used in position shown 4 20lbs 1 8 9 1kg 20 35lbs 9 1 15 9kg NOT LEVEL ...

Page 35: ...Instructions LATCH Storage Fold LATCH Belt up as shown and place inside the storage compartment ...

Page 36: ......

Page 37: ......

Page 38: ......

Page 39: ...ümer aller geistigen Eigentumsrechte bezüglich unserer in dieser Veröffentli chung aufgeführten Marken Designs und Erfindungen Diese schließen die Marken phil teds adapt survive und INLINE sowie die Form INLINE DOUBLE BUGGY ohne Einschränkungen ein Personen die unsere Eigentumsrechte verletzen werden von uns aktiv verfolgt Phil and Teds Most Excellent Buggy Company Ltd 2012 Nos pertenecen a nosotr...

Page 40: ...Z Mountain Buggy Australasia 102 112 Daniell Street Newtown Wellington 6021 New Zealand Nouvelle Zélande 64 4 3800 833 USA CAN phil teds USA Inc 221 Jefferson Street Fort Collins CO 80524 USA 1 800 839 4985 EUR phil teds Europe BV Klavermaten 37C 7472 DD Hof van Twente Goor NETHERLANDS Pays Bas 31 0 547 352 727 AU NZ phil teds 102 112 Daniell Street Newtown Wellington 6021 New Zealand Nouvelle Zél...

Reviews: