This allows the vacuum pump to reach the final pressure and no operating fluid escapes at the exhaust
flange.
Prerequisites
● Vacuum pump switched off
● Vacuum pump vented to atmospheric pressure
● Vacuum pump cooled
● Operating fluid drained
● Exhaust filter changed in the operating fluid separator
Required consumable material
● Operating fluid of the vacuum pump
● Parts according to the maintenance kit
● Compressed air
Required tool
● Hexagonal wrench,
WAF 4
3
2
1
4
5
6
8
7
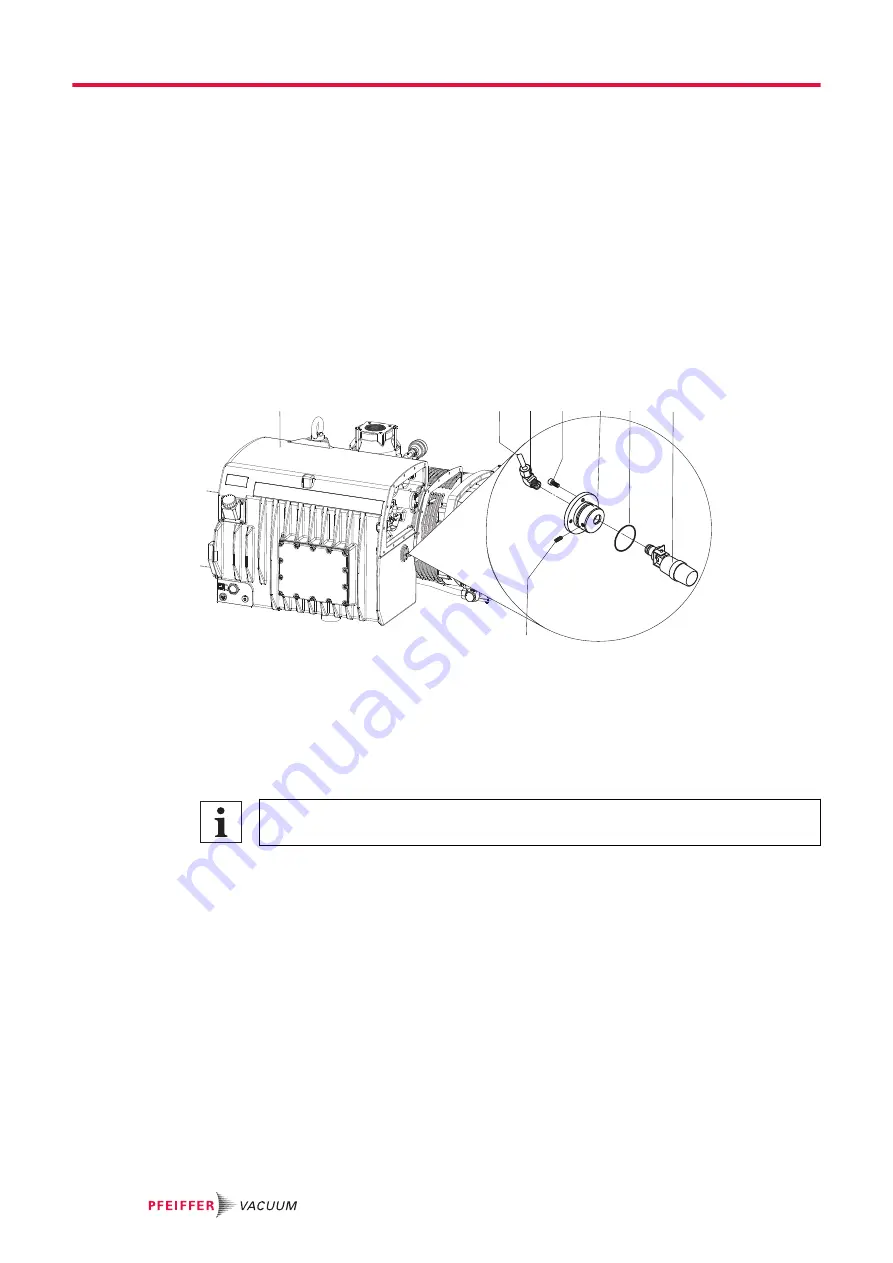
Fig. 20:
Operating fluid return with float valve
1 Operating fluid separator
5
Valve holder
2 Operating fluid return line
6
O-ring
3 Elbow union
7
Float valve
4 Screws
8
Grub screw, set screw
Dismantle the float valve
Operating fluid leaks out
Small amounts of operating fluid may leak out when carrying out the work described below.
1. Where necessary, extract the remaining operating fluid from the float chamber inside the operat-
ing fluid separator.
2. Disconnect the operating fluid return line at the elbow union.
3. Remove the screws on the valve holder.
4. If necessary, the screws can be used to press down the valve holder.
5. Remove the valve holder with float valve whilst paying particular attention to the O-ring.
6. Loosen the grub screw in the valve holder.
7. Remove the float valve from the valve holder.
Clean the float valve and operating fluid return line
1. Clean the float valve.
2. Clean operating fluid return line with compressed air.
Mounting the float valve
1. Check the function of the float valve.
– Make sure that the float moves easily by its own weight.
– Make sure that the axial sealing surface on the floater is clean.
2. Mount the float valve in the correct installation position in the valve holder.
3. Mount the valve holder with a new o-ring onto the operating fluid separator.
Maintenance
44/62


