background image

6

 STEP 4:

PREPARE THE WALL SLEEVE

Prepare the wall sleeve for installation of the new unit per the following brand instructions.

BRAND

DEPTH

PAGE

#1

PERFECT AIRE

, Frigidaire, White-

Westinghouse, Carrier (52F Series)

16" & 17½"

7

#2

Fedders

19¾”

8

#3

Fedders or Friedrich

16¾”

9

#4

General Electric/Hotpoint

 16⅞"

10

#5

Sears or Carrier (51S Series)

18⅝"

11

#6

Whirlpool

17⅛”

12

#7

Whirlpool

23"

13

#8

Emerson

15"

14

#9

White-Westinghouse, Frigidaire

22"

15

 STEP 5:

IDENTIFY YOUR WALL SLEEVE’S BRAND

Identify your wall sleeve’s brand and install new unit into wall sleeve using the applicable instructions on the 

following pages.

 STEP 6:

ATTACH GROUND WIRE TO NEW UNIT

To attach ground wire to the new unit, remove the screw from the left side front.

 STEP 7:

ASSEMBLE AND INSTALL THE TRIM FRAME (SEE INSTRUCTIONS)

IMPORTANT:

•  The unit’s increased performance characteristics result from having two rear air intakes.

•  It is very important that these installation instructions are followed to ensure that your unit can operate at  

maximum efficiency.

•  If this is an existing sleeve and there is an existing rear grille, it needs to be replaced by one that has been shipped 

with the unit in the accessory kit.

For increased efficiency, utilize the provided louvered rear panel.

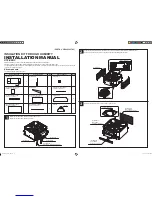
Installation of the new grille provided with the unit:

1.  Remove the existing grille.

2.  Place the grille included with the new air conditioner towards the rear of 

the sleeve.

3.  Mark the hole positions.

4.  Drill through the sleeve’s flanges with a 1/8 inch drill bit.

5.  Attach the new grille with self-threading screws and washers (not 

included).

6.  It is VERY IMPORTANT that the grille is placed exactly as shown in the 

picture on the right.

7.  Most decorative exterior grilles may be left in place as long as the proper 

interior art direction grille is installed.

Summary of Contents for 3PATW14002

Page 1: ...TWH10002 WITH ELECTRIC HEATER 3PATWH12002 WITH ELECTRIC HEATER 3PATWH14002 WITH ELECTRIC HEATER 3PATW14002 Before using your air conditioner please read this manual carefully and keep it for future re...

Page 2: ...___________________________ Purchase Date _____________________________________ Store Purchased ______________________________________ Installation Date ____________________________________ Installati...

Page 3: ...for installation of this unit if necessary The air conditioner is not intended for use by young children without adult supervision Young children should be supervised to ensure that they do not play w...

Page 4: ...m the unit Failure to do so may cause fire and electric shock DO NOT use the socket if it is loose or damaged Doing so may cause fire and electric shock DO NOT open the unit during operation Doing so...

Page 5: ...of time unplug or turn OFF main power switch Leaving power on may cause unit failure or fire DO NOT place obstacles around air inlets or inside of air outlet Obstacles may cause appliance failure or a...

Page 6: ...curely and correctly installed according to the installation instructions in this manual Save this manual for possible future use in removing or installing this unit When handling the air conditioner...

Page 7: ...allation is not covered under the Warranty You MUST use only supplied parts and use proper installation procedures as described in these instructions when installing this air conditioner CAUTION DO NO...

Page 8: ...r the air conditioner CAUTION When the installation is complete replacement unit MUST have a rearward slope as shown STEP 2 REMOVE OLD AIR CONDITIONER Remove old air conditioner from wall sleeve and p...

Page 9: ...t s increased performance characteristics result from having two rear air intakes It is very important that these installation instructions are followed to ensure that your unit can operate at maximum...

Page 10: ...sleeve Attach the other 1 x x 14 long seal 4 from the right side of the sleeve 5 Center unit and gently slide unit into sleeve 6 Before sliding all of the way back remove second screw from front on l...

Page 11: ...n the center at the top of the sleeve Remove the backing paper and press into position 6 Attach 2 1 x x 14 long seals to the left and right sides of the sleeve 7 Cut 2 1 x x 25 long seal to 14 long an...

Page 12: ...x x 25 long seal in the center at the top of the sleeve Remove the backing paper and press into position 6 Attach 2 1 x x 14 long seals to the left and right sides of the sleeve 7 Cut 2 1 x x 25 long...

Page 13: ...eals to the left and right sides of the sleeve 6 Cut 2 1 x x 25 long seal to 14 long and attach to the vertical sections of the rear grille as shown 7 Center unit and gently slide unit into sleeve 8 B...

Page 14: ...the left and right sides of the sleeve 6 Cut 2 1 x x 25 long seal to 14 long and attach it to the vertical sections of the rear grille as shown 7 Center unit and gently slide unit into sleeve 8 Before...

Page 15: ...sides of the sleeve 6 Cut 2 1 x x 25 long seal to 14 long and attach it to the vertical sections of the rear grille as shown 7 Center unit and gently slide unit into sleeve 8 Before sliding all of th...

Page 16: ...olid vertical portion of the rear grille 10 Attach 2 4 x 3 x 1 foam blocks with the slot overlapping the seal above 11 Install the divider into the slots of the foam blocks You may need to trim the le...

Page 17: ...support blocks one on each side wall Place in center of side wall with the tapered end facing the opening 6 Gently slide unit into sleeve 7 Before sliding all the way back remove second screw from fr...

Page 18: ...14 long seal over the solid vertical portion of the rear grille 9 Attach 2 4 x 3 x 1 foam blocks with the slot overlapping the seal above 10 Install the divider into the slots of the foam blocks You...

Page 19: ...that a The double set of screw holes are at the bottom b The fins of the grille are pointed away from the unit 3 Align the top of the grille with the top of the unit and ensure that the overhang on ea...

Page 20: ...e wall sleeve and the unit A flat bladed screwdriver or putty knife is recommended 2 Assemble the trim frame by inserting top and bottom pieces into side pieces and snapping into place 3 Pull cord thr...

Page 21: ...remote control NOTE References to Heating HEAT in this manual are applicable only to units that have a built in electric heater for supplemental heating HEAT is not applicable to cooling only models...

Page 22: ...a mode is selected in a sequence that goes from AUTO COOL DRY HEAT units with heating function only and FAN The indicator light will be illuminated and remain on once the mode is selected The unit wil...

Page 23: ...the 4 way directional louvers to direct the air flow up or down and left or right throughout the room as needed Pivot horizontal louvers until the desired up down direction is obtained Move the center...

Page 24: ...ir filters CABINET CLEANING Be sure to unplug the air conditioner to prevent shock or fire hazard The cabinet and front may be dusted with an oil free cloth or with a cloth dampened in a solution of w...

Page 25: ...oil set to FAN only mode Then set temperature to a higher setting AIR CONDITIONER CYCLING ON AND OFF TOO FREQUENTLY OR NOT ENOUGH Be sure unit is not too large or too small for the area of the room Re...

Page 26: ...23...

Page 27: ...The design and specifications are subject to change without prior notice for product improvement Consult with the sales agency or manufacturer for details...

Page 28: ...fect Aire LLC 5401 Dansher Rd Countryside IL 60525 844 4PA AIRE 844 472 2473 www perfectaire us Specification and performance data is subject to change without notice Printed in China PA User_3PATWH_3...

Reviews: