
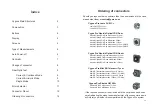


4
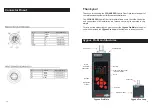
Display
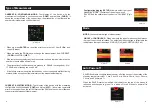
·Cal
.- If the device is not calibrated, the letters are red. If it is calibrated, the letters
are green.
·Cont / Sing
.- defines the type of measurement configurated in the device
Cont.-
It appears when you select the continous measuring.
Sing.-
It appears when you select a single test when you press the Enter
button.
·Sav
.- Green colour shows a particular auto power-off time. Red colour means
no auto power-off.
·Curr / Hist
.- Indicates the current or historical measuring.
“
Curr
”
defines a continuous measurement and shows the current status of the
connection at all times.
“
Hist
” is the option of continuous measurement that registers the status of
the lines in order to see all the detected errors.
·Battery
.- indicates the battery status at 20% intervals. When connected to a USB
port the charge status is shown by a lighting on the battery icon.
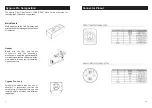
Errors detection
Error in the optic fiber:
If there is a breakdown in the
fiber line, the device shows attenuation
> 18
flashing and
increases the counter of fiber errors.
Shortcut in the copper lines:
If the device detects a
shortcut in any of the copper lines, it identifies the faulty
one and increases the counter of copper errors. The
picture shows a shortcircuit between pin P- and S+.
Open circuit.
If the device detects an open circuit in any
line, it signals the faulty line with a red circle. The picture
shows that pin S- is in open circuit .
Pinout errors:
Should the connection have any pinout
error due to a wrong assembling, the device would detect
it and would identify the faulty lines. The picture shows a
crossing between pins S+ and S-.
11
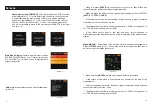
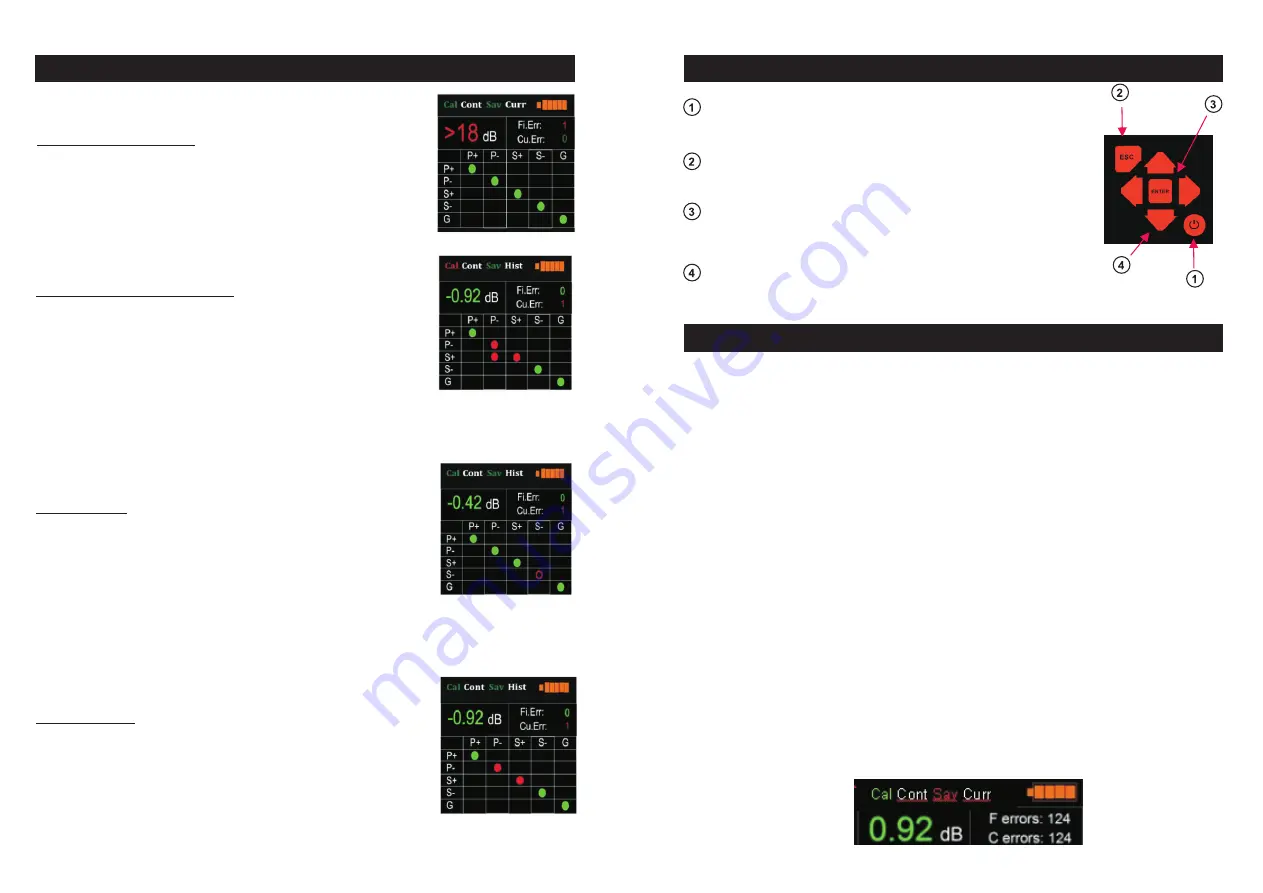
Indicators
Buttons
On ( Power Up)
.- Press the button during one second to
switch on the CYGNUS PRO. Press it three seconds to switch
it of.
Esc
( Escape ) .- This button allows you to return to the
previous screen
Arrow Keys
.- Allow to choose different menu options.
In some screens you may change from one mode to an
other
Enter
.- Allow to access several options and save the
configuration.


