background image

13

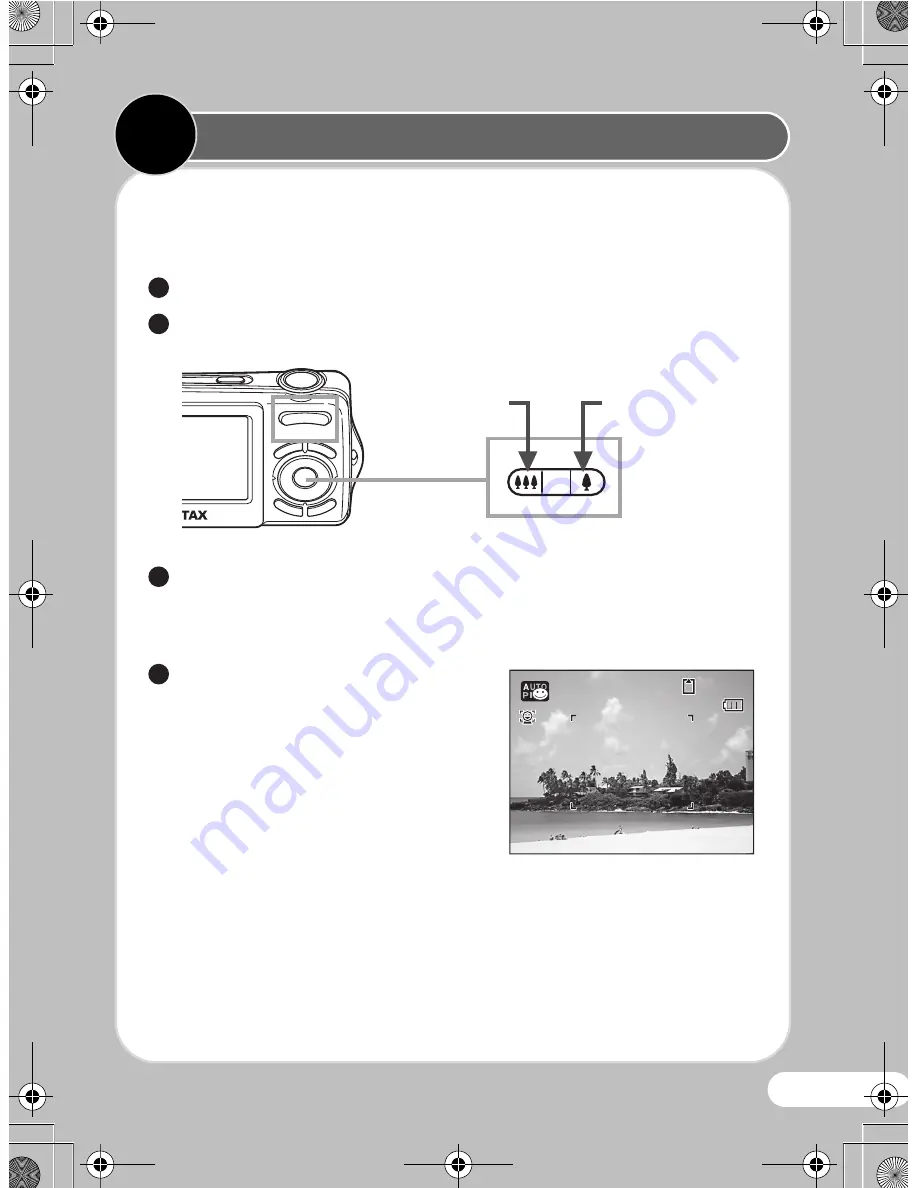
Aim the camera at the subject, then press the shutter release 
button. The flash discharges automatically depending on the 
brightness.

Frame the subject using the focus frame on the display.

Use the Zoom/

w

/

x

 button to change the captured area.

Press the shutter release button halfway.

The focus frame on the display turns green if the subject is in 
focus.

Press the shutter release button 
fully.

The picture is taken.

1

2

enlarges the subject

widens the area

captured by the

camera

3

38

38

38

14:25

14:25

14:25

02/02/2009

02/02/2009

4

Taking Pictures

3

3

Quick_Start_Guide_E70.fm  Page 13  Tuesday, January 13, 2009  9:28 AM

Summary of Contents for Optio E70

Page 1: ...basic operation of the camera Refer to the separately supplied Operating Manual by CD for further explanation of functions and advanced operations of the camera and how to connect the camera to your...

Page 2: ...ation or magnetic fields The liquid crystal panel used in the display is manufactured using extremely high precision technology Although the level of functioning pixels is 99 99 or better you should b...

Page 3: ...round your neck is also dangerous Please take care that small children do not hang the strap around their necks If the camera emits smoke or a strange smell or in the event of any other irregularity s...

Page 4: ...rs or physical condition the use of the camera may cause itching rashes or blisters In case of any abnormality stop using the camera and get medical attention immediately This camera uses two AA alkal...

Page 5: ...ed consult a PENTAX Service Center Do not short or touch the output terminals of the product while it is still plugged in Do not plug in the AC plug cord with wet hands This can cause an electrical sh...

Page 6: ...ot use the camera where it may come in contact with rain water or any other liquid Ensure that the camera is not subjected to substantial vibrations shocks or pressure as this may cause damage or malf...

Page 7: ...ssible to recover that data using off the shelf data recovery software Please manage your camera memory at your own risk Please do not press forcefully on the display This could cause breakage or malf...

Page 8: ...complete with the items listed below P Camera Optio E70 P Strap O ST51 P Software CD ROM S SW87 P USB cable I USB7 P AV cable I AVC7 P Two AA alkaline batteries P Operating Manual O Quick Guide this g...

Page 9: ...er switch Shutter release button Strap lug Zoom button Q button I button Four way controller 4 W button Green i button 3 button Names of Parts and Monitor Indicators In this Quick Guide the arrow keys...

Page 10: ...isplay in the Still Picture Capture Mode 02 02 2009 02 02 2009 F5 6 1 250 F5 6 1 250 14 25 14 25 14 25 1 0 1 0 1 0 38 38 38 F3 5 F3 5 F3 5 1 250 1 250 1 250 AUTO AUTO Face Priority icon Shooting mode...

Page 11: ...own in the illustration zInstalling the Battery and Card Install the battery and SD Memory Card as shown in the illustration The SD Memory Card is sold separately Battery SD Memory Card socket SD Memo...

Page 12: ...45 to select the desired language Press the 4 button If you accidentally select another language press the four way controller 5 use the four way controller 2345 to select the language and then press...

Page 13: ...ontroller 3 to move the frame to DST Daylight Saving Time Use the four way controller 45 to select O On or P Off Press the 4 button to display the Initial Setting screen Press the 4 button Use the fou...

Page 14: ...then use the four way controller 23 to set the date to the current day Press the four way controller 5 then press the four way controller 3 to move the frame to Time Set the time in the same manner as...

Page 15: ...utton to change the captured area Press the shutter release button halfway The focus frame on the display turns green if the subject is in focus Press the shutter release button fully The picture is t...

Page 16: ...flash mode cannot be switched In A Night Scene mode cannot be selected zSelecting the Drive Mode Each time you press the four way controller 2 the drive mode switches between the following modes Auto...

Page 17: ...5 after selecting g 10 sec Self timer In 9 Green C Movie p Frame Composite or F Digital Panorama mode j cannot be selected zSelecting the Focus Mode Each time you press the four way controller 5 the...

Page 18: ...r way controller 3 Use the four way controller 2345 tochoosea shooting mode then press the 4 button Selecting a Shooting Mode OK OK OK MENU Cancel Cancel For capturing landscape views Enhances colors...

Page 19: ...om f y button during playback simultaneously displays 4 thumbnail images and pressing f again displays 9 thumbnail images at a time Press f again while the 9 thumbnail images are displayed to switch t...

Page 20: ...o delete Press the i button The confirmation screen appears Use the four way controller 23 to select Delete Press the 4 button You can delete several images selected from the four image or nine image...

Page 21: ...mation screen appears Use the four way controller 2 to select Delete all images Press the 4 button You can protect stored images from being accidentally deleted 1 Delete all images All images are dele...

Page 22: ...ose a playback mode then press the 4 button For details of how to use the Optio E70 or instructions on connecting the camera to a computer refer to the manual below Optio E70 Operating Manual Selectin...

Page 23: ...goes the necessary treatment recovery and recycling and thus prevent potential negative effects on the environment and human health which could otherwise arise due to inappropriate waste handling 2 In...

Page 24: ...ttp www pentax fr Hotline 0826 103 163 0 15 la minute Fax 01 30 25 75 76 Email http www pentax fr _fr photo contact php photo contact PENTAX Italia S r l Via Dione Cassio 15 20138 Milano ITALY http ww...

Reviews: