background image

A.

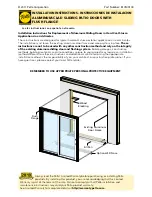
  Place a corner bead of sealant on the edge of the door 

flush flange on top and 

sides. DO NOT seal the sill of the door frame to the opening.

7


APPLY EXTERIOR PERIMETER SEALANT

Exterior View

JAMB CROSS SECTION

Flush flange

FIXED JAMB

ERIOR

INTERIOR

EXTERIOR

STUCCO

7A

7A

Interior

Interior

6"

Caution: Ensure use of low pressure polyurethane window and door installation foams 
and strictly follow the foam manufacturer’s recommendations for application. Use of 
high pressure foams or improper application of the foam may cause the door to bow 
and hinder operation.

8

 
INTERIOR SEAL

A.


Apply insulating foam.

 From the interior, 

insert the nozzle of the applicator 
approximately 1" deep into the space 
between the door and the rough opening 
and apply a 1" deep bead of foam. This 
will allow room for expansion of the foam 
and will minimize squeeze out. Apply 
sealant across the interior surface of shims 
to create a continuous seal. For doors with 
jamb extensions installed, ensure the foam 
is placed between the door frame and 
the rough opening, not between the jamb 
extension and the rough opening. Follow 
foam manufacturer's instructions. 

Note: It may be necessary to squeeze the 
end of the tube with pliers to insert it into 
the space between the door frame and the 
rough opening. DO NOT completely fill the 
space from the back of the brickmould to 
the interior face of the opening. 

8A

8C

B. 

Check the door operation by opening and closing the door.

Note: If the door does not operate correctly, check to make sure it is still plumb, level, 
square and that the sides are not bowed. If adjustments are required, remove the foam 
with a serrated knife. Adjust the shims and reapply the insulating foam sealant.

C. 

Add a sealant bead across the inner sill and 6" up each jamb

 between the frame and 

rough opening.

Summary of Contents for 81CM0100

Page 1: ...d additional care Determining the appropriate installation method is the responsibility of you your architect or construction professional If you have questions please contact your local Pella retaile...

Page 2: ...asure Level Sealant gun Square Hammer Screwdriver Utility knife Wide jaw pliers Reciprocating saw 1 8 and 1 4 drill bit Drill 4 5 4 5 Installation will require two or more persons for safety reasons 1...

Page 3: ...ealant and other debris from the door opening 2B NOTE 2B 2B 2A F If the weep holes of the existing sill have been cut away drill new weep holes in the existing door jambs Be sure to drill weep holes i...

Page 4: ...ound the end of the pan Dry t the sill pan and the door into the opening J If there is a step down at the exterior of the door opening cut the sill nosing to the rough opening width plus two times the...

Page 5: ...2L M If using sill nosing with a step down Install the sill pan and sill nosing into the opening Press down to seal them into the opening DO NOT overlap N Apply sealant at nosing ends continuing from...

Page 6: ...B Remove the shipping spacers Carefully slide the movable panel halfway open and remove the spacers from both the top and bottom of the movable panel C Remove the venting panel by lifting it off of th...

Page 7: ...o the opening and that the door anges will overlap the stucco or existing aluminum door frame by a minimum of 1 2 on all sides REMOVE THE DOOR FROM THE OPENING D Place three 3 8 beads of sealant Place...

Page 8: ...Note If the dimensions are not equal check to make sure the ns are folded out to 90 at all points K Secure the frame Insert a 1 wide shim behind the pilot hole at the lock strike s Insert a 8 x 2 1 2...

Page 9: ...corrosion resistant wood screws through the holes in the threshold in to the oor Note For concrete oors use masonry screws a minimum size of 3 16 x 3 1 2 4N L Apply sealant and insert a 8 x 2 1 2 pan...

Page 10: ...he exterior of the building tilt the top of the panel toward the door frame and insert the top of the door panel into the top track Move the bottom of the panel toward the door frame until it is verti...

Page 11: ...ion of the foam and will minimize squeeze out Apply sealant across the interior surface of shims to create a continuous seal For doors with jamb extensions installed ensure the foam is placed between...

Page 12: ...urface Clad Exterior Frame The exterior frame is protected by aluminum cladding with our tough EnduraClad baked an factory nish that needs no painting Clean this surface with mild soap and water DO NO...

Page 13: ...ruction must anticipate some water in ltration it is important that the wall system be designed and constructed to properly manage moisture Pella Corporation is not responsible for claims or damages c...

Reviews: