10
Technical Reference Booklet
Installing the Retention Mechanism for Intel® Pentium®
II & Intel® Pentium® III or Intel® Celeron® Processor
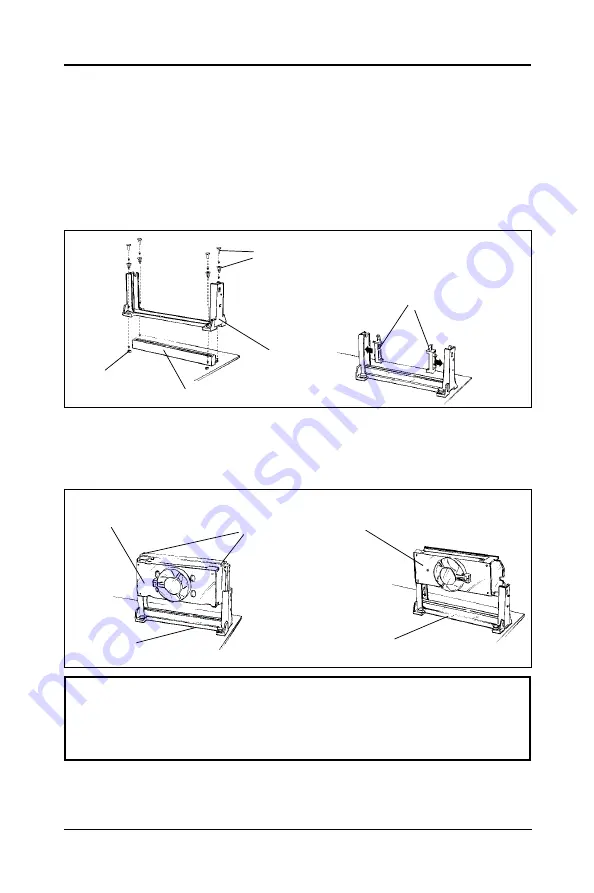
To install the retention mechanism, follow these steps:
1. Locate Slot 1 and the four attachment holes on the motherboard.
2. To position the mechanism, orient it as shown in figure. The tab on the
connector fits into a notch in the base of the mechanism. Press down on
the studs until it is firmly seated in attachment holes. When properly seated,
the base of the mechanism is flush with the motherboard.
Installing the Processor
To install the processor, follow these steps:
1. Insert the processor in the retention mechanism.
2. Press down on the processor until it is firmly seated in the Slot 1 connector.
Retention
Mechanism
Adapter for
Intel® Celeron® CPU
(This adapter is for installing
the Celeron® CPU only)
Attachment
Holes
Slot 1
Studs
Intel® Pentium® II CPU
Intel® Celeron® &
Intel® Pentium® III CPU
Latches
Retention
Mechanism
Retention
Mechanism
Setting the Processor Speed
After you install the processor into the motherboard, set the processor speed
by CMOS setup.
Warning:
There is a fan attached the CPU to prevent the overheating, please
ensure that the fan can operate. Otherwise the CPU can overheat
and cause damage to both CPU and motherboard.


