background image

32

USER MENU

-

-

-

-

-

-

-

-

-

-

-

-

-

-

-

-

-

-

-

-

-

-

-

-

-

-

-

-

26

5.2   USER MENU

Summary of Contents for SOFIA

Page 1: ...Produzione stufe e termostufe a pellets e policombustibili User manual SOFIA Ermetic Stove ...

Page 2: ...Model N serial number Dealer Purchase date In this space it is advisable to mark the data of the stove in this way you can always have a reference in case of request ...

Page 3: ...neral warnings 3 2 Electrical Connections 3 3 Stove features 3 4 Water Connection and Indicative Assembly Diagrams 3 5 Deflector 4 Use of stove 4 1 Lcd Control Panel 4 2 First Start Operation 4 3 Ignition and Normal Operation 4 4 External thermostat installation 5 Display 5 1 Console 5 2 User Menu 5 3 Alarms 6 Maintenance 6 1 Ordinary Maintenance 6 2 Periodic Maintenance 7 Anomalies 8 Parameters T...

Page 4: ... improper use of the product will be borne by the user Installation maintenance and any repairs must be carried out by professionally qualified personnel In case of repairs only original spare parts supplied by the manufacturer must be used Incorrect installation or poor maintenance can cause damage to people animals or things in this case the manufacturer will be relieved of any responsibility Be...

Page 5: ...correct draft of the flue obstruction of the same or of the air intake pipe presence of residual material in the brazier that obstructs the holes alters the functioning of the stove which in the ignition phase leads to an excessive dosage of fuel in the brazier If you notice an abundant stagnation of the fumes inside the combustion chamber immediately move away from the appliance The excessive con...

Page 6: ...he appliance are not followed Modifications to the appliance carried out by the user or whoever on his behalf the use of inappropriate fuels or without the necessary precautions must be considered as the total responsibility of the user and invalidate the guarantee on the product itself relieving Pasian both in civil law from all responsibility The user is responsible for all the operations necess...

Page 7: ...3 Kw Kg but with an advantageous purchase cost compared to traditional fossil fuels MAIS Corn is an ecological fuel renowned for its optimal thermal yield thanks to a lower level of humidity it is easy to find it encourages the exploitation of renewable and alternative sources The calorific value of dried seeds up to 15 humidity is 6200 Kcal kg To overcome combustion problems such as the creation ...

Page 8: ...changes and without the ingress of dust from the external The installation of a coaxial pipe avoids the creation of an air presad air to air the environment in which the stove is positioned The use of a coaxial pipe allows the incoming air combustion agent to preheat in contact with the smoke outlet pipe This has a double advantage it improves combustion and favors greater efficiency of the glass ...

Page 9: ...LINO Deflector ash drawer electrical cable user manual ATTENTION the shape and aesthetic characteristics of the various components may undergo variations CARATTERISTICHE TECNICHE chimney Ø 80 mm Nina Ø 100 Perla Luna air inlet Ø 60 mm MANDATA 1 RITORNO 1 VALVOLA SICUREZZA 3 8 6 ...

Page 10: ...al air exchange of an electrical connection that does not comply with the regulations and of inappropriate use of the stove The installation must be performed by a qualified technician who must issue the buyer a declaration of conformity of the system and will assume full responsibility for the final installation and the consequent good functioning of the product Keep in mind that the floor of the...

Page 11: ... which it is located this air must be reintegrated through an air intake outside the room itself The appliance is equipped with a socket to be able to take the combustion air directly from the outside of the building connect the air inlet of the appliance with the outside of the building using special pipes resistant to high temperatures do not use grids and make sure that it is positioned so as n...

Page 12: ...ust be spaced from combustible or easily flammable materials with an air gap or insulating materials The use of flexible or extensible metal pipes or unsuitable material is not allowed Single or double walled steel pipes with a nominal internal diameter of 80 mm or 100 mm can be used depending on the model The minimum draft must be 12 Pa the optimal one 15 Pa The flue must be brought to the roof a...

Page 13: ... be unique for each generator no discharges in the flue shared with other devices are allowed figure 6 figura 7 If the smoke exhaust is inserted inside a pre existing flue this must be certified for solid fuels be kept in optimal conditions and appropriately insulated An external flue pipe can only be used if it meets the following requirements Only insulated double walled stainless steel pipes fi...

Page 14: ...aust of fumes is ensured It must prevent the entry of rain snow and be without mechanical suction aids the chimney pot must be positioned in such a way as to exceed the ridge of the roof and must be outside the reflux area caused by the shape of the roof or any obstacles figura 11 The installation must always be carried out by a qualified technician in accordance with the relevant regulations in f...

Page 15: ...VE FEATURES The filling compartment is located on the top The load capacity expressed in the technical data is to be considered variable according to the specific weight of the pellet When loading the tank it is necessary to pay particular attention as the pellet loading screw is located at the base of the tank In no case must foreign substances be introduced ATTENTION it is normal for pellets to ...

Page 16: ...er than the boiling point it is therefore necessary that the heating system is designed compatibly with the characteristics of the machine During installation and during operation keep in mind that the disposal of the minimum power supplied by the device must be guaranteed especially in multi zone systems Make sure that the thermal plumbing system is equipped with an additional and adequate closed...

Page 17: ... to position in the case of assembly with closed vessel an automatic vent valve at the outlet of the thermo stove delivery pipe if the kit is not installed in the appliance ATTENTION IDRO boilers and thermo stoves are normally produced complete with circulator and expansion tank see table above In the installation it is recommended to make journeys as short as possible to connect to the water syst...

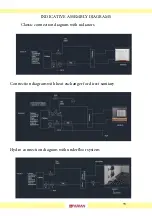
Page 18: ...INDICATIVE ASSEMBLY DIAGRAMS Classic connection diagram with radiators Connection diagram with heat exchanger for direct sanitary Hydro connection diagram with underfloor system 15 ...

Page 19: ...nitary boiler Complete hydro connection diagram with solar panel P Circulator S Gate valve RIE Filling Valv Sfiato Vent valve P Circulator already in the boiler AQP Water ELE Electricity Mis Mixer Valve 3Vie Three way valve SCA Drain 16 ...

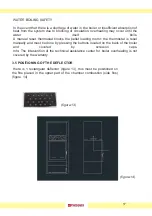
Page 20: ...ding motor the thermostat is reset manually and must be done by pressing the buttons located on the back of the boiler and covered by screw on caps Info The intervention of the technical assistance center for boiler overheating is not covered by the warranty 3 5 POSITIONING OF THE DEFLECTOR there is 1 rectangular deflector figure 13 this must be positioned on the fins placed in the upper part of t...

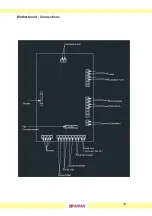
Page 21: ...Motherboard Connections 18 ...

Page 22: ...nd stop 5 6 power increase decrease setting tasto 1 tasto 6 tasto 5 tasto 2 tasto 3 tasto 4 AIR FAN IN THE INTERNAL MODEL THERE IS AN AMBIENT FAN IT IS POSSIBLE TO ADJUST THE POWER OR DEACTIVATE IT FAN STATUS To set the fan power Press key 5 once and then set the speed with keys 1 to increase and 2 to lower 0 off From 1 to 5 working power from minimum to maximum independent of the status of the bo...

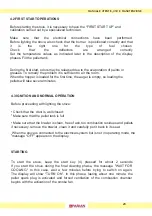
Page 23: ... the auger is empty so loading the pellets will take several minutes 4 3 IGNITION AND NORMAL OPERATION Before proceeding with lighting the stove Check that the door is well closed Make sure that the pellet tank is full Make sure that the brazier is clean free of ash too combustion residues and pellets if necessary remove the brazier clean it and carefully put it back in its seat When the stove is ...

Page 24: ...sts about 5 minutes At the end of the stabilization phase FIRE PRESENT the stove passes to the normal working phase WORK As soon as the ignition phase is finished the stove goes into normal working mode during this phase it will be possible to change the power and temperature from the display Set the stove power by choosing from one of the 5 available levels The power is set by means of the KEYS 5...

Page 25: ...es to operate at maximum speed for a minimum time of about 10 minutes to ensure complete cooling of the stove The hot air fan also continues to operate until the stove cools down and turns off ATTENTION Never disconnect the power supply at this stage NO IGNITION ALARM If the ignition of combustion is not detected the message AL 5 NO IGNITION appears on the display To deactivate the alarm state pre...

Page 26: ... in the figure The contact to be used is of the NO type Normally open if there is no clean contact place a relay between the thermostat and the terminal board of the machine The connection of unsuitable thermostats could damage the electronic board in an irreparable way This operation must be carried out by specialized personnel To activate the thermostat press the power button for a few seconds a...

Page 27: ...CONSOLE 24 5 DISPLAY 5 1 ...

Page 28: ...28 25 ...

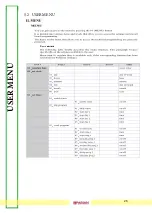
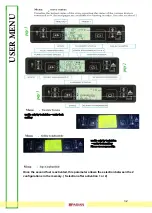
Page 29: ...USER MENU 26 5 2 USER MENU ...

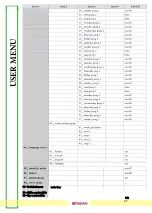
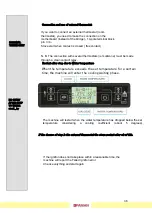
Page 30: ...USER MENU 09 Technical menu 10 Abilita combustibile 11 Tipo combustibile under key 1 2 27 ...

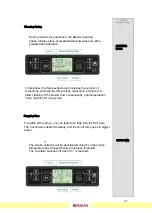
Page 31: ...USER MENU 28 ...

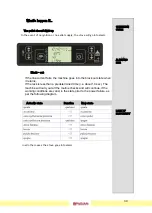
Page 32: ...USER MENU 29 ...

Page 33: ... and so on up to PROGRAM 4 USER MENU 30 ...

Page 34: ...USER MENU 31 ...

Page 35: ...his parameter allows the selection between the 2 configurations in the memory Selection after activation 1 or 2 USER MENU usable only by technician under lock and key usable only by technician under lock and key Please use responsably 32 ...

Page 36: ...OFF START Operation mode To light the stove press button P4 for a few seconds Display changes the state of all Lighting the Boiler 33 ...

Page 37: ... TEMP MODIFY SET WATER TEMP Ignition failure At the end of the ignition phase the stove goes into the normal working mode Work time To change the temperature ambient please taste the P2 button and after regoulate it by button P2 and P1 Set temperature of ambient To change the temperature ambient please taste the P1 button and after regoulate it by button P2 and P1 Set temperature of water 34 ...

Page 38: ...ed Modulation of fan When the temperature of water reach the set value the boiler goes at minimum level This is a step by step phase and terminated itself into MODULATION PHASE Modulation of boiler The temp of ambient doen t change the state of stove If the temp of water increase too the boiler goes into Stand by mode wait cooling 35 ...

Page 39: ... make the connection on the motherboard instead of the bridge 10 pole terminal block pin 3 4 Stove start when contact is closed free contact Connection and use of external thermostat If the ignition does not take place within a reasonable time the machine will report the Failed Ignition error Check everything and start again Restart after stop due to Water temperature If the dcause of stop is the ...

Page 40: ...ls and with a predetermined duration In this phase the fume extractor will increase the number of revolutions while the fuel drop will be reduced to a minimum to allow cleaning of the brazier and consequently optimal operation of the machine for long cycles CLEARING MODE SHUTDOWN Cleaning timing To switch off the stove you can taste for a little time the P4 Taste The Cochea stop itself immediatly ...

Page 41: ...For safety reasons re ignition of the stove will be possible when the fumes are cold and a pre established technical cooling time has elapsed OFF TIME RE START Re start Stop 38 ...

Page 42: ...hecks and will continue if the working conditions are valid in the state prior to the power failure as per the following diagram OPERATION STATE ALARM NO FIRE LACK OF ELECTRICITY in all other cases the stove goes into alarm What s happen if The pellet doesn t light up In the event of no ignition or no pellet supply the stove will go into alarm Black out Actually state Duration New state 39 ...

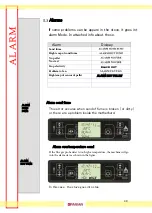
Page 43: ...case the stove goes into stop Alarm sond fume This error occures when sond of fume is broken or dirty or there are a problem inside the motherbord Alarms If some problems can be appare in the stove it goes int alarm Mode In attached info about those Alarm Dislpay ALARM HOT PELLET Sond fume High temp of sond fume No pellet No start Stop electicity Problem to fan High temp of sensor of pellet 40 5 3...

Page 44: ...self the stop procedure ALARM STOP DURING WORKING TIME If during normal work of stove the flame turn off and the temperature of fume falls below a determinate threshold of work it s activated the alarm The shutdown procedure is immediately activated ALARM FOR NO IGNITION If the fan of fume is broked the stove show itself the apposite error Allarm Fan 41 ...

Page 45: ... Once a week or if there is a lot of residue clean the baffles Before re igniting the stove check that the brazier is inserted correctly and that the hole corresponds to the spark plug the pellet tank is full the doors are perfectly closed 6 2 PERIODIC MAINTENANCE To ensure correct operation of the stove it is necessary to periodically clean the exchanger and the flue gas exhaust in order to remov...

Page 46: ...front tubes will fall into the ash compartment then remove any residues aspirating everything the residues of the 4 largest pipes will fall into the ash collection compartment which can be accessed by removing the side cap placed under the external covering figure 20 then remove the internal cap and vacuum up the residues After having carried out all the cleaning operations reassemble the caps wit...

Page 47: ...esidues have accumulated inside the tank it is necessary to completely empty the tank and check that there are no residues that obstruct the normal operation of the auger It is also necessary to carry out a general check on the various components Door seal check periodically and call the technician if deteriorated Aspirator check correct operation and eliminate any residues both on the fan and on ...

Page 48: ...t the product cool down reset the thermostat until the lock goes out and turn the appliance back on if the problem persists contact technical assistance door open or seals worn Close the door and replace the gaskets Poor pellets Change the type of pellets Low intake of pellets Request technical assistance Dirty combustion chamber Clean the combustion chamber Obstructed drain Clean the smoke duct S...

Page 49: ...weak Insufficient combustion air Make sure that the air intake in the room is present and free Clean the brazier and check that all the holes are clean Carry out a general cleaning of the combustion chamber exchanger and the smoke duct Check the condition of the door seals poor fuel change ttype of fuel Smoke extraction motor faulty Check operation and replace the motor if necessary the fumes moto...

Page 50: ...47 ...

Page 51: ...14 PR47 PR15 PR48 PR16 PR49 PR17 PR50 PR18 PR51 PR19 PR52 PR20 PR53 PR21 PR54 PR22 PR55 PR23 PR56 PR24 PR57 PR25 PR58 PR26 PR59 PR27 PR60 PR28 PR61 PR29 PR62 PR30 PR63 PR31 PR64 PR32 PR65 PR33 PR66 PR01 PR34 PR02 PR35 PR03 PR36 PR04 PR37 PR05 PR38 PR06 PR39 PR07 PR40 PR08 PR41 PR09 PR42 PR10 PR43 PR11 PR44 PR12 PR45 PR13 PR46 PR14 PR47 PR15 PR48 PR16 PR49 PR17 PR50 PR18 PR51 PR19 PR52 PR20 PR53 PR...

Page 52: ...___________________________________________ Eventuali ricambi_______________________________________________________ ____________________________________________________________________ Descrizione___________________________________________________________ Firma cliente Timbro e Firma tecnico __________________________ ______________________________ ________________________________________________...

Page 53: ...__________________________________________ Eventuali ricambi_______________________________________________________ ____________________________________________________________________ Descrizione___________________________________________________________ Firma cliente Timbro e Firma tecnico __________________________ ______________________________ Data________________Tipologia di intervento______...

Page 54: ...adere la garanzia 7 Non è previsto nessun indennizzo per il periodo di inefficienza della stufa o termostufa in attesa di riparazione 8 La garanzia è personale e non è cedibile a terzi 9 Se durante il periodo di garanzia vengono riscontrati difetti o rotture l acquirente deve rivolgersi al rivenditore presso il quale ha effettuato l acquisto che provvederà a verificare l eventuale difetto Se il di...

Page 55: ... che l installazione è stata effettuata in accordo alle normative vigenti certifica di aver effettuato la prima accensione verificando il regolare funzionamento della stufa Il cliente dichiara che i lavori sono stati eseguiti a regola d arte ed in accordo con le istruzioni del presente manuale d uso e manutenzione certifica che la macchina viene consegnata a soddisfazione propria e di aver preso v...

Page 56: ...CERTIFICAZIONE AMBIENTALE 4 STELLE 53 ...

Page 57: ...PASIAN SRL SOGLIANO CAVOUR LE Tel Whatsapp 0836 543750 Fax 0836 544431 www pasianpellets it info pasianpellets it info pasian eu 54 ...

Reviews: