


OS-8441
Wireless Diffraction Scanner
012-16243B
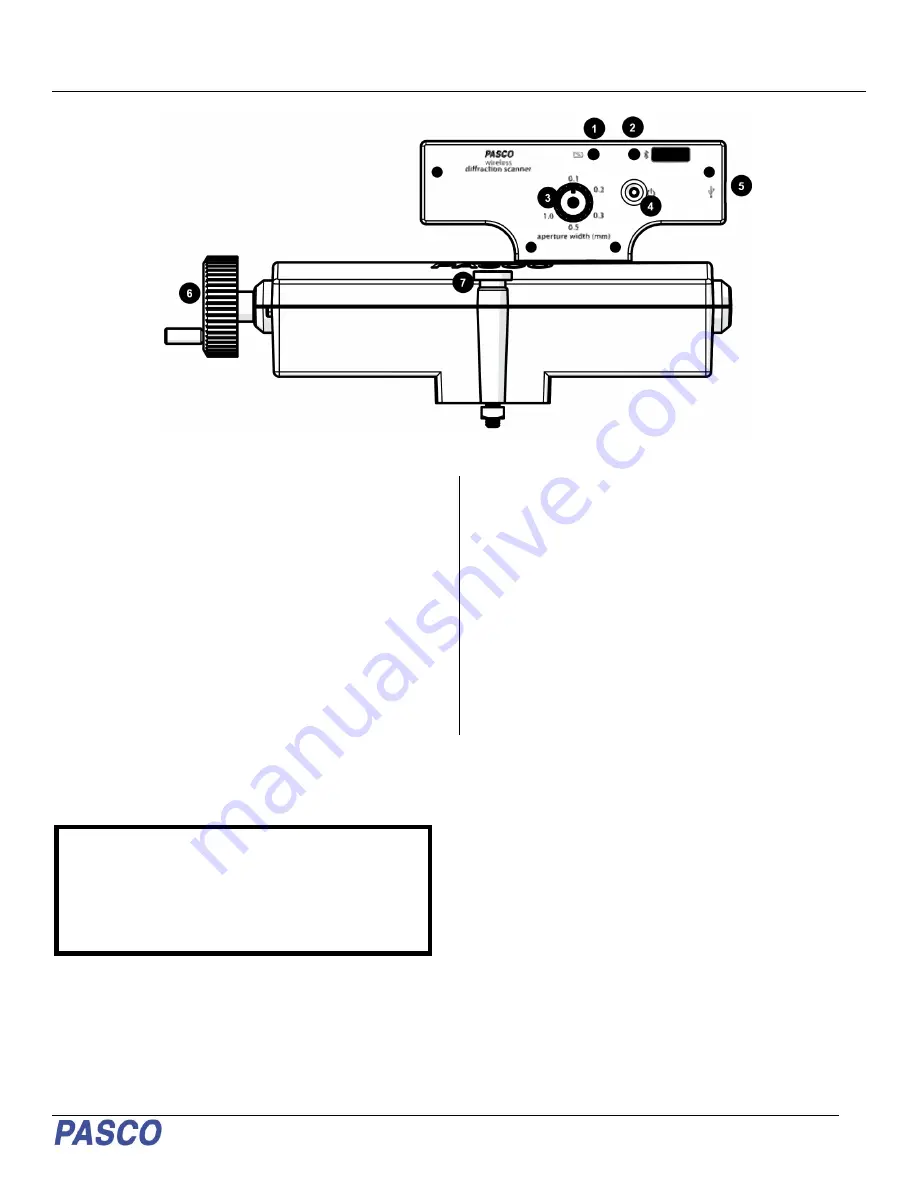
Components
1 Battery status LED
Red blink
Battery needs to be recharged soon.
Green solid Battery is fully charged.
Yellow solid Battery is charging.
5 Micro USB port
For connecting the included USB cable to a charger or
USB port of a computer.
2 Bluetooth status LED
Red blink
Ready to be paired with software.
Green blink Paired with software.
Yellow blink Remotely logging data.
6 Crank
Turn to change the position of the diffraction scanner
head.
3 Aperture selection knob
Turn the knob to adjust the aperture width.
7 Thumbscrew
For mounting the Diffraction Scanner to an optics
track or an optics carriage.
4 Power button
Press and hold to turn the power on or off.
8 Micro USB port
For connecting the included USB cable to a charger to
charge the battery.
Getting Started
Before using the device with students for the first time,
perform the following tasks:
1. Charge the battery.
2. Update your PASCO data collection software.
3. Update the firmware.
To charge the battery
1. Connect the micro USB cable to the micro USB
port on the Diffraction Scanner. Connect the other
end of the cable to a USB charger or port.
2. Allow the battery to charge for at least three
hours. The battery status LED will turn green
when fully charged.
Charging automatically stops when the battery is fully
charged. The device can remain connected to a power
source when fully charged without damaging the battery.
To update PASCO data collection software
1. Open the PASCO data collection software.
2. The software will display a message if an update
is available. Follow the instructions on the screen.
If you do not receive a message, the software is
up to date.


