


8
IE
NI
Dirt and the entry of water in-
crease the risk of electric shock.
• Operate the charger only with
the appropriate original batter-
ies.
Charging other batteries may
result in injuries and risk of fire.
• Avoid mechanical damage to
the charger.
This can result in
internal short circuits.
• Do not operate the charger on a
combustible surface (e.g. paper,
textiles).
Risk of fire due to heat
-
ing during charging.
• If the power cable for this
equipment is damaged, it must
be replaced by the manufac-
turer, a customer service agent
of the same or a similarly quali-
fied person in order to prevent
hazards.
• Do not use the charger to
charge non-rechargeable bat-
teries. The device could become
damaged.
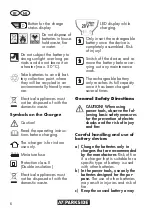
Charging Process
Do not expose the battery to
extreme conditions such as
heat or impact. Risk of injury
from escaping electrolytic so-
lution! After eye/skin contact,
rinse the affected areas with
water or a neutraliser and
consult a doctor.
Charge the battery in a dry
room only.
Prior to attaching the charger,
check that the battery‘s outer
surface is clean and dry.
There is a risk of injury due
to electric shock.
• Charge the battery before the first
time of use. Do not briefly recharge
the battery several times in a row.
• Only usechargers from the Parkside
X 20 V Team series to recharge the
battery.
• Ifthe operating time is considerably
shortened despite charging, this shows
that the rechargeable battery is de-
pleted and must be replaced. Only use
an original replacement battery from
the Parkside X 20 V TEAM seriespur
-
chased from customer service.
• Always take heed of the applicable
safety instructions as well as the envi-
ronmental protection regulations and
information.
• The warranty excludes all defects
caused by improper handling.
Removing/inserting the
Battery
1. To remove the battery (4) from the ap
-
pliance, press the release button (1) on
the battery and pull out the battery.
2. To insert the battery (4), place it on the
guide track and push it into the appli-
ance. It will audibly snap in.
Only insert the rechargeable
battery once the device is
completely assembled. Risk
of injury!
Checking the charge status
of the rechargeable battery
The battery charge status indicator (3)
signalises the state of charge of the battery
(4).
Summary of Contents for PTHSA 20-Li A2
Page 3: ...3 A B 1 2 3 4 5 6 7 8 16 9 10 10 12 13 14 15 11 11 19 12a 12b 2 6 17 18 5 ...
Page 36: ...36 ...
Page 37: ...37 ...
Page 40: ...40 ...
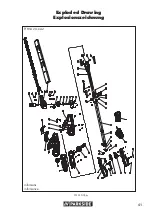
Page 41: ...41 Exploded Drawing Explosionszeichnung 2019 10 28_ks informativ informative PTHSA 20 Li A2 ...
Page 42: ...C 6 7 8 D 1 2 3 ...
Page 43: ......
Page 47: ...1 2 3 4 5 5 4 6 ...
Page 66: ...22 ...
Page 69: ...25 ...