background image

6

GB/IE

Safety instructions for handling batteries

Always make sure that the batteries are inserted 
with the correct polarity (+ and –), as indicated on 
the battery. 

Do not short-circuit batteries.

Do not charge non-rechargeable batteries.

Do not overcharge batteries!

Do not mix old and new batteries or batteries of 
different types or manufacturers! Replace an entire 
set of batteries at the same time.

Immediately remove used batteries from the device 
and dispose of them properly! 

Do not allow batteries to heat up!

Do not weld or solder directly on batteries!

Do not dismantle batteries!

10 

Do not allow batteries to deform! 

11 

Do not throw batteries into fire!

12 

Keep batteries out of the reach of children.

13 

Do not allow children to replace batteries without 
supervision!

14 

Do not keep batteries near fire, ovens or other sour

-

ces of heat. Do not use batteries in direct sunlight 
or store them in vehicles in hot weather. 

15 

Keep unused batteries in the original packaging 
and keep them away from metal objects. Do not 
mix unpacked batteries or toss them together! This 
can lead to a short-circuit of the battery and thus 

damage, burns or even the risk of fire.

16 

Remove batteries from the equipment when it will 
not be used for an extended period of time, unless 
it is for emergencies!

17 

NEVER handle batteries that have leaked without 

appropriate protection. If the leaked fluid comes into 

contact with your skin, the skin in this area should be 
rinsed off under running water immediately. Always 

prevent the fluid from coming into contact with the 

eyes and mouth. In the event of contact, please seek 
immediate medical attention.

18 

Clean the battery contacts and corresponding 
contacts in the device prior to inserting the batteries.

m


 Residual risks

The machine has been built according to the state of 
the art and the recognised technical safety require-
ments. However, individual residual risks can arise 
during operation.

•  Health hazard due to electrical power, with the use of 

improper electrical connection cables.

•  Furthermore, despite all precautions having been met, 

some non-obvious residual risks may still remain.

•  Residual risks can be minimised if the „safety instruc-

tions“ and the „Proper use“ are observed along with 
the whole of the operating instructions.

•  Do not load the machine unnecessarily: excessive 

pressure when sawing will quickly damage the saw 
blade, which results in reduced output of the machine 
in the processing and in cut precision.

•  When cutting plastic material, please always use 

clamps: the parts which should be cut must always 

be fixed between the clamps.

•  Avoid accidental starting of the machine: the opera-

ting button may not be pressed when inserting the 
plug in an outlet.

•  Use the tool that is recommended in this manual. 

In doing so, your mitre saw provides optimal perfor-
mance.

•  Hands may never enter the processing zone when the 

machine is in operation. Release the handle button 
and switch off the machine prior to any operations.

Commissioning

Prior to commissioning, observe the safety instruc-
tions in the operating instructions.

REMOVAL FROM THE PACKAGING  

Remove the machine from its package, which protects it 
during transport, without damaging the package in order 
to be able to use it later for transporting the mitre saw for 
long-term storage.

MOVING

Since the mitre saw is relatively small and light, its lo-
cation can be easily changed, even by a single person. 
After locking the locking knob (26 - Fig. 4) in the bottom 
position, lift the mitre saw by the handle (2 - Fig. 4).

TRANSPORT 

If the machine must be transported, carry it by the hand-
le (2 - Fig. 4) and place it in the original packaging in 
which it was supplied. In the process, make sure that it 
is correctly positioned in the package (see arrows on the 
package). 

If possible, the load should be fixed with ropes or secu

-

ring belts in order to prevent shifting during the transport 
or parts of the load from falling down.

POSITIONING/WORK STATION 

Position the machine on a work bench or on a flat base 

so that the machine is supported as stably as possible.
When working with the machine, ergonomic factors 
must be considered; the ideal height of the work table 
or the base is reached when the base surface or the up-
per work surface is 90 to 95 cm above the ground. The 
positioning of the machine must provide for at least 80 
cm of clearance in all directions and in order to allow for 
cleaning and repair work as well as necessary adjust-
ments in observance of safety conditions and with suf-

ficient room to manoeuvre.

CAUTION:

 Position the machine in a zone which is 

suitable in respect to the environmental conditions and 
lighting. Never forget that the general environmental 
conditions play an extremely important role in accident 
prevention.

CONNECTION TO THE POWER SUPPLY

Make sure that the socket is in a good condition. We 
would like to remind you that the power supply must be 
connected to a magnetic-thermal circuit breaker which 
protects all lines from short-circuits and overloading. 

Summary of Contents for 102787

Page 1: ...E SAW PKS 1500 A1 Operating and Safety Instructions Translation of Original Operating Manual GB SCIE DE COUPE ET A ONGLET PKS 1500 A1 AFKORT EN VERSTEKZAAG PKS 1500 A1 Gebruiks en veiligheidsvoorschri...

Page 2: ...GB IE Mitre Saw 1 11 FR BE Scie de coupe et onglet 12 22 NL BE Afkort en verstekzaag 23 33 DE AT CH Kapp und Gehrungss ge 34 43 MITRE SAW PKS 1500 A1...

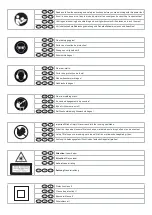
Page 3: ...the running saw blade FR BE Attention risque de blessure Ne touchez pas la lame de scie lorsqu elle est en mouvement NL BE Let op Risico een verwonding op te lopen Niet in het draaiende zaagblad grij...

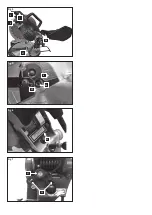
Page 4: ...Fig 2 20 21 Fig 3 24 23 25 Fig 1 1 10 17 14 15 16 Fig 1 2 19 19 18 18 22 1 3 2 4 5 6 7 8 9 10 11 12 13 Fig 1...

Page 5: ...Fig 4 2 3 27 26 1 Fig 5 28 29 6 Fig 6 30 Fig 7 32 31...

Page 6: ...Additional safety instructions 4 6 Residual risks 6 Commissioning 6 Assembly 7 Area of application 7 Settings 7 Working instructions 7 8 Electrical connection 8 Accessories 8 Maintenance 8 9 Disposal...

Page 7: ...ning the operati on of the machine and who are informed about the asso ciated dangers The minimum age requirement must be complied with In addition to the safety notes contained in the present operati...

Page 8: ...ine Despite use as intended specific risk factors cannot be entirely eliminated Due to the design and layout of the machine the following risks remain Contact with the saw blade in the non covered saw...

Page 9: ...outdoors Only use approved and appropriately identified extension cables for use outdoors Only use cable reels in the unrolled state 19 Remain attentive Pay attention to what you are doing Remain sen...

Page 10: ...r passive medical implants under certain conditions In order to prevent the risk of serious or deadly injuries we recommend that persons with medical implants consult with their physician and the manu...

Page 11: ...s in reduced output of the machine in the processing and in cut precision When cutting plastic material please always use clamps the parts which should be cut must always be fixed between the clamps A...

Page 12: ...ble Exact angle adjustment is possible on the basis of the scale The angle can be precisely and quickly ad justed from 0 to 45 with locking positions at 15 22 5 and 30 To pivot the rotary table loosen...

Page 13: ...hang on the power network during the inspection Electrical connection cables must comply with the ap plicable VDE and DIN provisions Only use connection cables with the marking H 07 RN The printing o...

Page 14: ...ot use any other equipment or motors on the same circuit Motor overheats easily Overloading of the motor insufficient cooling of the motor Avoid overloading the motor while cutting remove dust from th...

Page 15: ...ons ingress of foreign bodies into the device e g sand stones or dust effects of force or external influences e g damage caused by the device being dropped and normal wear resulting from proper operat...

Page 16: ...nes de s curit suppl mentaires 15 16 Risques r siduels 16 17 Mise en service 17 Montage 17 Domaine d utilisation 18 R glages 18 Consignes de travail 18 Raccord lectrique 19 Accessoires 19 Maintenance...

Page 17: ...ation puis le suivre attentivement Seules les per sonnes form es l utilisation de la machine et conscien tes des risques associ s sont autoris es travailler avec la machine L ge minimum requis doit tr...

Page 18: ...l teraient Dans ce cas l utilisateur op rateur est le seul responsable En outre les prescriptions de pr vention des acci dents doivent tre respect es de la mani re la plus scrupuleuse possible Toutes...

Page 19: ...e soin de ses outils Veiller ce que les outils de d coupe demeurent ac r s et propres afin d assurer un fonctionne ment plus efficace et plus s r Respecter les consignes de graissage et de remplacemen...

Page 20: ...s qu ils sont d cel s 3 Travail en toute s curit Utiliser uniquement des lames de scie dont la vitesse maximale autoris e n est pas inf rieure la vitesse de broche maximale de la scie circu laires Ell...

Page 21: ...olarit correcte des piles et indiqu e dessus 2 Ne pas court circuiter les piles 3 Ne pas charger les piles non rechargeables 4 Ne pas charger les piles de mani re excessive 5 Ne pas m langer piles anc...

Page 22: ...90 95 cm au dessus du sol La machine doit tre position n e de mani re respecter autour d elle un d gagement d au moins 80 cm dans toutes les directions de mani re pouvoir r aliser les travaux de netto...

Page 23: ...e la poign e 2 jusqu l enclencher dans sa position la plus haute Appuyez uniform ment la pi ce sur les barres de bu t e 27 Veillez maintenir vos mains en dehors de la zone de coupe de la lame de scie...

Page 24: ...tique de la machine Donn es figurant sur la plaque signal tique du mo teur Accessoires ASPIRATION DE LA SCIURE La scie de coupe est dot e d un manchon d aspiration auquel il est possible de raccorder...

Page 25: ...e du moteur pour garantir un refroidissement optimal du moteur Diminution de la puissance de d coupe lors du sciage Lame de scie trop petite aff t e trop souvent R gler nouveau la but e finale du modu...

Page 26: ...ccessoires non autoris s au non respect des dispositions de maintenance et de s curit la pr sence de corps trangers dans l appareil par exemple sable gravier ou poussi res une utilisation forc e ou de...

Page 27: ...nde veiligheidsvoorschriften 26 27 Restrisico s 27 28 Inbedrijfstelling 28 Montage 28 Toepassing 28 Instellingen 29 Werkinstructies 29 Elektrische aansluiting 29 30 Accessoires 30 Onderhoud 30 Afvalve...

Page 28: ...ke gevaren en risico s mogen het apparaat gebruiken De vereiste minimumleeftijd moet worden voldaan Als aanvulling op de veiligheidsvoorschriften in deze handleiding en de speciale voorschriften van u...

Page 29: ...king ver meld in deze handleiding maakt eveneens deel uit van het reglementaire gebruik Personen die de machine bedienen en onderhouden moeten hiermee vertrouwd en van mogelijke gevaren op de hoogte z...

Page 30: ...de onderhoudsvoorschriften en de instructies voor het verwisselen van gereedschappen in acht Controleer regelmatig de stekker en de kabel en laat deze bij beschadiging door een erkende vakman vervang...

Page 31: ...e bewerken materiaal Controleer of de zaag in geen enkele positie de draaitafel raakt door nadat de stekker uit het stopcontact is gehaald het blad met de hand in de standen 45 en 90 te draaien Stel z...

Page 32: ...Batterijen niet in open vuur werpen 12 Bewaar batterijen buiten het bereik van kinderen 13 Voorkom dat kinderen zonder toezicht de batterijen kunnen vervangen 14 Bewaar batterijen niet in de buurt va...

Page 33: ...igheden en een goede ver lichting Houd er rekening mee dat de algemene ar beidsomstandigheden een cruciale rol spelen bij het voorkomen van ongevallen ELEKTRISCHE AANSLUITING Het stopcontact moet in g...

Page 34: ...e motor uitschakelt Zaagblad vervangen afb 5 Neem de stekker uit het stopcontact Breng de zaageenheid in de stand Afkorten Ontgrendel de beweegbare zaagbladbescherming 6 door de blokkering 3 afb 1 in...

Page 35: ...m raadplegen of recht streeks contact met ons opnemen Zorg er altijd voor dat reparatie onderhouds en rei nigingswerkzaamheden en het verhelpen van storin gen uitsluitend plaatsvinden als de aandrijvi...

Page 36: ...or defect Laat de motor controleren door een vakman De motor bereikt het maximale vermogen niet Groep van stroomnet overbelast lampen andere motoren enz Gebruik geen andere apparaten of motoren op de...

Page 37: ...alingen binnendringen van vreemde voorwerpen in het apparaat zoals b v zand stenen of stof gebruikma king van geweld of invloeden van buitenaf zoals b v schade door neervallen alsmede door normale sli...

Page 38: ...se 35 37 Zus tzliche Sicherheitshinweise 37 38 Restrisiken 39 Inbetriebnahme 39 Montage 39 40 Einsatzbereich 40 Einstellungen 40 Arbeitshinweise 40 41 Elektrischer Anschluss 41 Zubeh r 41 Wartung 41 4...

Page 39: ...en arbeiten die im Gebrauch der Maschine unterwiesen und ber die damit verbundenen Gefahren unterrichtet sind Das ge for der te Mindestalter ist einzuhalten Neben den in dieser Bedienungsanweisung ent...

Page 40: ...Bestandteil der bestimmungsgem en Verwendung ist auch die Beachtung der Sicherheitshinweise sowie die Montageanleitung und Betriebshinweise in der Be dienungsanleitung Personen die die Maschine bedien...

Page 41: ...n des Werkst ckes zu verhindern 13 Vermeiden Sie abnormale K rperhaltung Sorgen Sie f r sicheren Stand und halten Sie jederzeit das Gleichgewicht Vermeiden Sie ungeschickte Handpositionen bei denen du...

Page 42: ...cker Die L rmverursachung wird von verschiedenen Faktoren beeinflusst unter anderem von der Be schaffenheit der S gebl tter Zustand von S ge blatt und Elektrowerkzeug Verwenden Sie nach M glichkeit S...

Page 43: ...hlungsexposition f hren Lasermodul niemals ffnen Es k nnte unerwartet zu einer Strahlenexposition kommen Wenn die Kapps ge l ngere Zeit nicht benutzt wird sollten die Batterien entfernt werden Der Las...

Page 44: ...le auf der Schachtel Fixieren Sie die Ladung mit Seilen oder Sicherheitsrie men damit es w hrend des Transports nicht zu Ver schiebungen kommt oder Teile der Ladung herausfallen POSITIONIERUNG ARBEITS...

Page 45: ...Winkel kann anhand der Skala 24 mittels Zeiger 25 festgestellt werden Abschlie end ist der Handgriff wieder fest anzuziehen Arbeitshinweise Nachdem Sie nun all dies was bis hierher beschrieben wur de...

Page 46: ...Vorschrift Wechselstrommotor Die Netzspannung muss 230 V betragen Verl ngerungsleitungen bis 25 m L nge m ssen ei nen Querschnitt von 1 5 Quadratmillimeter aufwei sen Anschl sse und Reparaturen der el...

Page 47: ...kreise in Netzanlage berlastet Lampen andere Motoren etc Verwenden Sie keine andere Ger te oder Motoren auf demselben Stromkreis Motor berhitzt sich leicht berlastung des Motors ungen gende K hlung de...

Page 48: ...dungen wie z B berlastung des Ger tes oder Verwendung von nicht zugelassenen Einsatzwerkzeugen oder Zubeh r Nichtbeach tung der Wartungs und Sicherheitsbestimmungen Eindringen von Fremdk rpern in das...

Page 49: ...vu atbilst bas un standarti du rakstu NL verklaart hierbij dat het volgende artikel voldoet aan de daarop betrekking hebbende EG richtlijnen en normen RUS PT declara o seguinte conformidade com a Dir...

Page 50: ......
Page 51: ...mindeligt affald I henhold til det europ iske direktiv 2012 19 EU em bortskaffelse af elektriske og elektroniske produkter og g ldende national lovgivning skal brugt elv rktoj indsamles separat og bor...

Page 52: ...sion des informations Stand van de informatie Stand der Informationen Update 07 2014 Ident No 102787_5901101976 scheppach Fabrikation von Holzbearbeitungsmaschinen GmbH G nzburger Str 69 D 89335 Ichen...

Reviews: