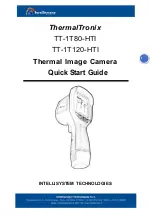
background image

Step 9.

Record Quality

Path: Menu - Record - Mainstream

Highlight the individual camera (AV) and press

“ENTER” to adjust the setting.
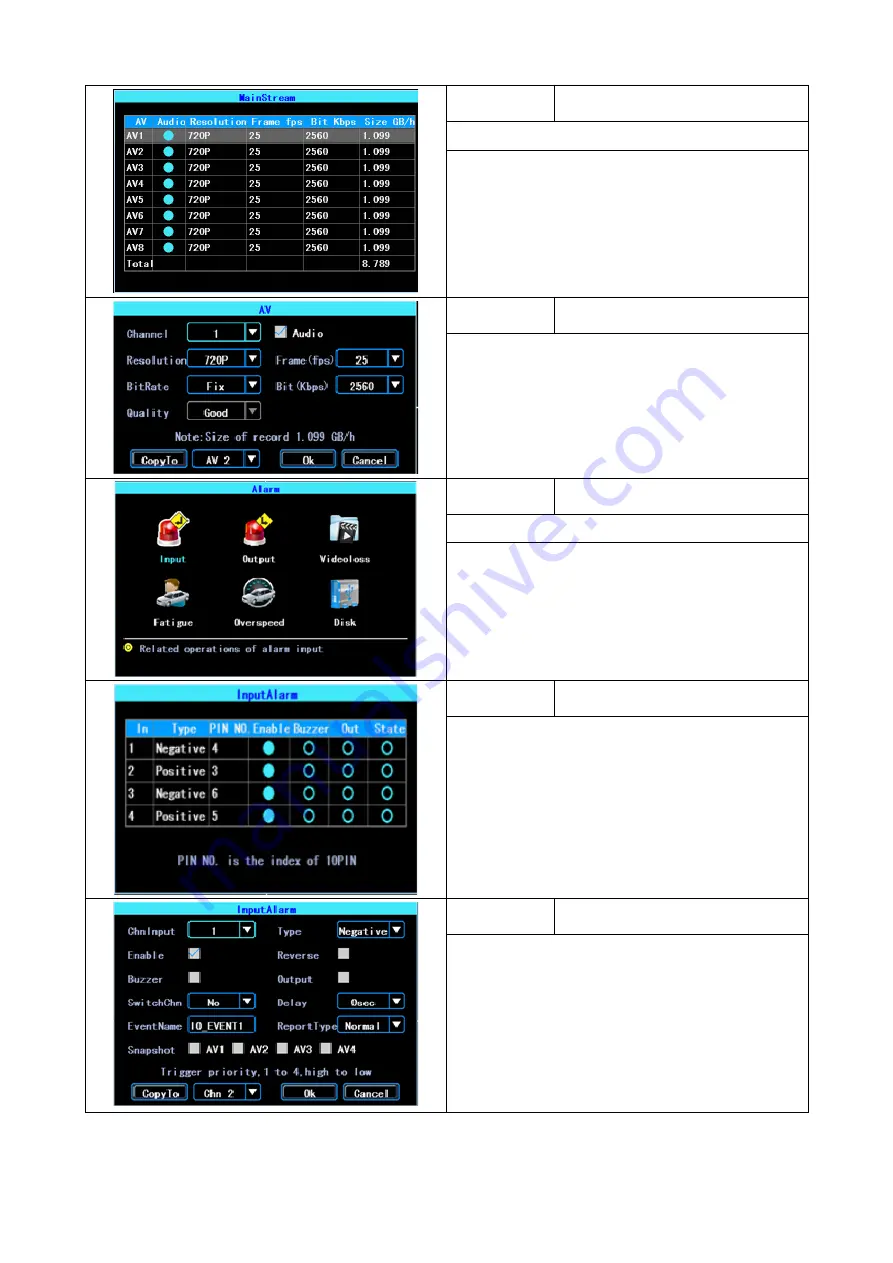
Step 10.

Record Quality

The record settings can be altered individually for each

camera.

Adjust the setting to suit the camera type fitted.

Note: Higher settings will affect the storage capacity

record times.

When complete, highlight “OK” and press enter.

Step 11.

Alarm Triggers

Path: Menu - Alarm - Input

The DVR has 4 inputs.

Inputs 2 & 4 are positive type input.

1 & 3 are optional Positive/Negative type input.

Step 12.

Trigger selection

Navigate to the desired trigger input and press

“ENTER”

Screen shows current settings and state (on/off) for each

trigger. This screen can be used to test trigger inputs

(STATE) for correct detection.

Step 13.

Trigger setting

Chn Input - 

AV input device.

Type 

- Trigger input positive or negative.

Enable 

- Turn trigger on/off.

Reverse 

- Mirror/oppose trigger operation.

Buzzer 

- Sound buzzer upon trigger activation.

Output 

- Activate output upon trigger activation

SwitchChn 

- Switch monitor to full screen AV channel

Delay

- Remain triggered after removal of trigger

When complete, highlight “OK” and press enter.

Summary of Contents for Silent Witness SW004

Page 1: ... 1 Using the supplied remote control press MENU Admin is the account used to change system settings The screen to the left is displayed using the directional keys move the cursor to OK and press ENTER Note Password will be automatically entered Step 2 Press MENU again now highlight MENU and press ENTER Step 3 This is the Main Menu from here you can navigate to the different device settings You can...

Page 2: ...imed on off programs 24 hr clock When complete highlight OK and press enter Step 7 On Off Settings Path Menu Basic On Off VOLT The device will detect the vehicle voltage automatically when the battery voltage is lower than the Shut Volt the device will shut down to avoid draining the battery When the voltage is higher than the PowerVolt the device will power on and begin recording Powertype Please...

Page 3: ...pe input 1 3 are optional Positive Negative type input Step 12 Trigger selection Navigate to the desired trigger input and press ENTER Screen shows current settings and state on off for each trigger This screen can be used to test trigger inputs STATE for correct detection Step 13 Trigger setting Chn Input AV input device Type Trigger input positive or negative Enable Turn trigger on off Reverse M...

Page 4: ...on to be recorded OSD with AV channels When complete highlight OK and press enter Step 17 Export Config Path Menu Maintenance Config When installing numerous vehicles using the same products and set up this can be used to save the complete set up programmed on this device to a USB memory stick IMPORT Import saved configuration file from USB EXPORT Export configuration file to USB Step 18 Format HD...

Reviews: