


Parker Hannifin Corporation
EMN Automation
-
Parker
Irwin, Pennsylvania
50
406LXR Series Product Manual
Chapter 6
-
Maintenance and Lubrication
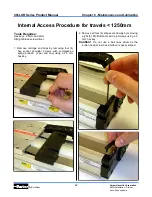
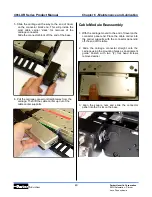
4. Slide the connector panel into the T
-
slot until the
front face of the connector panel is aligned with
the back of the base end cap as shown below.
Using a 3mm ball nose hex key tighten the two
socket cap screws inside the panel.
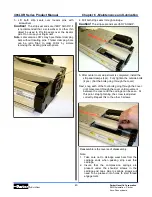
5. Reinstall the silver back cover onto the connector
panel and tighten the two button head screws.
Note:
The back cover is symmetrical and can be
installed two ways with no affect on performance.
However installation of the screws will be easiest
if the cover is oriented so the lower screw hole is
away from the table.
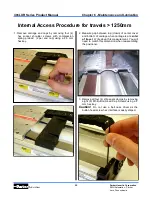
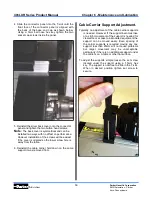
6. Reinstall the cable carrier hold down on the same
support it was removed from.
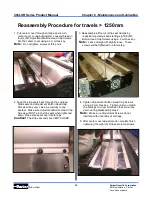
Typically no adjustment of the cable carrier supports
is needed. However If the support becomes lose
or a slight movement of the support is needed for
clearance or access to associated equipment the
support can be moved easily. Even spacing of
the carrier supports is required moving any one
support less than 25mm will not cause problems
but larger movement may be unacceptable
particularly if there is no additional support under
the carriers i.e. A table or other flat surface.
To adjust the supports simple loosen the set screw
located under the support using a 1.5mm hex
key. The support is now free to slide in the T
-
slot.
When in desired position tighten set screw to
secure.
Cable Carrier Support Adjustment.
Summary of Contents for 406LXR Series
Page 30: ...26 ...
Page 38: ...34 ...
Page 64: ...Parker Hannifin Corporation EMN Automation Parker Irwin Pennsylvania Notes ...
Page 65: ...Parker Hannifin Corporation EMN Automation Parker Irwin Pennsylvania Notes ...
Page 66: ...Parker Hannifin Corporation EMN Automation Parker Irwin Pennsylvania Notes ...
Page 67: ...Parker Hannifin Corporation EMN Automation Parker Irwin Pennsylvania Notes ...
Page 68: ......


