background image


3.2.2.1   Motor DiSEqC 

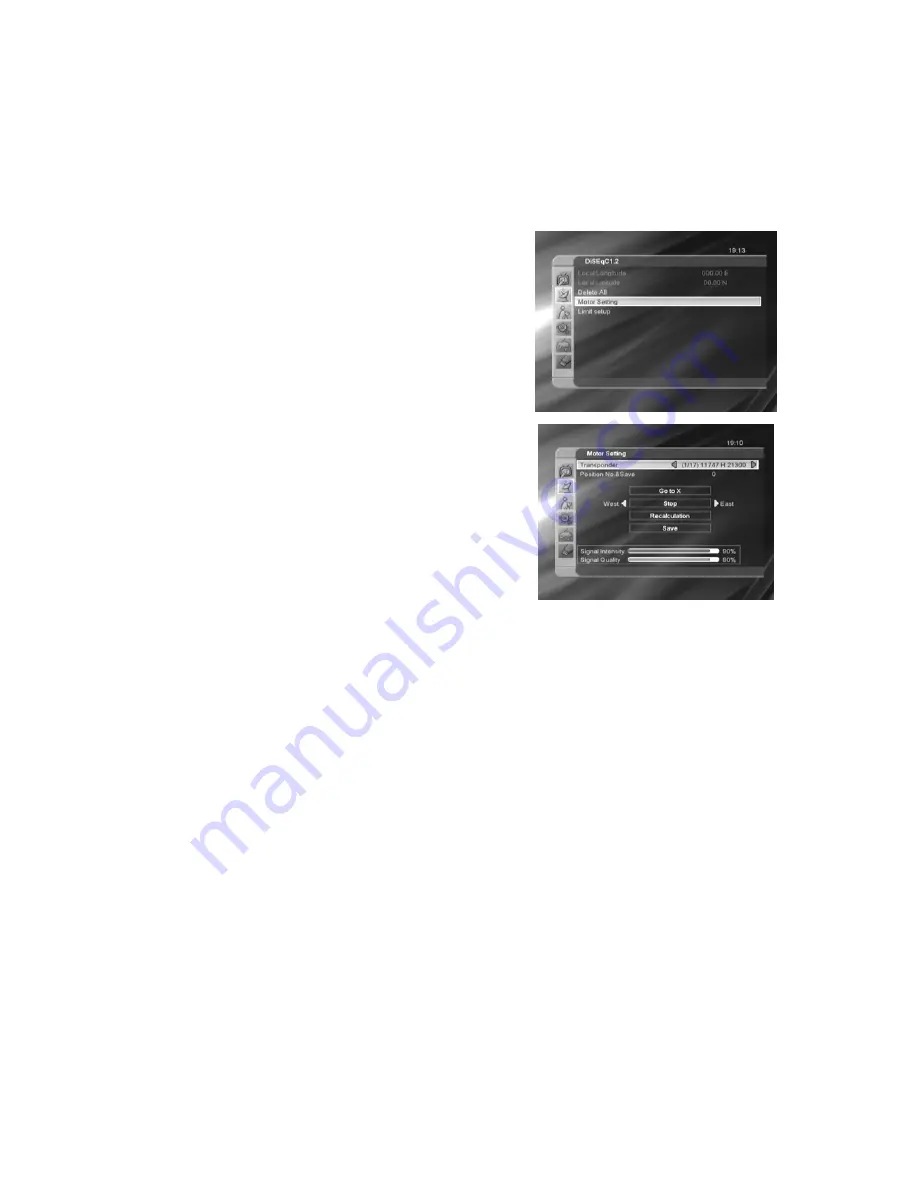
DiSEqC 1.2 


“Local Longitude”/”Local Latitude” is disabled for DiSEqC 1.2 

Motor Setting 


Select “Motor Setting” in the DiSEqC 1.2 menu 

 Press


 buttons to change satellite or transponder 


Go to “Position No. & Save” 

o

 Press 


 buttons or numbers to select or input 

Position NO. 


“Go to X” 

o


Press [OK] to open a list. You can go to X or go 

to reference. 

 Select 

“Satellite” 

o


Highlight “West/Save/East” and press the 


buttons to move the dish. 

o


Press [OK] to save the position. 

 “Recalculation” 

o

  Selection this option and press [OK] to 

recalculate. 


USALS 


Set the satellite’s longitude and local longitude / local latitude. USALS can move the dish automatically. 


Local Longitude: Please input the Local Longitude using the numeric keys. Adjust East/West using the 


buttons 


Local Latitude: Please input the Local Latitude using the numeric keys and adjust South/North using the 


buttons 


Motor Setting: Switching the satellite can move the dish to the right place 


Limit Setup: When you set “limit setup” to “West Limit/ East Limit”, you can move the dish to the west or east by 

pressing


 buttons manually.  When you are finished moving to the target place, please press [OK] key to 

save the point. 

3.2.2.2   Skew Control 

If a LNB with a mechanical polarizer is used in your system, adjust the skew value by using the 


 buttons while 

monitoring the signal status bar. Adjust to the maximum signal status point. 
 

3.2.3  Single Satellite Search 


Select the satellite to scan 


Scan Option: Scan All Channels or Scan Free Channels 


Scan Channel: Scan TV+Radio Channels, TV Channels, or Radio Channels 


Network Scan: Enable/Disable Network Scan 


Scan Mode: Normal Scan or Blind Scan 

Summary of Contents for 9500HDX

Page 1: ...2011 by Panarex Electronics User s Guide HD Satellite Receiver Pansat 9500HDX Panarex Electronics Sun Valley California U S A...

Page 2: ...1...

Page 3: ...it Channel 9 3 3 1 TV Channel List 9 3 3 2 Radio Channel List 10 3 3 3 Delete Channel 10 3 4 System Setup 10 3 4 1 Language 10 3 4 2 TV System 10 3 4 3 Display Settings 11 3 4 4 Local Time Setting 11...

Page 4: ...3 3 8 3 Timeshift 15 3 8 4 Jump 15 3 9 Channel List 16 3 10 Program Guide EPG 16 3 11 Audio Change 16 3 12 Favorite Channels 16 3 13 Video Mode 16 4 SPECIFICATIONS 17 5 TROUBLESHOOTING 18...

Page 5: ...k if damaged power cords are used Do not install the unit on the following places o in direct sunlight o in damp or wet areas o in extremely cold or hot areas o in very dusty areas o in places that ha...

Page 6: ...orites menu SAT Enter programmed satellite list SIG Check signal quality TIME Shows current Time Set time Fast rewind playback Fast forward playback Plays recorded program Stop recording or playing Sl...

Page 7: ...n 1 IF Input Output IF INPUT From LNB to receiver IF Loop through output to 2 nd receiver 2 HDMI Digital Video Audio Output 3 RS232 Serial Port used for software upgrade 4 UHF Option for UHF Remote Co...

Page 8: ...B configuration for each satellite 5 Start scan to find programs 6 Exit the installation after all programs are scanned and found Use the buttons to navigate the menu and press OK on the remote to mak...

Page 9: ...keys Adjust East West using the buttons Local Latitude Please input the Local Latitude using the numeric keys and adjust South North using the buttons Motor Setting Switching the satellite can move t...

Page 10: ...sing the buttons Press OK to place a favorite marker Press OK on a marked favorite group to cancel the existing favorite marker When finished press EXIT to go back to TV Channel List A favorite marker...

Page 11: ...exiting the Edit Channel menu the marked channel s will be deleted 3 3 2 Radio Channel List Operation of the Radio Channel List is similar to operation of TV Channel List Please refer to the TV Chann...

Page 12: ...nnel provides the correct time information you will see the current time while you enter the Time menu If the channel does not provide the time you will have to input the date and time information man...

Page 13: ...o the antenna Channel Play Type You can choose to play Free Scrambled or All channels Press Exit to exit the Other menu 3 5 Tools 3 5 1 Information Show the system information including model name boo...

Page 14: ...buttons to rewind or fast forward at x2 x4 x8 x16 x24 speeds 6 Use the buttons to rewind or play at x1 2 x1 4 x1 8 speeds 3 7 2 Storage Information Storage Information of the USB or SATA device will b...

Page 15: ...ck mode Repeat the folder contents Shuffle Repeat a single file Image Player Use the buttons to navigate through image files JPG BMP and display them in the preview window Press OK to select a file an...

Page 16: ...list Selecting another file will start playback of that file 3 8 3 Timeshift Use this option to enable or disable the Timeshift Enabling Timeshift will cause the system to store any current channel in...

Page 17: ...return to full screen 3 11 Audio Change While watching a program offering multiple audio languages Press Audio and use the buttons to switch languages To change the audio mode L Left R Right L R Stere...

Page 18: ...720p 1080i Audio Decoding ISO IEC13818 3 MPEG2 audio MUSICAM Dolby AC3 Video Output HDMI Component YPbPr CVBS Audio Mode Single Channel Dual Channel Stereo Joint Stereo Audio Sampling Frequency 16 22...

Page 19: ...correctly 2 Connect two terminals correctly 3 Connect the antenna cable correctly 4 Adjust the direction of antenna 5 Check the cable connections 6 Type the setting value correctly Black and white Scr...

Page 20: ...19...

Page 21: ...20...

Reviews: