background image

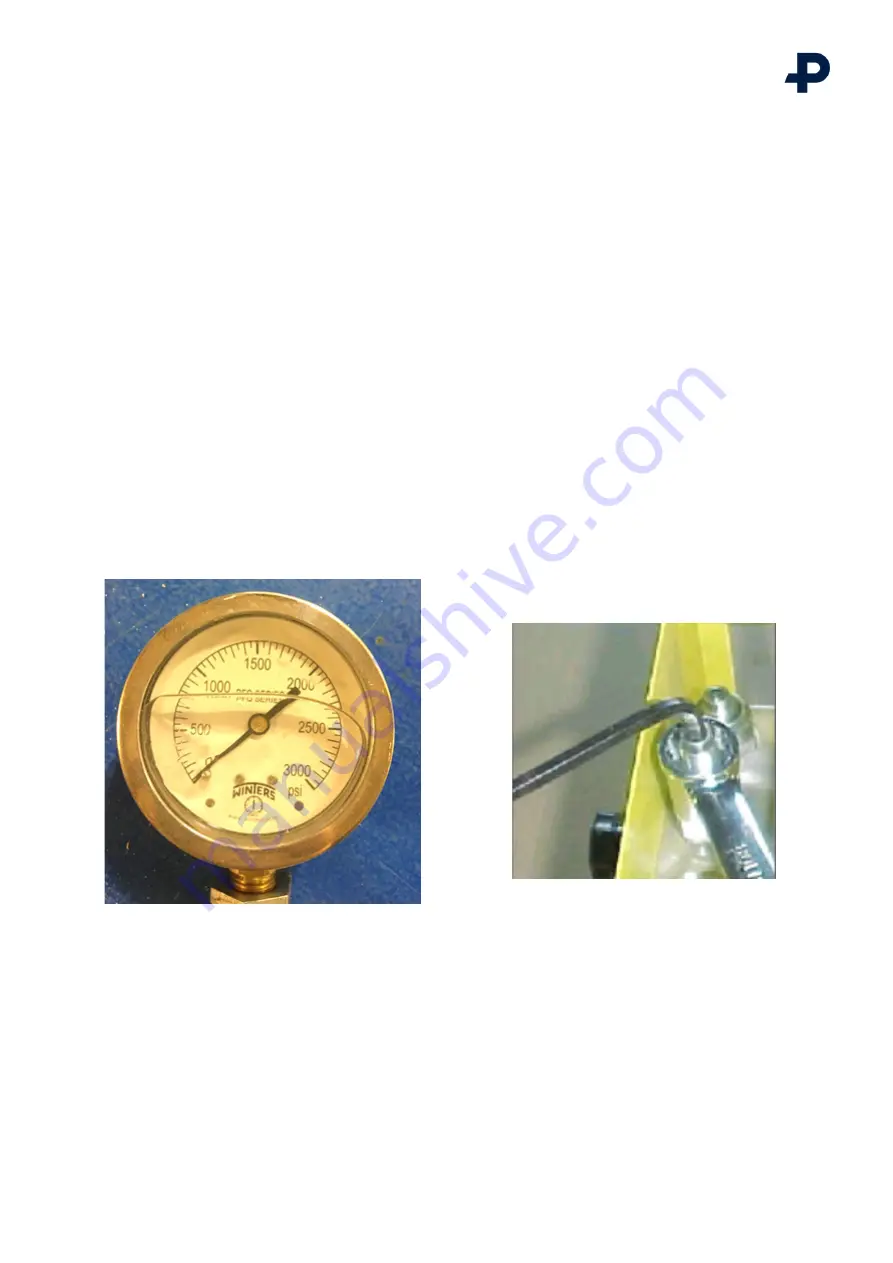
8.  Relief pressure calibration

With flow and pressure test gauge connected to the 10 GPM port, close the needle valve, and turn on top control 

valve noting the pressure shown on the gauge. Proper relief setting will be 2000-2100 PSI. (Turn valve off after 

checking pressure)
If you need to adjust the 00139 pressure relief valve. Loosen the jam nut on the 00139 relief valve with a 3/4” 

deep socket. (Or similar tool) turn the adjustment screw clockwise to increase relief setting. (A 1/4” hex key will be 

needed for adjustment) turn top valve on noting the pressure on the gauge. After relief pressure has been reached, 

tighten the jam nut on the 00139 relief valve being careful not to turn pressure adjustment screw. Turn the valve off 

after setting pressure.

Fig 5. 


Fig 6. 


14 av 34

OPERATION AND MAINTENANCE MANUAL I ENG_OMM_ELECTRIC_POWER_UNIT_P01 I 30th November 2021 


@Pandrol 2021


Summary of Contents for 03700A

Page 1: ...Partners in excellence ENG_OMM_ELECTRIC_POWER_UNIT_P01 30th November 2021 OPERATION AND MAINTENANCE MANUAL Electric Power Unit MODEL 03700A...

Page 2: ...people who handle and operate the machine It is originally written in English and translated into the local language by Pandrol Pandrol reserves the right to change specifications equipment instructi...

Page 3: ...Final calibration and double check 16 11 Review of hydraulic principles 17 11 1 Hydraulic formulas 17 11 2 Back pressure 17 12 Maintenance 18 12 1 General 18 12 2 Warning labels and information symbo...

Page 4: ...manifold parts diagram 30 15 9 Tool manifold parts list 31 15 10 Electric diagram 32 16 Disclaimer 33 17 Contact 33 18 Recycling and Environment 33 4 av 34 OPERATION AND MAINTENANCE MANUAL I ENG_OMM_E...

Page 5: ...ersonnel well informed and educated in general railway workmanship and specifically in the conditions standards and regulations on specific rail track The machine may only be used for its specified pu...

Page 6: ...ur supervisor applicable for the job you are doing and the tool you are using The use of an compressed air which must be less than 8 BAR 116 PSI to blow parts clean or to blow them dry after being cle...

Page 7: ...ation Maintenance Manual and have received training and information from Pandrol In order to avoid personal injury and or material damage everyone involved with assembling starting up or overhaul must...

Page 8: ...r 1 10 GPM circuit at 2000 PSI for hydraulic tool operations in buildings or other closed environments It is perfect for maintenance shop testing of tool repairs The unit is equipped with heavy duty w...

Page 9: ...priate flow control valves See valve positioning in this manual To change tools turn the control valves to the off position To shut down the power unit turn the control valves to the OFF position and...

Page 10: ...ore disconnecting hoses Once the tool has been changed turn the valves to the ON position depending on flow requirements of the tool being used 5 3 Cold weather operation Hydraulic system performance...

Page 11: ...power supply Repair any leaks or obvious damage to power unit Maintenance to be performed by qualified maintenance personnel only Read Operation manual to understand operational characteristics befor...

Page 12: ...with thermal measurement device If over 140 Degrees F 60 Degrees celsius Check the following Hydraulic oil to full mark in tank Adequate clearance for air circulation around power unit Power unit shou...

Page 13: ...lic oil has reached approximately 70 90 degrees 21 32 celsius 7 1 Flow calibration Fig 4 Connect the 03600 female coupling onto the 10 GPM male port and the male coupling into the return female port O...

Page 14: ...jam nut on the 00139 relief valve with a 3 4 deep socket Or similar tool turn the adjustment screw clockwise to increase relief setting A 1 4 hex key will be needed for adjustment turn top valve on n...

Page 15: ...ately 1500 PSI this pressure will remain on the gauge until the 00141 01 flow control valve is adjusted Slowly turn the adjustment screw counterclockwise until pressure suddenly drops to zero Tighten...

Page 16: ...ow control valve Loosen jam nut and very slightly turn adjustment nut clockwise and tighten jam nut Remove the gauge and turn valves on and off connect it to the 10 GPM port If it goes on easily adjus...

Page 17: ...le tools with 2000 PSI operating pressure are installed on a system with 250 PSI back pressure This leaves 1750 PSI as a maximum tool pressure Imagine a system with 500 PSI back pressure 2000 Minus 50...

Page 18: ...wide range of operating conditions Have tool inspected at least annually by Pandrol or a Pandrol qualified service representative to determine if tool is in need of safety changes or worn part replac...

Page 19: ...nd information symbols on the machine If any of these labels become damaged or lost they are to be replaced with new original warning labels that are available from Pandrol 19 av 34 OPERATION AND MAIN...

Page 20: ...Serial numbers must not have been altered defaced or removed Such action voids limited warranty 13 1 Exclusions to limited warranty This limited warranty is exclusive and is in lieu of any other warr...

Page 21: ...GPM circuits 5000 watt generator 02050RM Modular power unit 1 9 GPM 03700A Electric power 1 10 GPM or 2 5 GPM circuits Grinders 09200A Precision frog grinder 06000 Profile grinder 06950 06950A Multi...

Page 22: ...rigger versions available 00800A 16 Rail saw 05000 Hand pump weld shear 02500 10 GPM 1 Impact wrench 08300 Spike driver 01600A 5 GPM 1 Impact wrench 01100RM Light weight spike puller Other products Hy...

Page 23: ...15 Assembly 15 1 Flow diagram 23 av 34 OPERATION AND MAINTENANCE MANUAL I ENG_OMM_ELECTRIC_POWER_UNIT_P01 I 30th November 2021 Pandrol 2021...

Page 24: ...15 2 Frame parts diagram 24 av 34 OPERATION AND MAINTENANCE MANUAL I ENG_OMM_ELECTRIC_POWER_UNIT_P01 I 30th November 2021 Pandrol 2021...

Page 25: ...15 3 Frame parts list 25 av 34 OPERATION AND MAINTENANCE MANUAL I ENG_OMM_ELECTRIC_POWER_UNIT_P01 I 30th November 2021 Pandrol 2021...

Page 26: ...15 4 Engine and pump parts diagram 26 av 34 OPERATION AND MAINTENANCE MANUAL I ENG_OMM_ELECTRIC_POWER_UNIT_P01 I 30th November 2021 Pandrol 2021...

Page 27: ...15 5 Engine and pump parts list 27 av 34 OPERATION AND MAINTENANCE MANUAL I ENG_OMM_ELECTRIC_POWER_UNIT_P01 I 30th November 2021 Pandrol 2021...

Page 28: ...15 6 Hydraulic and starter relay parts diagram 28 av 34 OPERATION AND MAINTENANCE MANUAL I ENG_OMM_ELECTRIC_POWER_UNIT_P01 I 30th November 2021 Pandrol 2021...

Page 29: ...15 7 Hydraulic and starter relay parts list 29 av 34 OPERATION AND MAINTENANCE MANUAL I ENG_OMM_ELECTRIC_POWER_UNIT_P01 I 30th November 2021 Pandrol 2021...

Page 30: ...15 8 Tool manifold parts diagram 30 av 34 OPERATION AND MAINTENANCE MANUAL I ENG_OMM_ELECTRIC_POWER_UNIT_P01 I 30th November 2021 Pandrol 2021...

Page 31: ...15 9 Tool manifold parts list 31 av 34 OPERATION AND MAINTENANCE MANUAL I ENG_OMM_ELECTRIC_POWER_UNIT_P01 I 30th November 2021 Pandrol 2021...

Page 32: ...15 10 Electric diagram 32 av 34 OPERATION AND MAINTENANCE MANUAL I ENG_OMM_ELECTRIC_POWER_UNIT_P01 I 30th November 2021 Pandrol 2021...

Page 33: ...of Pandrol All components of the product can either be Recycled Taken care of Be re used We recommend you to follow your local region regulations of environmental and recycling policies 18 Recycling...

Page 34: ...Find out more at pandrol com Pandrol Pandrol Partners in excellence...

Reviews: