background image

P.11

P.12

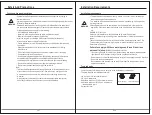
Installation Instructions

    Install inlet pipe

Dispose the packing materials

The packing materials of this machine may be dangerous to children. Please dispose of them 
properly and immediatelly. Please dispose of the related packing materials 
according to the relevant local regulations. Please do no throw the packing materials away 
together with the other daily living rubbishes. 

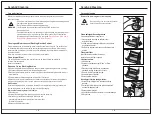
Remove transport bolts and foam

Before using this washing machine, transport bolts 
must be removed from the backside of
 this machine. Please take the following steps to 
remove the bolts:
1.Loosen all bolts with spanner and then remove them.
2.Cover the holes with transport hole plugs.
3.Keep the transport bolts properly for future use.

Make sure the small triangle foam is removed with the 
bottom one together. If not, lay the unit down on side 
surface, then remove the small foam from the of unit bottom 
manually.

Select the location

Before installing the washing machine, the location characterized as follows shall be
 selected:
- Rigid, dry, and level surface (if not level, please make it level with reference to the

following figure “Adjust Leg”)

- Avoid direct sunlight
- Sufficient ventilation

- Room temperature is above 0

- Keep far away from the heat resources such as coal or gas.
Make sure that the washing machine will not stand on power cord.
Do not install the washing machine on carpeted floors.

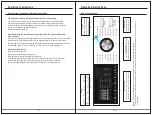
Connect inlet pipe


Connect the inlet pipe as indicated in the figure.
For the model which has a hot valve , please connect 
the hot vale to hot water tap.

H

C

1.Connect the elbow to tap and fasten it

clockwise.

2.Connect the other end of inlet pipe to the inlet

valve at the backside of washing machine and
fasten the pipe tightly clockwise.

Note: after connection, if there is any leakage with hose, then repeat the steps to connect inlet
 pipe. The most common type of tap shall be used to supply water. If tap is square or too big, 
then standard tap shall be changed.

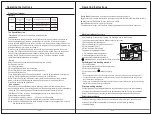
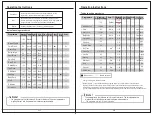
Drain system options

A

    Capacity can be no less than 17 gal

.(

64 L

)

per minute

.

    The top of the standpipe must be at least 60cm high and
   no higher than 100cm from the bottom of the washer

.


Floor drain system

(

view D

)

.The floor drain system requires

      a siphon break that may be purchased separately

.

      See

Tools


and


Parts”

.

The siphon break must be a minimum

of 28

" (

710


mm

)

from the bottom of the washer

.

 Additional


hoses


might be needed

.

Min 60 
Max 100

B

Laundry tub drain system 

(

view C

)

The laundry tub needs a minimum 20 gal

. (

76 L

)

capacity

The


top


of


the


laundry


tub


must


be

at least  60cm above the foor

.

M

in

.6

0

cm

M

a

x.

1

0

0

cm

C

28

min

.

(

710


mm

)

D

Standpipe drain system 

-

wall or foor 

(

views A 

B

)

The


standpipe


drain


requires


a


minimum


diameter

standpipe


of


2

"

(50


mm).The


minimum


carry

-

away

Installation Instructions

Summary of Contents for COMBI-110

Page 1: ...how to use and maintain your washing machine properly Just a little preventative care on your part can save you a great deal of time and money over the life of your washing machine You ll find many an...

Page 2: ...before installation and operation of this machine to prevent injury and property damage WHAT YOU NEED TO KNOW ABOUT SAFETY INSTRUCTIONS Warnings and Important Safety Instructions in this manual DO NOT...

Page 3: ...e unless they have been given supervision or instruction concerning use of the machine by a person responsible for their safety Children should be supervised to ensure that they do not play with the m...

Page 4: ...ranch Circuit Check with a qualified electrician or serviceman if you are in doubt as to whether the washer is properly grounded DO NOT modify the plug provided with the appliance if it will not fit t...

Page 5: ...tector may be tripped or fuse may be burned out Installation requirements WARNING Tools and parts Cautions when washing clothes Cold water shall be used and hot water may be also connected according t...

Page 6: ...he washer See Electrical Requirements 3 Hot and cold water faucets located within 3 ft 0 9 m of the hot and cold water fill valves 4 The water pressure should be between 20 100psi 138 690kPa 5 A level...

Page 7: ...sure that the washing machine will not stand on power cord Do not install the washing machine on carpeted floors Connect inlet pipe Connect the inlet pipe as indicated in the figure For the model whic...

Page 8: ...ed and properly earthed Make sure the power voltage at your place is same to that in the machine s rating label Power plug must match the socket and cabinet must be properly and effectively earthed Do...

Page 9: ...preparation before washing clothes Operating Instructions Operating Instructions Checklist and preparation before washing clothes Size articles of different sizes are washed together to increase the...

Page 10: ...rella ski suits car covers sleeping bags etc Cautions during Draining Draining of normal clothes Moisture is drained through the drain hole Draining of water proof clothes and fiber products In the no...

Page 11: ...tin synthetic fibres or blended fabrics Sanitary Give full play to its active enzyme washing powder with 60 Lord washed and prewash function suitable for difficult to wash clothes Wool You can select...

Page 12: ...is higher View of control panel Operating Instructions P 22 Operating Instructions Washing clothes at first time Before washing clothes for the first time the washing machine shall operate one round o...

Page 13: ...12 0 8 0 6 0 6 0 12 0 12 0 6 0 12 0 2 5 Default Temp C Warm 12 0 1300 1 04 1 35 2 36 2 18 2 08 0 12 0 20 1 58 1 28 4 18 3 09 1 39 1 37 1 00 0 20 0 5 1 0 2 5 Warm Hot Warm Warm Hot Hot Eco Warm Eco Co...

Page 14: ...econnect inlet pipe to the tap and check whether inlet and outlet are working normally Note when the washing machine is reused make sure the ambient temperature is above 0 C Anti freeze If your washin...

Page 15: ...the pump Never remove the pump cover during a wash cycle always wait until the appliance has finished the cycle and is empty When replacing the cover ensure it is securely tightened Warning Open the...

Page 16: ...he door is closed tightly Check if power plug is inserted well Check if water supply tap is opened Check if button On Off is pressed Check if button Start Pause is pressed Check if the fixing bolts ha...

Page 17: ...be fixed well so that it will not trip people or other things and be damaged Special attention shall be paid to the socket It shall be plugged into the sockets easily and attention shall be paid to th...

Page 18: ......

Reviews: