background image

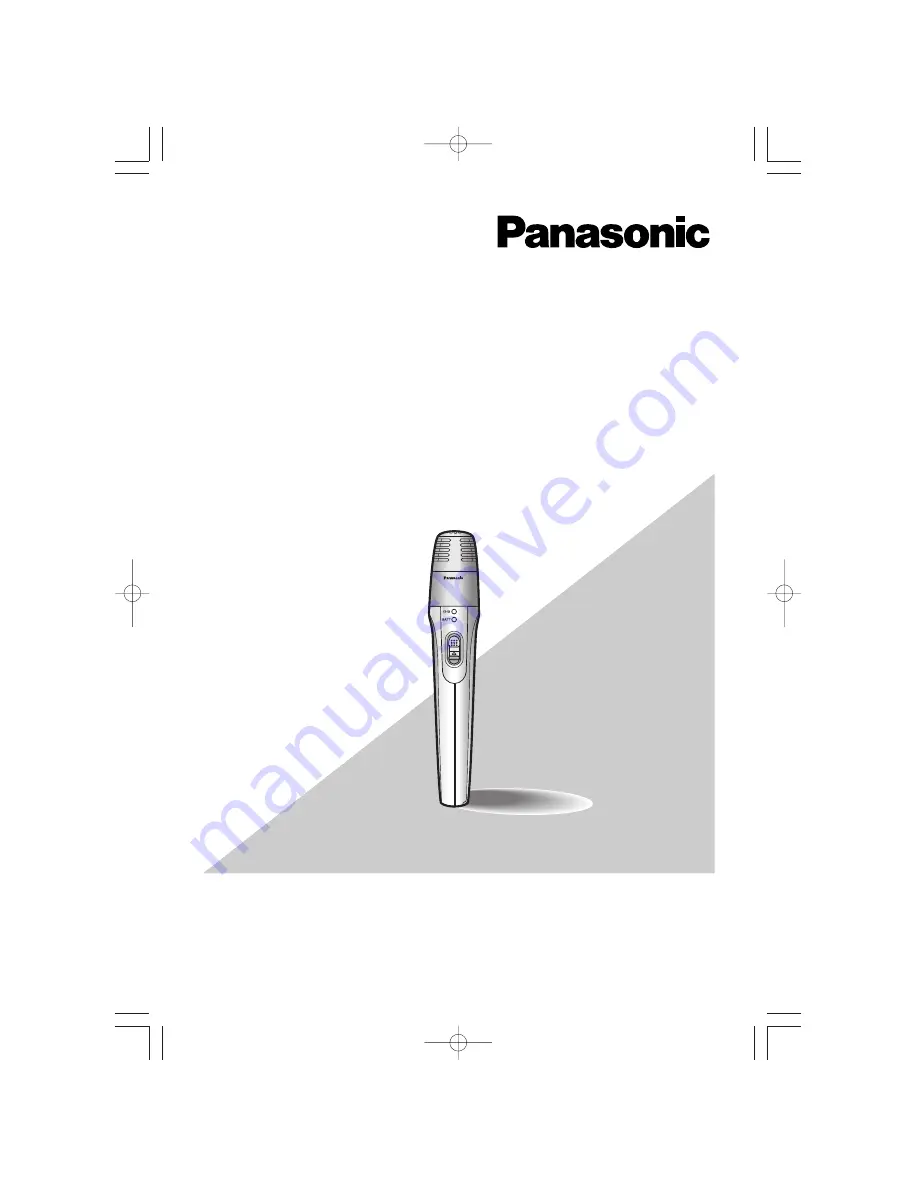
Before attempting to connect or operate this product, please read these

instructions carefully and save this manual for future use.

Operating Instructions

Infrared Wireless Microphone

Model Nos.

WX-LT150

WX-LT150E

WX-LT150

WX-LT150

ON

3TR006021BZA̲WX-LT150  09.5.22  04:08 PM  ページ1

Summary of Contents for WX-LT150

Page 1: ...te this product please read these instructions carefully and save this manual for future use Operating Instructions Infrared Wireless Microphone Model Nos WX LT150 WX LT150E WX LT150 WX LT150 ON 3TR006021BZA WX LT150 09 5 22 04 08 PM ページ1 ...

Page 2: ...oi dichiariamo sotto nostra esclusiva responsabilità che il prodotto a cui si riferisce la presente dichiarazione risulta conforme ai seguenti standard o altri documenti normativi conformi alle disposizioni delle direttive 2006 95 CE e 2004 108 CE Wij verklaren als enige aansprakelijke dat het product waarop deze verklaring betrekking heeft voldoet aan de volgende normen of andere normatieve docum...

Page 3: ... PRODUCT FOR THE CASES INCLUDING BUT NOT LIMITED TO BELOW 1 ANY DAMAGE AND LOSS INCLUDING WITHOUT LIMITATION DIRECT OR INDIRECT SPECIAL CONSEQUENTIAL OR EXEMPLARY ARISING OUT OF OR RELATING TO THE PRODUCT 2 PERSONAL INJURY OR ANY DAMAGE CAUSED BY INAPPROPRIATE USE OR NEGLIGENT OPERATION OF THE USER 3 UNAUTHORIZED DISASSEMBLE REPAIR OR MODIFICATION OF THE PRODUCT BY THE USER 4 ANY PROBLEM CONSEQUEN...

Page 4: ...plifiers that produce heat 9 Do not defeat the safety purpose of the polarized or grounding type plug A polarized plug has two blades with one wider than the other A grounding type plug has two blades and a third grounding prong The wide blade or the third prong are provided for your safety If the provided plug does not fit into your outlet consult an electrician for replacement of the obsolete ou...

Page 5: ... Do not use solvents such as benzine or thinner or a metal polish Otherwise the contacts may become deformed or dis colored or the brass plating may come off Do not use a deteriorated or short circuit ed battery A battery in this condition may leak fluid overheat and cause dam age The product is not made to drip proof specification Do not use the product with the wet hands in a place where it is d...

Page 6: ...thinner When using a chemical cloth for clean ing observe the cautions provided with that product Useful hints Noise prevention Turn off the power of this product and turn down the volume of a powered amplifier mixer etc before replacing removing or inserting the battery as this might produce a large noise from these devices For a clear sound without noise content use the product at a distance of ...

Page 7: ...d source to the product s microphone input terminal will allow you to transmit audio to the receiver Caution about interception of transmission This product is a wireless system using infrared and the transmission and reception of audio signals are possible within the range that the infrared can reach If any third party is within the range of the infrared the audio signals can reach anywhere unles...

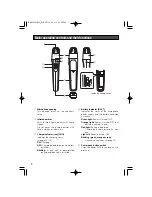
Page 8: ...ON Charging OFF Charging completed or no battery installed Blinking A dry cell or deteriorated rechargeable battery is installed r Battery indicator BATT Indicates the status of the microphone power supply and the battery condition as follows Green light Power is turned ON Orange light Power is turned ON but battery is nearing its end Red light Battery is depleted Charge the battery or install a n...

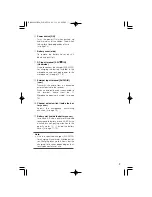
Page 9: ... device to the receiver When an external device is connected to this terminal audio from the q Microphone opening is muted page 13 0 Channel select switch inside the bat tery cover Selects the microphone transmitting channels page 10 1 Battery slot inside the battery cover Install one AA size nickel metal hydride rechargeable battery or one AA LR6 size alkaline dry cell paying attention to the pol...

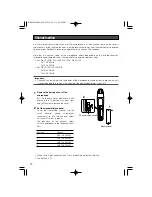
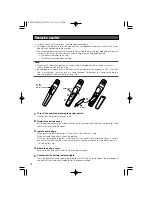
Page 10: ... the microphone turned on but to prevent noise it is recommended to turn down the volume of the powered amplifier mixer etc CH 4 3 21 Battery cover 2 1 CH 4 3 2 1 Channel select switch A 1 Remove the battery cover of the microphone Pull the battery cover downward while pressing the A portion with both right and left thumbs to remove the cover 2 Set the transmitting channel To set the transmitting ...

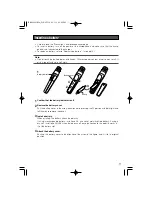
Page 11: ...e the battery cover Pull the battery cover in the arrow direction while pressing the A portion with both right and left thumbs to remove the cover 3 Install a battery When installing the battery check the polarity If using a rechargeable battery install one AA size nickel metal hydride battery if using a dry cell install one AA LR6 size alkaline dry cell paying attention to the polarity marks of t...

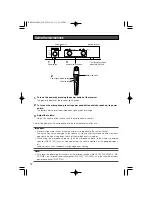
Page 12: ...ud volume may dam age your ears when the power switch of the microphone is turned on While using the microphone do not take the microphone close to the wireless powered speaker WX LP100 such as when adjusting the volume controls of the powered speak er Loud noises such as feedback may damage your hearing Note Also read the operating instructions of the infrared receiver WX LR100 WX LR100 A WX LR10...

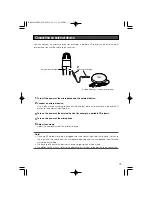
Page 13: ... CD player to the external input terminal 3 Turn on the power of the external device for example a portable CD player 4 Turn on the power of the microphone 5 Adjust the volume Adjust the audio volume of the external device Note Once a ø3 5 stereo mini plug is plugged into the external input terminal priority is given to this input and the audio from the microphone opening and the microphone input ...

Page 14: ...used for a long time 1 Turn off the power by pressing the power switch Confirm that the battery indicator is off 2 Remove the battery cover Pull the battery cover in the arrow direction while pressing the A portion with both right and left thumbs to remove the cover 3 Install a new battery When removing the used battery lift out the side then the side When installing the battery check the polarity...

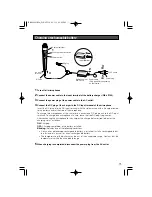
Page 15: ...e to the charger the charge indicator red indicates the charging status as follows ON Charging OFF Charging completed or no battery installed Blinking Indicates one of the following conditions A dry cell or deteriorated rechargeable battery is installed Install a rechargeable bat tery instead of a dry cell or a new rechargeable battery The temperature of the battery may be out of the acceptable ra...

Page 16: ... longer charging times Note however that charging times may become longer even within the operating tempera ture range if the temperature of the microphone is higher or lower than the normal condi tion The charger and the microphone may get hot slightly during charging Do not charge a rechargeable battery that has just been fully charged Otherwise you will shorten the life of the battery For a new...

Page 17: ...y Is the battery installed with the cor rect polarity Install it with the correct polarity The power cannot be turned on Ref pages Symptom Is the power switch turned on Turn on the power switch 9 12 14 15 17 11 14 Is the channel select switch in a position other than 1 4 Confirm that the channel select switch has clicked into place in any of positions 1 4 Is the charger correctly connected to the ...

Page 18: ... he microphone matched to the receiv ing channel of the receiver Set the transmitting channel of the microphone to a receiving channel of the receiver used Is the channel select switch in a position where it has firmly clicked into place Check the position of the chan nel select switch Interference Continuous noise No reception at all No audio output from the receiver or reception indicator does n...

Page 19: ... ter minal Confirm the connection Are any of the devices turned off Turn on the power of all devices when operating the system No reception at all No audio output from the receiver or reception indicator does not respond No sound Does not charge charge indicator is off Symptom Ref pages Cause solution C 13 15 16 C C Operating instructions of WX LR100 WX LR100 A WX LR100 B WX LA20 WX LA50 WX LP100 ...

Page 20: ...han the speci fied one connected Use the specified charger WX LZ150 Is the battery extremely hot Disconnect the charger once and allow the battery to cool off before reconnecting Is a dry cell installed Dry cells are not rechargeable Install a rechargeable battery Does not charge charge indicator is blinking 15 16 15 16 15 16 Does not charge The charge indicator lights but goes off after a few min...

Page 21: ...onaural mix Required batteries Rechargeable battery Nickel metal hydride battery of AA size 2 000 mAh to 2 100 mAh x 1 pc Dry cell Alkaline battery of AA LR6 size x 1 pc Battery life Duration At 25 C normal temperature for continuous use Around 6 hours Battery indicator Green light and orange light when using Panasonic s nickel metal hydride batteries of HHR 3M Series Around 5 hours Battery indica...

Page 22: ... following accessories are needed for installation Small screw driver 1 pc Note Install one of the following batteries Rechargeable battery AA size nickel metal hydride battery Dry cell AA LR6 size alkaline battery 3TR006021BZA WX LT150 09 5 22 04 08 PM ページ22 ...

Page 23: ...out collection and recycling of old products and batteries please contact your local municipality your waste disposal service or the point of sale where you purchased the items Penalties may be applicable for incorrect disposal of this waste in accordance with national legislation For business users in the European Union If you wish to discard electrical and electronic equipment please contact you...

Page 24: ...r support call 1 800 528 6747 Three Panasonic Way 2H 2 Secaucus New Jersey 07094 Panasonic Canada Inc 5770 Ambler Drive Mississauga Ontario L4W 2T3 Canada 905 624 5010 http www panasonic ca For European and other fields http panasonic net Importer s name and address to follow EU rules Panasonic Testing Centre Panasonic Marketing Europe GmbH Winsbergring 15 22525 Hamburg F R Germany 3TR006021BZA WX...

Reviews: