12
Using the microphone
1
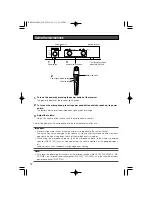
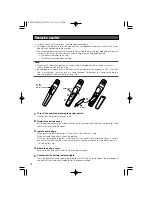
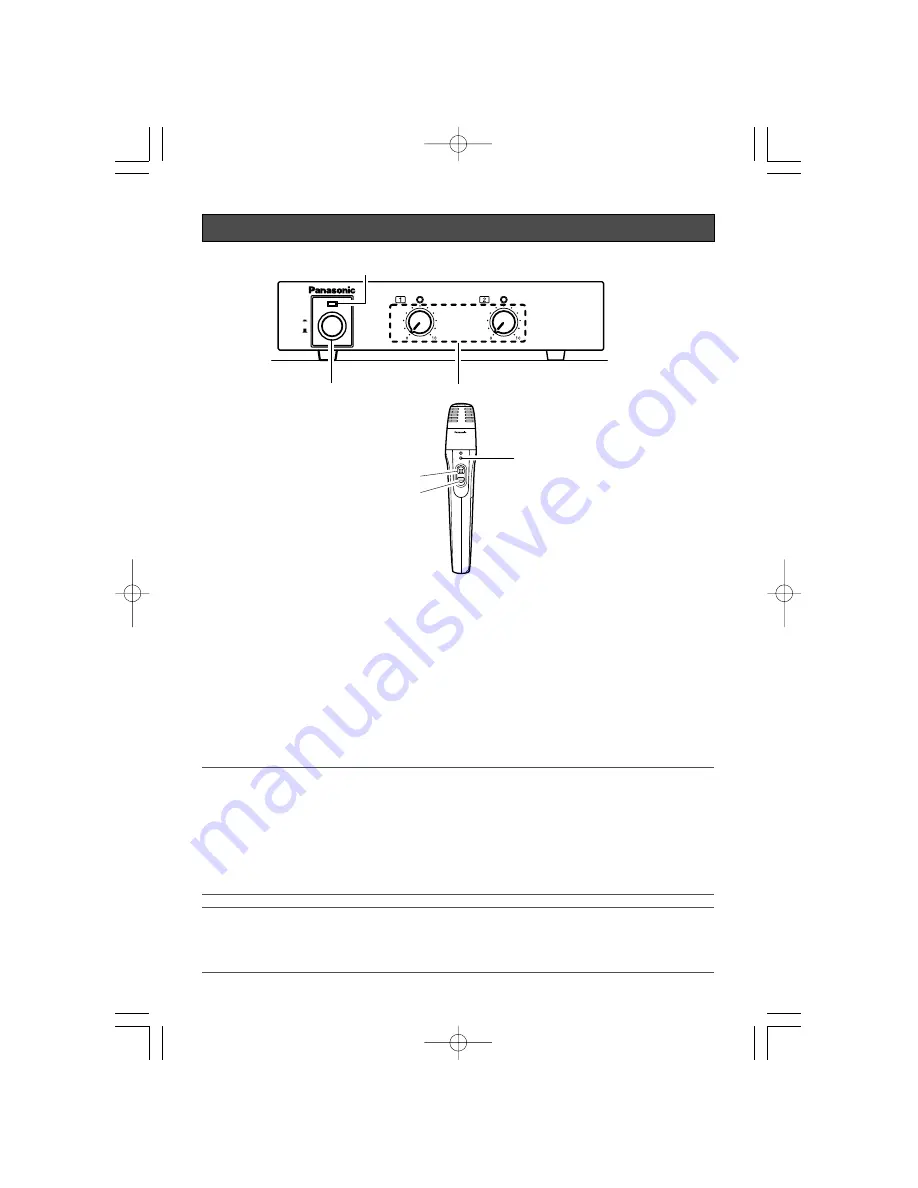
Turn on the power by pressing the power switch of the receiver.
The power indicator of the receiver lights green.
2
To turn on the microphone, press its power push-button switch or push up its power
switch.
The battery indicator of the microphone lights green or orange.
3
Adjust the volume.
Adjust the volume of the receiver with the audio volume controls.
Turn off the power of the microphone and the infrared receiver after use.
Important:
• Do not assign more than one infrared wireless microphone to the same channel.
The noise may cause damage to the speaker, and an excessively loud volume may dam-
age your ears when the power switch of the microphone is turned on.
• While using the microphone, do not take the microphone close to the wireless powered
speaker (WX-LP100) (such as when adjusting the volume controls of the powered speak-
er).
Loud noises such as feedback may damage your hearing.
Note:
• Also read the operating instructions of the infrared receiver (WX-LR100, WX-LR100/A, WX-
LR100/B), the infrared receiver/amplifier (WX-LA20, WX-LA50), and the infrared wireless
powered speaker (WX-LP100).
ON
OFF
POWER
IR SIGNAL
IR SIGNAL
Infrared Receiver WX–LR100/A
Power indicator
Power switch
1
Audio volume controls
3
Infrared receiver
* The illustration shows
model WX-LR100/A.
WX-LT150
ON
2
BATT
CHG
Battery indicator
Power push-button switch
Power switch
3TR006021BZA̲WX-LT150 09.5.22 04:08 PM ページ12


