Model No.
WV-NS324
Color CCTV Camera
Operating Instructions
Before attempting to connect or operate this product,
please read these instructions carefully and save this manual for future use.
Page 1: ...Model No WV NS324 Color CCTV Camera Operating Instructions Before attempting to connect or operate this product please read these instructions carefully and save this manual for future use ...
Page 2: ...his product may be found on the top of the unit You should note the serial number of this unit in the space provided and retain this book as a permanent record of your purchase to aid identification in the event of theft Model No WV NS324 Serial No Warning This equipment generates and uses radio frequency energy and if not installed and used properly i e in strict accor dance with the instruction ...
Page 3: ... your outlet consult an electri cian for replacement of the obsolete outlet 10 Protect the power cord from being walked on or pinched particularly at plugs convenience receptacles and the points where they exit from the apparatus 11 Only use attachments accessories specified by the manufacturer 12 Use only with the cart stand tripod bracket or table specified by the manufacturer or sold with the a...
Page 4: ...ME POSITION 34 Self return Setting SELF RETURN 34 Auto Mode Selection AUTO MODE 34 Flip A Chip Setting 36 Cleaning CLEANING 36 Image Hold IMAGE HOLD 36 Camera Setting 37 CAMERA SETUP WITH PC 45 SETUP FROM PC 46 Image Setup 46 Alarm Setup 46 FTP Client Setup 47 User Setup 48 Host Setup 49 System Setup 49 Multiscreen Setup 50 Preset Setup 51 Auto Pan Setting 51 INITIALIZING 52 Setting the Switches 5...
Page 5: ...ll the setting status of Netscape Communicator in advance 2 Uninstall the old Netscape Communicator and delete the holder named Netscape from your PC once 3 Install the applicable version of Netscape Communicator to your PC 4 Input the same setting status that item 1 to the Netscape Communicator Trademarks Adobe Adobe logos and Acrobat are registered trademarks of Adobe Systems Incorporated in the...
Page 6: ...e the refresh mode on the special menu See page 44 To use this camera with the WJ SX550C Matrix Switcher set the auto cleaning function on each unit then clean the WV NS324 once a day Preset Data Uploading or Downloading To download the preset data from the camera to the controller or upload the downloaded data to the cam era set the following functions to OFF Downloading or uploading the data may...
Page 7: ...ct specifications for weights 8 Do not operate the camera beyond the specified temperature humidity or power source ratings Do not use the camera in an extreme environment where high temperature or high humidity exists Do not place the camera near heat sources such as radiators stoves or other units that produce heat Use the camera under conditions where tempera tures are between 10 C and 50 C 14 ...
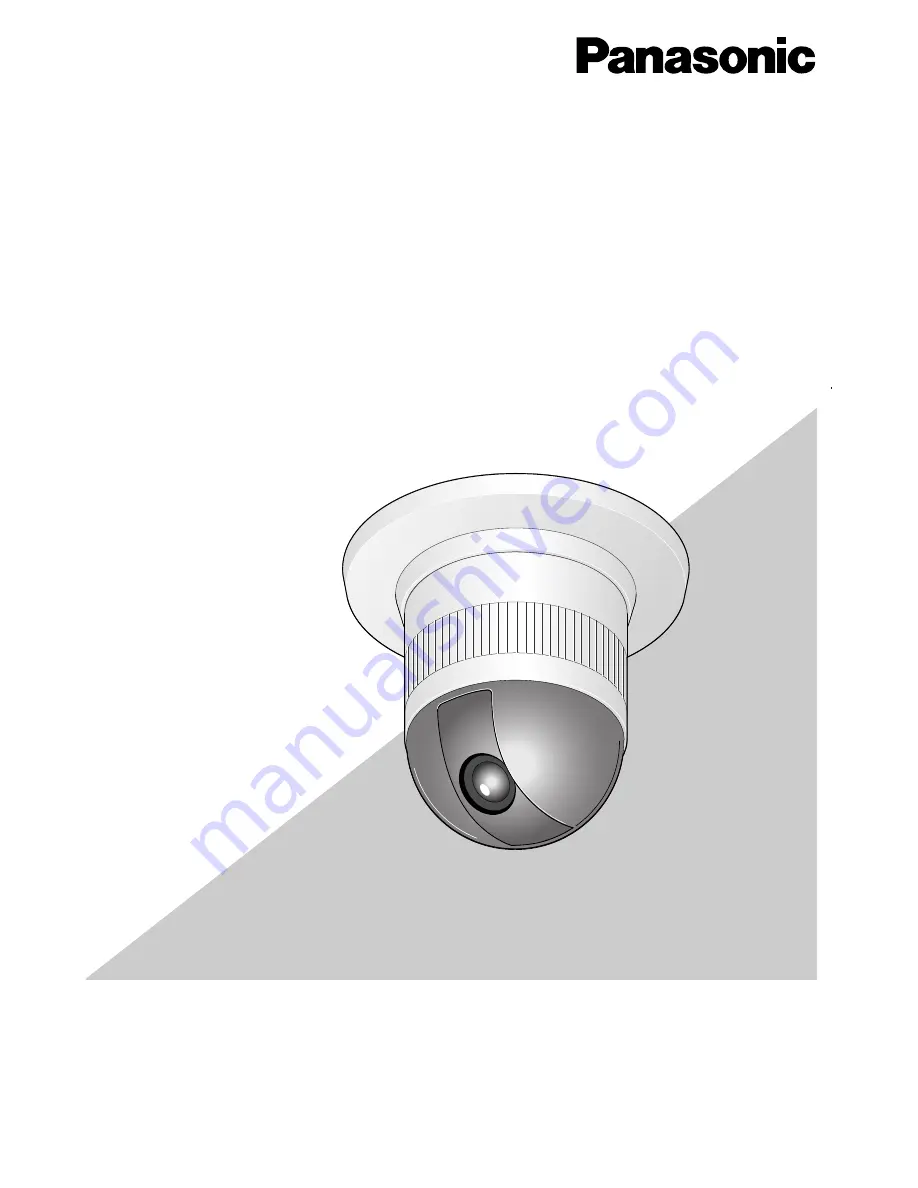
Page 8: ...STRUCTION q Alarm Input Connector w Alarm Output Connector e Video Output Connector r Network Port t Power Cable y Camera Mounting Base Color Gray u Panning Starting Point i Fall Prevention Wire o Decoration Cover 0 Dome Cover ...
Page 9: ...r once before removing the screw 2 Turn the camera mounting base approximately 15 degrees counterclockwise and remove the base from the camera 2 Setting Switches The camera is provided with an 8 bit DIP switch The 8 bit DIP switch is used to return the camera to the factory default settings Switch settings are read into the camera when the power is turned on Make sure to turn the camera off then t...
Page 10: ...he supplied dust protection sheet if the cam era mounting base is liable to be exposed to a dusty atmosphere Remove the cover from the dust protection sheet then stick the sheet on the cam era mounting base Remove the sheet before mounting the camera on the base While the camera is separated from the base keep the camera in the supplied polyethylene sack 4 Mount the camera on the camera mounting b...
Page 11: ... base are installed safely 3 When removing the camera from the camera mounting base loosen and press up the cam era fixing screw M3 by using a screwdriver 6 Fix the decoration cover to the camera mounting base a Sideway Cable Exit Pass the cables through the cutout made in the diecast case and decoration cover b Top Cable Exit Push the decoration cover against the camera mounting base ...
Page 12: ...LASS 2 POWER SUPPLY ONLY How to Assemble the Cable with the Accessory Connector Strip back the cable jacket approx 3 mm 0 1 inch and separate the individual conductors Copper wire size AWG 12 CONNECTIONS Precautions The following connections should be made by qualified service personnel or system installers in accordance with all local codes See the reverse side of the cover page for mains lead co...
Page 13: ...s The maximum extensible coaxial cable length between the camera and the monitor is shown in the table Network Connections Prior to connections specify the connection type and prepare relevant devices and cables Notes We recommend that you use connection type 1 or 2 when setting up the network address of the cam era Be sure to unplug or switch off all the devices before starting connections Direct...
Page 14: ... connection Network Cable Straight type 16 clients maximum Switching Hub PC Network Cable Straight type Internet DSL CATV Modem PC 16 clients maximum Switching Hub or Router PC 16 clients maximum Network Cable Straight type Internet DSL CATV Modem Necessaries Straight type network cable Category 5 CATV modem cable modem or DSL modem Switching hub or router for 10BASE T 100BASE TX Notes Setting the...
Page 15: ...SH button will display the updated MAC addresses and IP addresses of all the connected cameras that are in the same subnet The setup window appears 3 Set parameters for each item IP Address Subnet Mask Default Gateway HTTP Port 4 Input the parameters for your environment DHCP DNS 5 Click the Enable button when using DHCP and DNS When using the DHCP and DNS functions enter the Primary DNS Server ad...
Page 16: ... 0 XXX where XXX should be a number from 2 to 254 except 10 Note The procedure described below is based on the assumption that Windows XP is running on the PC When running an OS other than Windows XP see the manual included with the OS 1 Start up your PC 2 Click the Start button and select Control Panel 3 Double click the Network and Internet Connections icon 4 Double click the Network Connections...
Page 17: ...tup of the PC begin the network setup of the camera If two or more cam eras are connected each camera needs to be set up individually The following information is necessary for the network setup of the camera If you do not have this information contact your network administrator or Internet service provider IP address Subnet mask Default gateway when using a gateway server or a router Port number ...
Page 18: ...t setting is admin The adminis trator should change the user name and pass word in the User Setting Menu 4 Click the OK button The Setup Menu window appears 5 Click the Network button The Network Setup window appears 6 Enter parameters for each item in the columns The parameters differ depending on the connec tion type ...
Page 19: ...ed in an intranet Net mask Enter the Net mask assigned by your network administrator The setting is not required if DHCP is used in an intranet Default gateway Enter the IP address of the default gateway assigned by your net work administrator The setting is not required if DHCP is used in an intranet Host name Contact your network administrator and enter the assigned host name if required Network...
Page 20: ...dary DNS Enter the IP address of DNS when using the DNS server Contact your Internet service provider for the IP address of the DNS Primary and secondary IP addresses can be set for the DNS DDNS Click ON when using DDNS function Host name Ask your administrator User name Ask your administrator Password Ask your administrator Access interval Ask your administrator Connection type 4 IP address The s...
Page 21: ... number set for NTP when using the NTP function DHCP Click ON if the router uses DHCP DNS Click ON when using the DNS server Primary DNS 0 0 0 0 Secondary DNS Enter the IP address of DNS when using the DNS server Contact your Internet service provider for the IP address of the DNS Primary and secondary IP addresses can be set for the DNS DDNS Click ON when using the DDNS function Host name Ask you...
Page 22: ...ask DNS Domain Name System Set to ON when using DNS Enter the primary address If nec essary enter the secondary address When set to AUTO the DHCP server will auto matically send you an address DDNS Dynamic DNS Consult your system administrator Note You can correct the DHCP setting to off via the Panasonic IP setting or Camera control menu if you have wrongly set DHCP to ON in a none DHCP DHCP serv...
Page 23: ...s bar The factory default for the camera address is 192 168 0 10 4 Press Enter on the keyboard 5 The main window of the WV NS324 camera will appear on the display Note Adobe Acrobat Reader should have been installed on your PC to open the manual Visit the home pages of Adobe Systems Incorpo rated Camera Control 1 Click Camera Control in the Main Menu 2 The authentication dialog appears The factory...
Page 24: ...t 1 to Preset 8 Notes Presets 9 to 16 are not available for taking pictures If you skip a preset position number in the setting the skipped number cannot be preset afterward The skipped number is replaced with its next previ ous number and the picture on the next previous number is displayed on the position of the skipped number MULTISHOT does not work normally when operat ing on a low speed netwo...
Page 25: ...NU SETUPS Camera Setup Camera A A Network Setup Camera A A Network Setup HTML A NA Operating Mode Setup HTML A NA Alarm Setup HTML A NA FTP Client Setup HTML A NA User Authentication HTML A NA Host Authentication HTML A NA System Setup HTML A NA A Available NA Not Available Note 1 The setup menus are operated from a system device e g a Video Multiplexer or a system controller The side panel button...
Page 26: ...e not regis tered user names yet At this time you need not to enter the password Menu control buttons will appear under the camera image 4 Click the Menu ON button to overlay SET UP MENU on the camera image The cursor is high lighted in the window Note Refer to the next page for setup operations 5 Click the MENU OFF button after finishing the setup operations The changed settings will be stored in...
Page 27: ...Position Setting P 31 Auto Focus Setting P 33 Sensitivity Level Adjustment P 42 Dwell Time Setting P 43 Display Mode Setting P 42 Mask Area Setting P 42 Chroma Level Setting P 43 Aperture Level Setting P 43 Pedestal Level Setting P 43 Camera Phase Hue Setting P 43 Digital Noise Reduction P 43 Demonstration Display P 43 To Restore the Camera Default Position P 44 Camera Resetting P 44 INT Manual Se...
Page 28: ... R L SW for 2 seconds or more OPERATE LOGIN ALARM CAM SETUP PROGRAM PROGRAM PRESET UNIT A IRIS CLOSE OPEN NEAR FAR WIDE TELE FOCUS ZOOM AUTO FOCUS IRIS RESET AUTO SETUP ALM SUSPEND FUNCTION CAM FUNCTION MULTI SCREEN SELECT DEF WIPER EL ZOOM SHIFT ALM RESET VCR CAM STILL ALM RECALL PATROL LEARN PATROL STOP AUX 1 AUX 2 B W UNIT SEQ PAUSE SLOW SEQUENCE PATROL PLAY HOME PRESET UNIT B MON CAM LOGOUT ES...
Page 29: ...tting Preset Menu Display 1 Displaying the preset menu directly 1 Move the cursor to PRESET 1 O and select the position number by moving the joystick to the right or left 2 Press the CAM SET key The preset setting menu appears on the moni tor screen 2 Displaying the preset menu from the PRESET NUMBER SET menu 1 Move the cursor to MAP O and press the CAM SET key The PRESET NUMBER SET menu appears o...
Page 30: ... key The positions are set and the screen returns to the position setting menu Notes When the camera is used at a nearly horizontal angle the focus may not be adjustable to a high level of accuracy If you move the cursor to the position number and move the joystick to the right or left the position number can be selected The selected preset position number can also be set after pressing the CAM SE...
Page 31: ...y the desired ID 3 Follow the step To Change an Entered Preset ID if necessary To Set a Display Position for a Preset ID 1 Move the cursor to POSI and press the CAM SET key The display position set menu appears 2 Move the ID to the desired position by using the joystick and press the MON ESC key The display position is set and the monitor screen returns to the preset ID setting menu To Enter the N...
Page 32: ... moving to a preset position To Return to the Preset Number Set Menu Move the cursor to RET and press the CAM SET key The PRESET NUMBER SET menu appears with the mark to the right of the preset position number To Return to the Setup Menu Move the cursor to RET and press the CAM SET key Deleting Preset Positions 1 Move the cursor to PRESET 1 and select the posi tion number to be deleted by using th...
Page 33: ...at is set to AUTO PAN when a specific time has elapsed after a manual operation Auto Mode Selection AUTO MODE AUTO MODE activates the camera s auto turn within the preset panning range 1 Auto mode Move the cursor to AUTO MODE and select a mode by moving the joystick to the right or left The factory default setting is OFF Modes change as follows OFF No automatic operation The camera can be operated...
Page 34: ...ult setting is OFF ON Manual pan is limited from the starting point to the endpoint specified by position setting Set ENDLESS to OFF before setting PAN LIMIT to ON OFF Manual pan is not limited Note When ON is selected for PAN LIMIT manual pan moves the camera away from the other side PAN LIMIT of the start end range 6 ENDLESS to ON OFF The factory default setting is OFF ON The camera pans from th...
Page 35: ...ical contacts are refreshed at regular intervals approx 7 days if CLEANING is set to ON A dry contact adversely affects picture quality and motor operation The factory default setting is OFF ON The contacts are cleaned for approx 1 minute CLEANING disappears when the process is com pleted OFF No contact cleaning Note Select OFF when the camera downloads or uploads preset data Image Hold IMAGE HOLD...
Page 36: ...n Backlight compensation is available in the ALC mode It eliminates strong background light which makes the camera picture dark such as a spotlight MANUAL The lens iris is fixed at the value that you have set regardless of the brightness of an object 1 Display the SET UP menu on the monitor screen by referring to page 29 2 The factory default setting is ALC When you select ALC set backlight compen...
Page 37: ...ch a case the object at the centre of the screen can be still clearly seen even though the backlight may vary 1 Press the CAM SET key after selecting ALC The ALC CONT menu appears 2 Move the cursor to the BLC and select ON 3 If you want to adjust the video output level move the I cursor for LEVEL Adjust it to the desired level by using the joystick 4 Move the cursor to RET and press the CAM SET ke...
Page 38: ...st priori ty 2 Line lock LL 3 Internal sync INT lowest priority 2 Whenever the vertical drive pulse VD2 is supplied to the camera the camera sync mode is automati cally switched to the multiplexed vertical drive pulse VD2 regardless of the selected sync mode Line lock Sync Mode LL 1 Move the cursor to SYNC and select LL by using the joystick LL sync mode is not available when the multiplexed verti...
Page 39: ...the vertical phase of the camera video output signal may be disturbed White Balance WHITE BAL 1 Auto Tracing White Balance Mode ATW In this mode the color temperature is monitored contin uously and thereby white balance is set automatically The color temperature range for the proper white bal ance is approx 2 600 to 6 000 K Proper white balance may not be obtained under the following conditions 1 ...
Page 40: ...e auto focus lens may not function properly in the AUTO mode under the following conditions 1 Dirt or water on window glass The auto focus may focus on the dirt or water 2 Low lighting or illumination 3 Bright objects or high intensity objects 4 Single color object such as a white wall or fine felt 5 No centre objects and sloping objects 6 Far and near objects on the screen Electronic Zoom EL ZOOM...
Page 41: ...e the cursor to MASK SET and press the CAM SET key 48 mask areas appear on the monitor screen Refer to the Light Control Setting on page 38 for masking operations 4 After masking areas press the MON ESC key The MOTION DETECT menu appears on the moni tor screen 5 Move the cursor to ALARM and select ON or OFF by using the joystick The factory default setting is OFF ON The alarm signal is supplied wh...
Page 42: ...AL and press the F2 button of the WV CU550CJ The special menu appears on the monitor screen For the WV RM70 keep pressing the Right and Left switches simultaneously for 2 seconds or more 1 Chroma Level Setting CHROMA GAIN 2 Aperture Level Setting AP GAIN 3 Pedestal Level Setting PEDESTAL 4 Camera Phase Hue Setting HUE 1 Move the cursor to HUE The I cursor appears in inverse video 2 While observing...
Page 43: ...imultaneously for 2 seconds or more 9 To Close the SPECIAL Menu Move the cursor to RET and press the CAM SET key The setup menu appears on the monitor screen Reset to the Factory Default Settings Any of the above settings plus the ALC MANUAL level control and phase adjustments can be reset to the fac tory default settings by placing the cursor over the desired mode and then pressing the F2 button ...
Page 44: ...t up down right Move the cursor 2 ALL RESET button Resets all the settings to the factory default when the cursor is at CAMERA RESET in the SPECIAL menu 3 RESET SPECIAL button Resets the parameter of an item when the cur sor is at the item Opens the SPECIAL menu when the cursor is at SPECIAL in the CAMERA SET UP menu 4 ESC button Returns the menu to the next higher layer CAMERA SETUP WITH PC q w e...
Page 45: ...Super Fine Fine Normal and Low Bandwidth Control 32 kbps 64 kbps 128 kbps 256 kbps 512 kbps 1024 kbps and Unlimited 3 Click the SET REBOOT button It will take about 5 seconds to complete the reboot 4 Click the Go to Main Menu button to go back to the main page The 640 x 240 selection is good to display moving images without aliasing while 640 x 480 selection is good to display motionless images No...
Page 46: ...lds before and after an alarm input are stored in the memories of the cameras Set the number of image frames for pre recording 0 20 and post recording 1 20 Set the recording rate fps frame per second Pre recording rates 1 10 1 5 1 3 1 2 1 2 3 3 5 The default setting is 1 Post recording rates 1 10 1 5 1 3 1 2 1 2 3 3 5 10 The default setting is 1 Click the SET REBOOT button 6 Panasonic Protocol Set...
Page 47: ...umber of files and the frame rate fps Select ON or OFF to transmit the image files ON Transmits the files when alarm arises OFF Does not transmit Enter the receiver directory Enter the file name 5 Click the SET REBOOT button Note Wait around 5 seconds or more when exe cuting SET REBOOT button 6 Click the Go to Main Menu button to go back to the main window Note Set the file system on the FTP serve...
Page 48: ... lowed by user authentication if both are set to ON All users will become level 3 if both the host and the user authentications are set to OFF An unregistered host will be unable to access the camera Never turn around the order start with the host registration and then proceed to authentica tion ON OFF System Setup 1 Click the System button 2 Time Adjustment Click the MANUAL or NTP radio button an...
Page 49: ...rmat Select the Time format by pressing the o button and click the SET button 3 time format are available MM DD YYYY DD MM YYYY or YYYY MM DD MM month DD date YYYY year 6 Daylight Saving Time Click ON or OFF and the SET button if necessary ON The time indication is advanced one hour OFF No daylight saving time or to go back to reg ular time 7 Camera Title Enter any Camera Title up to 32 characters...
Page 50: ...lick the END POINT button to assign the starting position AUTO PAN ON OFF button for confirmation REVERSE Set positions from end to start in reverse order Preset Setup You can preset up to 16 viewpoint positions 1 Click the Camera button in the Setup menu and then click the Preset button 2 Adjust the angle of view in the same manner as described for Camera Control 3 Click the PROGRAM button this r...
Page 51: ...ould always be set to off Menus Initializing Setup menu Initializing HTML files Initializing Setup menu and HTML files Common procedures 1 Set DIP SW1 and SW2 in accordance with the table 2 Turn the power on and wait until the servo initial ization of Camera is completed 3 Turn the power off and return the DIP switch to normal position Note Do not make any DIP switch setting other than above No Di...
Page 52: ... can be saved as a still image on your PC 1 Move the cursor to the picture area on the screen and right click to select Save As 2 Enter a file name to be assigned to the picture and specify the storage place in the dialog box 3 Click Save VIEWING PICTURES ...
Page 53: ... new picture data when the memory capacity is exceeded The table below gives the number of pictures available for post alarm storage When the pre alarm file is set to 20 When the pre alarm file is set to none E mail notifications can be sent to a maximum of four addresses with or without attached picture file A mail contains the camera name time date of occurrence cause of event and the reference ...
Page 54: ...op window or in the Camera Control window Click the Setup Menu or Alarm List button 2 Indicating ALARM in the Alarm window Click the Setup Menu button VMD Setup You can set up VMD Video Motion Detector Detection Area Setup 1 In the main window click the Camera Control but ton The menu control buttons appear under the image display area 2 Click the MENU ON button SET UP will be overlaid on the came...
Page 55: ... striped The striped area will change to blinking non masked 7 Repeat step 6 until all areas are set 8 Click the ESC button to return to the MOTION DETECT menu 9 VMD demonstration To confirm the alarm output function move the cursor to ALARM and turn it to ON Move the cursor to DISPLAY MODE and click the SET button The demonstration starts and the areas where motion is detected will blink Click SE...
Page 56: ...ber of pictures for the event 4 Use the buttons to flip over the Alarm event picture pages FIRST FRAME Displays the first alarm event pic ture PREVIOUS Displays the previous alarm event pic ture ALARM FRAME Displays the number of pictures recorded NEXT Display the next alarm event picture LAST FRAME Skips to the latest alarm event 5 Click the Go to Main Menu button to go back to the main window No...
Page 57: ...ate y m d t Number of alarm images n URL of Alarm Image u Display example Alarm arisen at NS320 192 168 0 10 Date 2003 02 04 13 55 40 Number of alarm image 5 URL of Alarm Image http 192 168 0 10 ALM0000_00 jpg Item Substitution Letter Description indication type etc Alarm date year Y 4 digit indication 2000 to 2099 Alarm date year y 2 digit indication 00 to 99 Alarm date month m 2 digit indication...
Page 58: ...g the IP address of the unit For the FTP software use the user name and administrator password level 1 registered in the User Setting window If no administrator has been registered proceed as follows User Name admin Password None Step 3 Upload the file almmail tmpl to this unit Note Do not upload with FTP when connecting with low baud rate lines such as ISDN ...
Page 59: ...s connected to the AUX OUT terminal of the camera 1 Set this item on the Camera Control window 2 Select the polarity for switching the connected device on or off High Supplies high voltage Low Supplies low voltage Note The initial state when the camera is turned on is HIGH AUXILIARY OUTPUT CONTROL ...
Page 60: ...ss the camera from the browser Are the network cables connected properly Is the status indicator lamp of the network connection termi nal on If not a network connection has not been established or the other devices are not in operation Is a valid IP address set for the camera Are you connecting to a wrong IP address Open the command prompt on your PC and enter ping enter here the IP address set fo...
Page 61: ...LARM IN Camera Section Effective pixels 3 65 mm H x 2 71 mm V 1 4 768 H x 494 V 15 734 kHz internal line lock multiplexed vertical drive VD2 59 94 Hz 1 0 V p p NTSC composite 75 Ω more than 480 lines at center more than 350 lines at center 50 dB AGC OFF weight on 1 0 lx 0 1 foot candle AGC ON HIGH Scanning area Synchronization Horizontal scanning fre quency Vertical scanning frequency Video output...
Page 62: ...ations are subject to change without notice 360 endless possible in auto pan mode manual auto pan manual approx 1 0 s to 100 s 8 steps 64 steps preset position maximum approx 100 s 0 to 92 manual manual approx 1 0 s to 100 s 8 steps 64 steps preset position maximum approx 100 s pan tilt lens 16 preset positions home position Panning angle setting Panning mode Panning speed Tilting range Tilting mo...
Page 63: ...7 1 CAM FUNC Off 1 7 2 CAM FUNC Speed Up 1 7 3 CAM FUNC Speed Down 1 7 4 CAM FUNC AGC On 1 7 5 CAM FUNC Off 1 7 6 CAM FUNC SENS UP On 1 7 7 CAM FUNC Off 1 7 8 CAM FUNC Up 1 7 9 CAM FUNC Down 1 8 0 CAM FUNC SENS UP AUTO On 1 8 1 CAM FUNC Off 1 8 2 CAM FUNC Up 1 8 3 CAM FUNC Down 1 8 4 CAM FUNC LL SYNC phase INC 1 8 5 CAM FUNC DEC 1 8 6 CAM FUNC PAN 180 turn 1 8 7 CAM FUNC CLEANING On 1 8 8 CAM FUNC...
Page 64: ...85 809 750 4300 Panasonic Digital Communications Security Company Unit of Matsushita Electric Corporation of America Security Systems Group www panasonic com cctv Executive Office One Panasonic Way 3E 7 Secaucus New Jersey 07094 Zone Office Eastern One Panasonic Way Secaucus NJ 07094 201 348 7303 Central 1707 N Randal Road Elgin IL 60123 847 468 5205 Western 6550 Katella Ave Cypress CA 90630 714 3...