IMPORTANT
•
After the VIQS setting is set to “On”, the VIQS area may move out of alignment when the JPEG/H.264
“Image capture mode” setting is changed. Make sure to check the VIQS setting after changing the
“Image capture mode” setting.
•
After configuring the VIQS area, the VIQS area may move out of alignment when “Extra zoom” is
configured. Make sure to check the VIQS area after configuring “Extra zoom”.
Configure the VIQS area
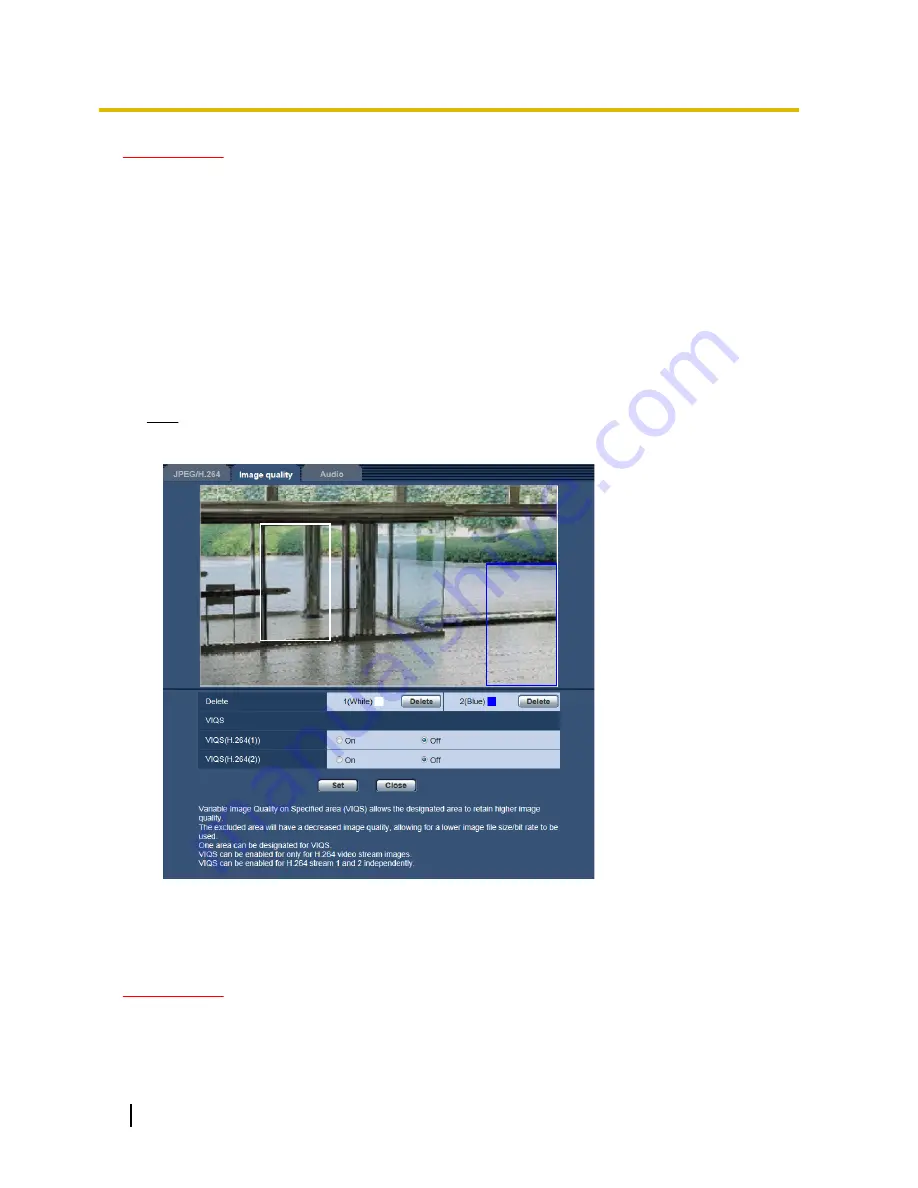
The VIQS area is specified by following the steps below.
1.
Drag the mouse on the screen to specify the area (up to 2 areas).
→
The specified area is set to area “1(White)”, and the outline is displayed.
The areas are set in the area number order from number 1. The color next to the area number show
the color of the corresponding outline.
Note
•
A selectable area is limited.
2.
Select [On]/[Off] to activate/deactivate a distributed image of [VIQS(H.264(1))] or [VIQS(H.264(2))].
3.
Click the [Set] button.
→
This unit is updated with the setting contents. Click the [Delete] button corresponding to the area to be
deleted.
IMPORTANT
•
No setting contents are determined unless the [Set] button is clicked.
•
To check the window after VIQS setting, display an H.264 image on the “Live” page.
100
Operating Instructions
11 Configure the settings relating to images and audio [Image/Audio]


