25
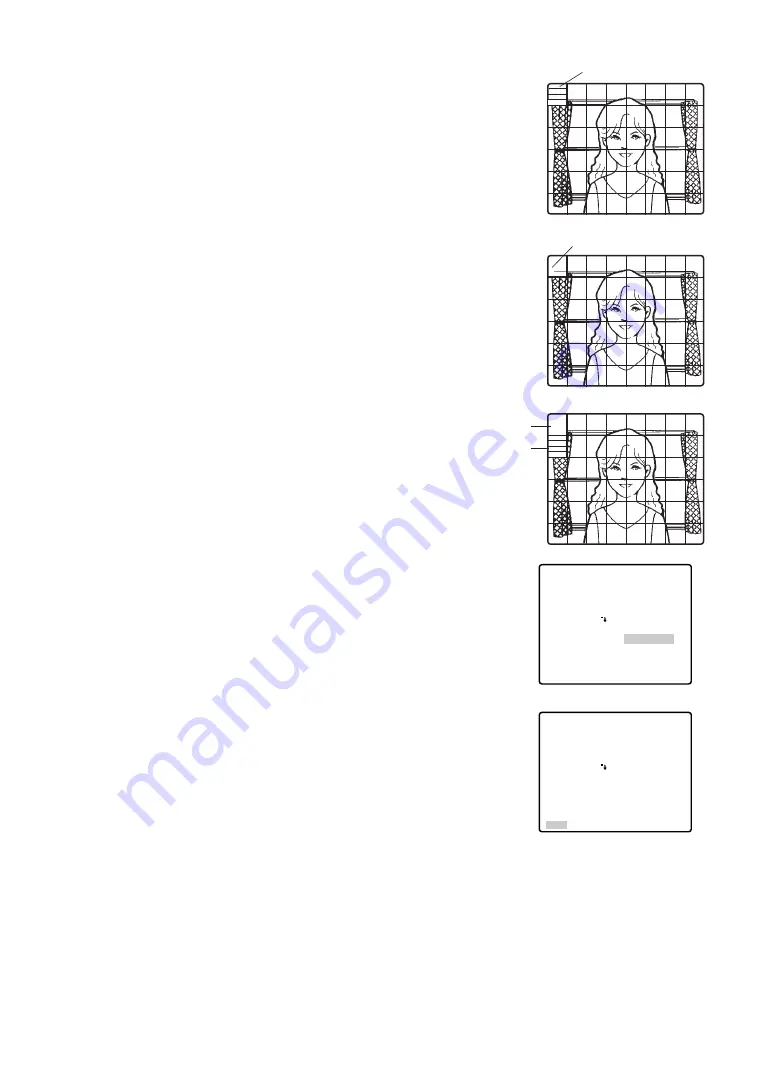
5. After masking is completed, press the MON (ESC) key. The 48
mask areas on the monitor screen disappear and the ALC CONT
menu appears.
6. If you want to change the video output level (picture contrast),
move the “I” cursor for LEVEL and adjust the level.
7. Move the cursor to RET and press the CAM (SET) key to return to
the CAM SET UP menu. To return to the camera picture, press the
F4 button.
Blinking
Turns to white
** ALC CONT **
BACK LIGHT COMP
BLC
MASK SET
LEVEL
RET
OFF
••|•••••
- +
** ALC CONT **
BACK LIGHT COMP
BLC
MASK SET
LEVEL
RET
OFF
••|•••••
- +
(2) ALC Mode with BLC OFF
1. Move the cursor to the BLC and select OFF. When you select
MANUAL, BLC is not available. The MASK SET appears on the
menu.
2. Move the cursor to MASK SET and press the CAM (SET) key. The
48 mask areas appear on the monitor screen. The cursor is blink-
ing in the top left corner of the screen.
3. To mask an area where backlight is bright, move the cursor to the
area and press the CAM (SET) key. The mask turns to white.
Repeat this procedure to mask the desired area.
4. To cancel a masked area, move the cursor to the area, and press
the CAM (SET) key. To cancel all masking areas, press the F2
button of the WV-CU550CJ. For the WV-RM70, press the right and
left switches simultaneously.
Blinking
Blinking


