background image

The serial number of this product may be found on the
bottom of the unit.
You should note the serial number of this unit in the
space provided and retain this book as a permanent
record of your purchase to aid identification in the event
of theft.

Model No. 

Serial No. 

THIS APPARATUS MUST BE EARTHED.

To ensure safe operation the three-pin plug supplied must be insert-
ed only into a standard three-pin power point which is effectively
earthed through the normal household wiring. Extension cords used
with the equipment must be three-core and be correctly wired to pro-
vide connection to earth. Wrongly wired extension cords are a major
cause of fatalities.
The fact that the equipment operates satisfactorily does not imply
that the power point is earthed and that the installation is completely
safe. For your safety, if in any doubt about the effective earthing of
the power point, consult a qualified electrician.

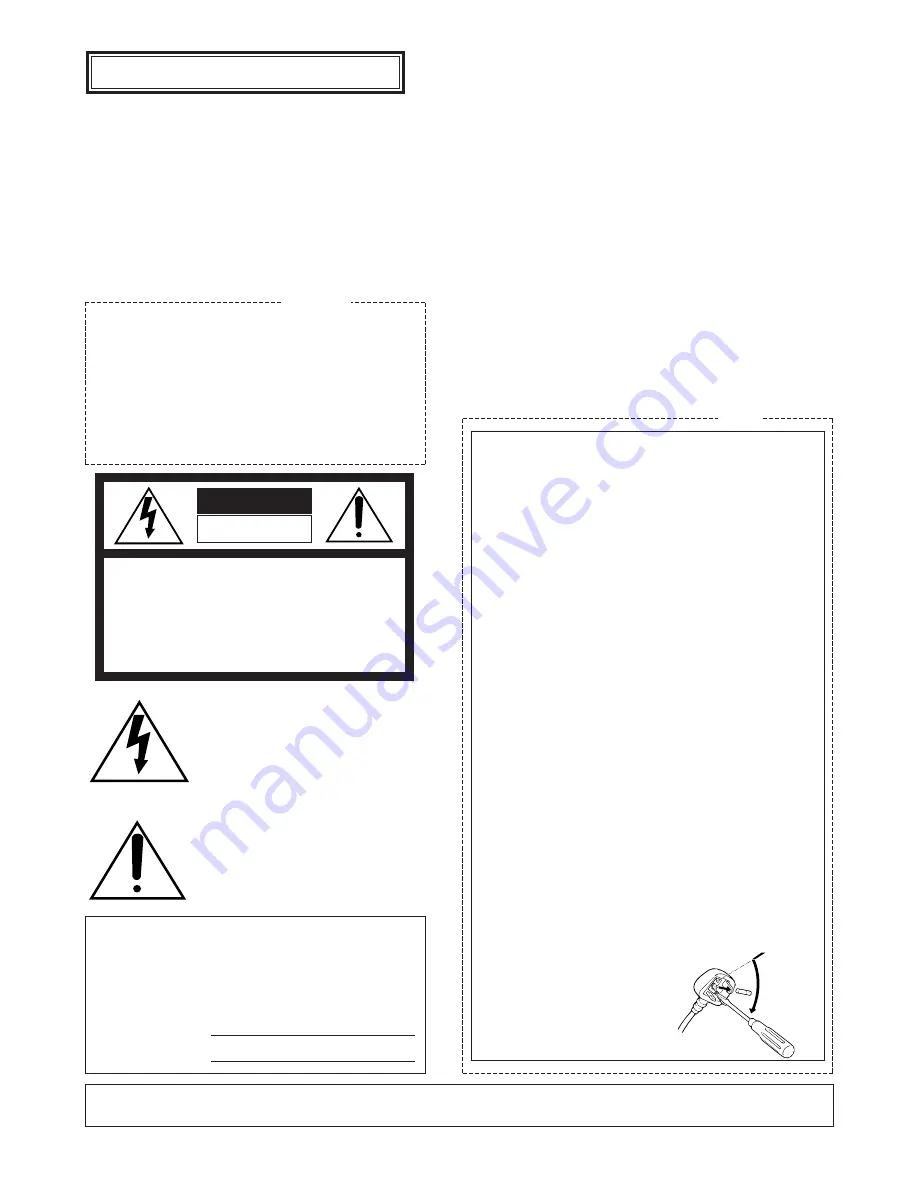
The lightning flash with arrowhead sym-
bol, within an equilateral triangle, is
interned to alert the user to the presence
of uninsulated "dangerous voltage" within
the product's enclosure that may be of
sufficient magnitude to constitute a risk of
electric shock to persons.

The exclamation point within an equilat-
eral triangle is intended to alert the user
to the presence of important operating
and maintenance (servicing) instructions
in the literature accompanying the appli-
ance.

WARNING:

TO PREVENT FIRE OR ELECTRIC SHOCK HAZARD, DO NOT EXPOSE THIS APPLIANCE TO RAIN OR MOISTURE.

CAUTION:
TO REDUCE THE RISK OF ELECTRIC SHOCK,
DO NOT REMOVE COVER (OR BACK), NO USER
SERVICEABLE PARTS INSIDE.
REFER SERVICING TO QUALIFIED SERVICE
PERSONNEL.

CAUTION

RISK OF ELECTRIC SHOCK

DO NOT OPEN

For Australia

FOR YOUR SAFETY PLEASE READ THE FOLLOWING TEXT CARE-
FULLY.
This appliance is supplied with a moulded three pin mains plug for your
safety and convenience.
A 13 amp fuse is fitted in this plug.
Should the fuse need to be replaced please ensure that the replacement
fuse has a rating of 13 amp and that it is approved by ASTA or BSI to
BS1362.
Check for the ASTA mark 

H

or the BSI mark 

G

on the body of the

fuse.
If the plug contains a removable fuse cover you must ensure that it is
refitted when the fuse is replaced.
If you lose the fuse cover the plug must not be used until a replacement
cover is obtained.
A replacement fuse cover can be purchased from your local Panasonic
Dealer.

IF THE FITTED MOULDED PLUG IS UNSUITABLE FOR THE SOCK-
ET OUTLET IN YOUR HOME THEN THE FUSE SHOULD BE
REMOVED AND THE PLUG CUT OFF AND DISPOSED OF SAFELY.
THERE IS A DANGER OF SEVERE ELECTRICAL SHOCK IF THE
CUT OFF PLUG IS INSERTED INTO ANY 13 AMP SOCKET.
If a new plug is to be fitted please observe the wiring code as shown
below.
If in any doubt please consult a qualified electrician.
WARNING: This apparatus must be earthed.

IMPORTANT

The wires in this mains lead are coloured in accordance with the follow-
ing code.

Green-and-yellow:

Earth

Blue:

Neutral

Brown:

Live

As the colours of the wire in the mains lead of this appliance may not

correspond with the coloured markings identifying the terminals in your
plug, proceed as follows.

The wire which is coloured green-and-yellow must be connected to

the terminal in the plug which is marked with the letter or by the earth
symbol 

I

or coloured green or green-and-yellow.

The wire which is coloured blue must be connected to the terminal in

the plug which is marked with the letter or coloured black.

The wire which is coloured brown must be connected to the terminal

in the plug which is marked with the letter or coloured red.

How to replace the fuse
Open the fuse compartment with
a screwdriver and replace the fuse
and fuse cover.

For U.K.

ENGLISH VERSION

CAUTION:

Before attempting to connect or operate this prod-
uct, please read the label on the bottom.

Summary of Contents for WJFS616 - SWITCHER

Page 1: ...Video Multiplexer WJ FS616 Before attempting to connect or operate this product please read these instructions completely ENGLISH DEUTSCH FRANÇAIS ESPAÑOL ...

Page 2: ...moulded three pin mains plug for your safety and convenience A 13 amp fuse is fitted in this plug Should the fuse need to be replaced please ensure that the replacement fuse has a rating of 13 amp and that it is approved by ASTA or BSI to BS1362 Check for the ASTA mark H or the BSI mark G on the body of the fuse If the plug contains a removable fuse cover you must ensure that it is refitted when t...

Page 3: ...okumenter som fælger bestem melsene i direktiven 73 23 EEC og 89 336 EEC We declare under our sole responsibility that the product to which this declaration relates is in conformity with the standards or other normative documents following the provisions of Directives EEC 73 23 and EEC 89 336 Noi dichiariamo sotto nostra esclusiva responsabilità che il prodotto a cui si riferisce la presente dichi...

Page 4: ...nnel order and individual dwell time The pattern of a 4 7 9 10 13 or 16 multiscreen sequence consisting of up to 5 steps can be pro grammed as shown below 4 SEGMENT SCREEN 7 SEGMENT SCREEN 9 SEGMENT SCREEN 10 SEGMENT SCREEN 13 SEGMENT SCREEN 16 SEGMENT SCREEN 2 sec 5 sec 3 sec 1 sec 4 sec Electronic zoom and still image functions are avail able The zoom area can be selected with the direction arro...

Page 5: ...ot strike or shake as this may damage the appliance Do not expose the appliance to water or moisture nor try to operate it in wet areas Do take immediate action if the appliance becomes wet Turn the power off and refer servicing to quali fied service personnel Moisture can damage the appliance and also cause electric shock Do not use strong or abrasive detergents when cleaning the appliance body U...

Page 6: ...to quali fied service personnel Note To prevent that the power of the video multi plexer is turned off accidentally install the sup plied switch protector as shown below 2 Lock Indicator LOCK This LED Yellow indicator lights up to indicate that the LOCK switch is in ON position While this LED is lit control from the video multi plexer is disabled 3 Alarm Reset Button ALARM RESET This button is use...

Page 7: ...s automatically set 5 5 Spot Monitor Button SPOT This button is used to operate the spot monitor con nected to the SPOT OUT connector The LED Green in the button lights up to indicate that the spot monitor is selected 6 Multiscreen Monitor Button MULTISCREEN This button is used to operate the multiscreen monitor connected to the MULTISCREEN connec tor The LED Green in the button lights up to indic...

Page 8: ...ors with an automatic 75Ω termination The camera control signal multiplexed on the video signal is not available at this connector When the Power Switch of the Video Multiplexer is turned off no signal is present at this connector 42 Camera Input Connectors CAMERA IN These connectors accepts either a colour or B W composite video signal from the camera In addi tion the VD2 signal for synchronizing...

Page 9: ...PC to this connector will allow you to remote control the video multiplexer 53 Remote Output Connector VTR CONTROL REMOTE OUT The VTR control signal for the time lapse VTR is pro vided via this connector You can select on the setup menu whether to have the VTR control signal supplied from this connector or the RS 232C Port 54 Alarm Remote Control Connector ALARM REMOTE This connector accepts the a...

Page 10: ...MULTISCREEN SELECT FUNCTION PRE POSI STILL HOME AUTO CLOSEOPEN IRIS AF FOCUS NEAR ZOOM TELE FAR WIDE System Controller for WJ FS 616 LEFT RIGHT UP DOWN ALARM BUSY F3 F4 F2 F1 CONTROLLER ON OFF IN OUT TERM ON OFF DATA 0 1 2 3 4 5 6 7 8 9 CONTROLLER UNIT NO 1 8 T L MODE SET UP PLAY REV CAMERA SET ON CAMERA SET OFF ALT ALL FS RESET AUX1 AUX2 MODE Connection with Video Multiplexer WJ FS616 TERM MODE O...

Page 11: ...with the Alternate button activates reverse playback on the Time Lapse VTR Play Button PLAY B This button used in combination with the Alternate button activates playback on the Time Lapse VTR 6 Joystick Controller The joystick is used to operate the Pan Tilt Head manually or to move the cursor to the desired posi tion on the setup menu of the Video Multiplexer 7 Iris Control Buttons IRIS CLOSE OP...

Page 12: ...s used to zoom the picture currently displayed on the monitor screen Note The above operation is not valid unless multi screen output is selected by pressing the F1 Function button 22 Alarm Reset Button RESET This button is used to cancel an active alarm Press this button while the alarm function is activated to reset the alarm and return the system to the condi tion before the alarm function was ...

Page 13: ...as 1 to 4 Please note that additional multiplex boards are available for purchase as model WV PB6164 Data Multiplex Boards which includes four control boards Caution Before installing boards be sure to turn off the Power Switch of the video multiplexer 1 Remove the six screws on the top cover of the video multiplexer as shown below 2 Remove the top cover 3 Remove the four screws on the board as sh...

Page 14: ...tion VD2 Data Setup on page 34 for details Jumper Connector Board Connector 12 Initial State Installed State 2 1 8 7 2 1 8 7 Tally Output Setting Allows you to use the Alarm Input Terminal as Tally Output Terminal by changing two internal connec tions 1 Disassemble the video multiplexer as described for installing the Data Multiplex Boards on page 11 2 Move the two connectors from the ALM side to ...

Page 15: ...ial factory settings VTR O C SW5 SW3 VTR O C SW4 VTR O C SW3 Alarm Output SW4 Alarm Reset Output SW5 Alarm SW Output Dummy Black Burst Setting According to the initial factory setting the Dummy Black Burst signal is supplied to the REC OUT con nector as needed to overwrite any picture dis played by error If this function is not required set the switch SW1 to the position shown below 1 Disassemble ...

Page 16: ...ck 1 Remove the four rubber feet by removing the four screws on the bottom of the video multiplexer 2 Place the rack mounting brackets on both sides of the video multiplexer and tighten with the four sup plied screws M4 X10 3 Install the video multiplexer with the rack mounting brackets in the rack by using four screws not included Cautions Do not block the ventilation opening or slots on the cove...

Page 17: ... CAM CAMERA PRESET POSITION Video Data RS 485 Video Multiplexer WJ FS616 Time Lapse VTR Personal Computer Software System Controller WV CU550A Spot Monitor Live 1 16ch Multiscreen Monitor Live 1 16ch Playback 1 16ch RS 232C Wired Alarm Sensor AUX Alarm 1 2 3 4 5 6 7 8 9 MON CAM 0 System Controller for WJ FS 616 F3 F4 F2 F1 Shown below is an example of a basic system connection ...

Page 18: ...ngth between the camera site and the WJ FS616 Video Multi plexer is less than 1 200 m 4 000 ft when using RG 6 U 5C 2V or equivalent cables Connect the Camera Site equipment to the RS485 Terminal on the rear of the Video Multiplexer when specified equipment is connected Note If you use cables assembled from locally procured materials it is important that only high quality data grade cable suitable...

Page 19: ...t in unstable operation of the system Setting the Termination and Controller Unit Number The Termination Switch and the Controller Unit Number Switch are located on the rear of the System Controller When combined with the WJ FS616 Video Multiplexer always keep these switches in the positions shown below Setting the Mode Selection Switch The Mode Selection Switch that selects the opera tion mode of...

Page 20: ...oom Sequence Spot Alarm Remote Select Input Sequence SW for Spot Output Not Used Alarm Recover Input Alarm Output Alarm 16 Alarm 14 Ground Alarm 11 Alarm 9 Alarm 8 Alarm 6 Ground Alarm 3 Alarm 1 Pin No Designation 20 21 22 23 24 25 26 27 28 29 30 31 32 33 34 35 36 37 Still Picture VTR Camera Select Multiscreen Select Multiscreen Ground Alarm SW Output Time Adjust Input Alarm Reset Output Ground Al...

Page 21: ... 2 3 4 5 6 7 8 9 10 11 12 13 14 15 16 8 9 28 26 1 3 4 7 16 1 2 3 4 ALARM IN COM ALARM RESET IN ALARM RECOVER OUT 5 6 7 8 ALARM OUT 1 SHOT IN TAPE END OUT 9 10 11 12 WARNING OUT HUMID OUT REC REVIEW OUT 13 14 15 16 SERIES REC IN TIME ADJUST IN TIME ADJUST OUT COM REC OUT SERIES REC OUT Video Multiplexer WJ FS616 Time Lapse VTR Note If the VTR is used for remote control connect with either the RS 23...

Page 22: ...ce Spot Alarm Remote Select Input Sequence SW for Spot Output Not Used Alarm Recover Input Alarm Output Camera 16 Camera 14 Ground Camera 11 Camera 9 Camera 8 Camera 6 Ground Camera 3 Camera 1 Pin No Designation 20 21 22 23 24 25 26 27 28 29 30 31 32 33 34 35 36 37 Still Picture VTR Camera Select Multiscreen Select Multiscreen Ground Alarm SW Output Time Adjust Sequence SW Alarm Reset Output Groun...

Page 23: ...downward LEFT Moves the cursor to the left or selects the mode or parameter RIGHT Moves the cursor to the right or selects the mode or parameter SET Executes the selections and displays a sub menu for an item with the mark STILL Selects the mode or parameter EL ZOOM Selects the mode or parameter FUNCTION Selects the next page Press the SETUP ESC button to execute the cur rently highlighted setting...

Page 24: ...le Display Position Sequence Setup Lock Mode Cable Compensation VD2 Data Alarm Terminal Setup Data Mode RS 232C Mode Communication Port Setup VTR Input Select Daisy Mode Unit Address Camera Download Multiscreen Output Menu Spot Output Setup Record Output Setup Multiscreen 2 Output Setup System Setup Page 25 Page 27 Page 27 Page 29 Page 30 Page 36 Page 37 Page 37 Sequence Timing Multiscreen Sequenc...

Page 25: ...LL 1 OF10 NO DATE TIME CAM ALM MODE 10 1 JAN97 12 00 00 16CH TRM 12 9 12 DEC96 4 00 00 10CH SITE 8 12 DEC96 3 00 00 8CH SITE 7 12 DEC96 2 00 00 7CH SITE 6 12 DEC96 1 00 00 6CH TRM 1 5 11 DEC96 15 00 00 5CH TRM 5 4 11 DEC96 14 00 00 4CH TRM 14 3 11 DEC96 13 00 00 3CH TRM 7 2 11 DEC96 12 00 00 2CH CH LOSS 1 11 DEC96 12 00 00 1CH CH LOSS DISPLAY NEXT PRE CLEAR ALARM SETUP ALM RECALL ALM SCHEDULE ON 0...

Page 26: ...em lets you set the dwell time for the alarm sequence 1 Move the cursor to DWELL TIME parameter 2 Select the desired dwell time by pressing the LEFT or RIGHT button The initial factory set ting is 2 seconds 1SEC 30SEC Selects a dwell time between 1 second and 30 seconds 4 Camera Switching Pulse Loss Alarm This item lets you enable or disable alarm display on the monitor screen when the camera swit...

Page 27: ... Move the cursor to the ALM REC MODE para meter 2 Select the desired mode by pressing the LEFT or RIGHT button The initial factory setting is MODE 0 MODE 0 Normal Recording MODE 1 8 Time Lapse mode without camera switching pulse MODE9 Time lapse mode with camera switch ing pulse After finishing the setting press the SETUP ESC button to return to the previous SETUP MENU Multiscreen Output Menu Move...

Page 28: ...sing the LEFT or RIGHT button The initial factory setting for the border colour is WHITE WHITE White Border GRAY Grey Gray Border BLACK Black Border OFF No Border 5 Camera Display Position Setting This item lets you select the position where the camera picture will be displayed on the Multiscreen Monitor 1 Move the cursor to DISPLAY POSITION then press the SET button The table shown below appears ...

Page 29: ... CAM UPLOAD NO ALL RESET SELECT Spot Output Setup 1 Move the cursor to the REC MULTI2 parameter on the SETUP MENU 2 Select REC OUTPUT by pressing the LEFT or RIGHT button then press the SET button The REC OUTPUT SETUP menu appears on the monitor screen shown below These items let you determine the mode for record ing on the Time Lapse VTR WJ FS616 SETUP MENU ALARM SETUP MULTI OUTPUT SETUP SPOT OUT...

Page 30: ...n assign the camera switching timing to any one of MODE1 to MODE8 when using a VTR with out camera switching pulse 1 Move the cursor to the desired MODE number to be assigned by pressing the UP or DOWN button 2 Press the SET button to move the cursor to the switching timing area Note The cursor does not move to this area when MODE 0 is selected in this table 3 Select the desired switching timing i...

Page 31: ...r on the SETUP MENU 2 Select MULTI 2 OUTPUT by pressing the LEFT or RIGHT button then press the SET button The MULTI 2 OUTPUT SETUP menu appears on the monitor screen as shown below MULTI2 OUTPUT SETUP DISPLAY POSITION SEQUENCE MODE SEQ2 1 Camera Display Position This item lets you select the position where the camera picture will be displayed on the Multiscreen 2 Monitor 1 Move the cursor to DISP...

Page 32: ...SETUP SPOT OUTPUT SETUP REC MULTI2 MULTI2 OUTPUT SYSTEM SETUP CAM DOWNLOAD NO CAM UPLOAD NO ALL RESET SELECT TITLE SETUP 1 OF 2 1CH 1 0123456789 2CH 2 ABCDEFGHIJK 3CH 3 LMNOPQRSTUV 4CH 4 WXYZÄÜÖÆÑÅØZ 5CH 5 abcdefghijk 6CH 6 lmnopqrstuv 7CH 7 wxyzäüöæñåøz 8CH 8 E TITLE SETUP 2 OF 2 9CH 9 0123456789 10CH 10 ABCDEFGHIJK 11CH 11 LMNOPQRSTUV 12CH 12 WXYZÄÜÖÆÑÅØZ 13CH 13 abcdefghijk 14CH 14 lmnopqrstuv ...

Page 33: ...e SET button The position setting menu appears on the monitor screen 2 Move the title by pressing the Direction Arrow Buttons Note The camera title and the clock are dis played on the same line of the Spot moni tor If the camera title position is moved to upward or downward the clock is moved to that position at the same time 3 Press the SETUP ESC button to execute the selection and return to the ...

Page 34: ...as been selected are marked in the DWELL TIME area Previous settings made in the DWELL TIME area become invalid Programming Steps 17 to 32 1 Press the FUNCTION button to display the next page The table shown below appears on the monitor screen 2 Program the sequence pattern for steps 17 to 32 as described for the previous page 3 Press the FUNCTION button to display the pre vious page 4 After finis...

Page 35: ...press the SETUP ESC button to execute the setting and return to the previous SYSTEM SETUP menu 6 Sequence Timing Multiscreen This item lets you select functions of devices con nected to pin 26 of the ALARM REMOTE Control Connector One of these functions is input of the time adjust ment signal from a VTR the other enables external sequence switching for multiscreen output 1 Move the cursor to the S...

Page 36: ...EM SETUP menu Note Installation of the WV PB6164 Data Multiplex Boards is required for controlling more than 4 cameras 10 Alarm Terminal Setup This item lets you edit the alarm input number cor responding to each channel 1 Move the cursor to ALM TERMINAL SETUP on the SYSTEM SETUP menu then press the SET button The ALARM TERMINAL SETUP table shown below appears on the monitor screen ALARM TERMINAL ...

Page 37: ...ITY ODD EVEN NONE STOP BIT 1 1 1 XON XOFF OFF OFF FULL HALF FULL 2 Move the cursor to the port you want to edit by pressing the Direction Arrow Buttons 3 Select the desired Delay Time in the DELAY area by pressing the Increment or Decrement button 4 Select the desired Baud Rate in the BAUD RATE area by pressing the Increment or Decrement button 5 Select the desired Wait Time in the WAIT TIME area ...

Page 38: ...EN DISABLED Camera Download This item lets you save the camera setup data into the memory of the Video Multiplexer If the setup contents of the camera should be lost due to malfunctioning or replacement of a camera you can simply reload the data stored in the Video Multiplexer 1 Move the cursor to the CAM DOWNLOAD parameter in the SETUP MENU 2 Select YES by pressing the LEFT or RIGHT but ton then ...

Page 39: ...irectly with the Camera Number Buttons 4 Move the cursor to NO by pressing the UP or DOWN button 5 Select YES by pressing the LEFT or RIGHT button 6 Press the SET button to begin the load NOW LOADING appears on the table To cancel loading press the SETUP ESC but ton 7 When loading is finished the result is dis played for each channel 8 Press the SET UP ESC button then system will restart Note Alar...

Page 40: ...ore details 3 Press the SEQUENCE button to move one step for ward in the sequence 4 To cancel the sequence press the respective CAMERA button again The selected camera picture is displayed in spot mode Operating the Multiscreen Monitor The following operations are available on the Multiscreen Monitor Displaying the Camera Picture 1 Single Spot 1 Press the MULTISCREEN button The LED green on the bu...

Page 41: ... on the EL ZOOM button goes off Note During zooming the picture some noises may appear on the right side of the screen 4 Multi Spot 1 Repeat steps 1 and 2 described for Single Spot on page 38 2 Press the MULTISCREEN SELECT button repeat edly Each time the MULTISCREEN SELECT button is pressed the next of the 6 available multiscreens is displayed as follows Notes Blank channels are displayed in blac...

Page 42: ...2 1 Press the MULTISCREEN button The LED green in the button lights up 2 Press the VTR CAM button to VTR position LED on Notes This unit does not reproduce a clear picture in reverse playback The playback picture may be skewed horizon tally distorted in the upper portion of the moni tor screen depending on the selected play back mode The LED on the VTR CAM button blinks when the looped through VTR...

Page 43: ...e 40 Confirm that the LED on the VTR CAM button is lit The LED on the VTR CAM lights up button while the playback picture is displayed Note The same channel cannot be displayed in multiple segments If this attempt is made only the picture of the channel with the lowest number is displayed the other segments appear black FUNCTION Camera 1 Camera 2 Camera 3 Camera 4 Playback Camera 2 Camera 3 Camera...

Page 44: ...e camera control is only available while the cam era picture is displayed in Single Spot on the select ed monitor screen and the LOCK switch is in OFF position Camera Selection 1 Press the SPOT or MULTISCREEN SELECT but ton The LED green on the button lights up 2 Press the VTR CAM button to CAM position LED off 3 Press a CAMERA 1 16 button to display a selected camera picture in Single Spot on the...

Page 45: ...ra Selection procedure described on page 42 2 Press the PRE POSI button 3 Press the CAMERA 1 16 buttons to select the preset position number and move the pan tilt head to the preset position LEFT RIGHT UP DOWN HOME SET CAM SET UP CAMERA ID OFF ALC ELC ALC SHUTTER AGC ON SENS UP OFF SYNC INT WHITE BAL AWC MOTION DET ON LENS DRIVE DC END SET UP DISABLE SET UP ESC 4 8 12 16 3 7 11 15 2 6 10 14 1 5 9 ...

Page 46: ...rol Connector ALARM is displayed on the monitor screen Video Input Signal Loss Alarm Alarm indicating that camera signal loss has occurred CHPP LOSS is displayed on the monitor screen Camera Site Alarm Alarm received from the associated camera site receiver or camera ALARM is displayed on the monitor screen PC Command Alarm OAI command received from the Personal Computer ALARM is displayed on the ...

Page 47: ...efore alarm was activated remain on the monitor screen If the alarmed channels are displayed the camera title and alarm display blink alternately on the moni tor screen Record Output Alarms are recorded in the mode specified for the ALM REC MODE parameter on the ALARM SETUP menu Alarmed channels are recorded with more fields than in normal recording if ON is specified for the DYNAMIC REC parameter...

Page 48: ... 2 Monitor is connected to the REC OUT connector When alarm is activated the picture of the alarmed camera is displayed in Single Spot mode on the Multiscreen 2 Monitor From the second alarm on the pictures of the alarmed cameras are displayed in quad mode on the Multiscreen 2 Monitor in the order of upper left to lower right segment The fifth alarm activated is displayed in Single Spot mode on th...

Page 49: ...corded on the VTR 2 Press the Record button of the VTR to begin record ing Notes While recording with the camera switching pulse MODE 9 quad recording will work properly when the selected recording interval is more than 0 13 seconds less than 8 fields s While recording without the camera switching pulse MODE 1 8 quad recording is not avail able When useing a VTR whose recording interval is 2 or 3 ...

Page 50: ...GHT UP DOWN AUX1 AUX2 SET SET UP 4 8 12 16 3 7 11 15 2 6 10 14 1 5 9 13 CAMERA PRESET POSITION 1 2 3 4 5 6 7 8 9 MON CAM UNIT ESC 0 SET Display the SETUP MENU or escapes from the menu Move the cursor or select the mode or parameter Execute the selection and display the submenu for items with the mark Execute the selection and return to the previous menu Select the mode or parameter Select the next...

Page 51: ...MULTISCREEN SELECT MONITOR CONTROL FUNCTONS 1 Press the Controller On Off Switch located on the rear of the System Controller to the ON position The display shown below appears on the System Controller s LCD The Function Buttons operate as shown below F1 Same operation as MULTISCREEN button F2 Same operation as SPOT button F3 Same operation as SEQUENCE button F4 Same operation as VTR CAM button _ ...

Page 52: ...e while observing the mon itor Press this button to the TELE position to optically bring an object closer Pressing to the WIDE posi tion has the reverse effect 4 Press the IRIS buttons to close or open the lens iris Adjust the lens iris by using the buttons to obtain the proper picture exposure By pressing both of these buttons at the same time for three seconds the lens iris is set to the initial...

Page 53: ...sition Selection The following functions are only available with cam eras that have preset panning functions such as the Panasonic WV BS500 or WV CS600 series 1 Select the desired camera referring to Camera Selection on page 50 2 Press the HOME button to move the camera to the home position 6 Camera Setup 1 Select the desired camera referring to Camera Selection on page 50 2 Press the CAMERA SET O...

Page 54: ...er WV CU550A Spot Monitor Live Main 1 16ch Local 1 16ch Multiscreen Monitor Live 1 16ch Playback 1 16ch RS 232C Wired AUX Alarm 1 2 3 4 5 6 7 8 9 MON CAM 0 System Controller for WJ FS 616 F3 F4 F2 F1 Camera 1 16 Main Site Unit 1 4 8 12 16 3 7 11 15 2 6 10 14 1 5 9 13 PUSH OPEN 16 POWER LOCK ON OFF ALARM MULTI SCREEN MULTISCREEN SELECT RESET SPOT SEQUENCE VCR CAM CAMERA PRESET POSITION Video Data R...

Page 55: ...m Controller in a daisy chain type connec tion Refer to the connections and data port settings shown below Notes Up to four Video Multiplexers can be daisy chained to the System Controller Unit numbers should be assigned in the order of connection starting with the unit connected directly to the WV CU550A System Controller It is not available to activate sequence extend ed the unit It is recommend...

Page 56: ...ill be processed at the underlined parameter value Note When remote controlling the Video Multiplexer by PC through the Data Port add the unit adress to the transmission command For example ADuu OMS m uu 01 16 unit number 1 Main Unit Operation Control Command ASCII Parameter ASCII Monitor Select OMS m OMS VTR Camera Select OVC m OVC m 0 Camera Mode m 1 VTR Mode Still ON OFF OST m nn OST m 0 Still ...

Page 57: ...mand ASCII Parameter ASCII Alarm Suspension MAD m MAD m 0 Alarm Suspension OFF m 1 Alarm Suspension ON Lock MKL m MKL m 0 Lock OFF m 1 Lock ON Setup MSU m MSU m 0 End Setup m 1 Begin Setup Item 3 Cursor Command ASCII Response Command ASCII Parameter ASCII Cursor Movement Select Parameter 1 The parameter valid on the main unit setup menu is mm UU DD RR LL BB ES FF IC DC The parameter valid for zoom...

Page 58: ...e Spot Still VTR 12 mPVSXcc Single Spot Zoom Still VTR 13 mPVSMLa Multi Spot Still VTR 14 mPVQNcc Spot Sequence VTR 15 mPVQMLa Multi Sequence VTR 16 mPVQZcc Spot Sequence Zoom VTR 17 mPRSMLa Live VTR Display Still 18 mPE Setup Mode 19 mPX Playback through m 0 1 2 Monitor Number 0 Spot Monitor 1 Multiscreen Monitor 2 Multiscrren 2 Monitor P N A D F N Normal A Alarm D Normal Alarm Suspension F Alarm...

Page 59: ...l Recording Output 1 0 V p p 75 Ω composite video signal Y Signal 0 7 V p p C Signal 0 3 V p p 75Ω S video signal Playback Input 1 0 V p p 75 Ω composite video signal Y Signal 0 7 V p p C Signal 0 3 V p p 75Ω S video signal Alarm Remote Control 37 pin D sub Connector VTR Control RS 232C 25 pin D sub Connector Ambient Operating Temperature 10 C 50 C 14 F 122 F Ambient Operating Humidity Less than 9...

Page 60: ...Matsushita Electric Industrial Co Ltd Central P O Box 288 Osaka 530 91 Japan N1097 1127 YWV8QA4661BN Printed in Japan N 19 Gedruckt in Japan Imprimé au Japon Impreso en Japón ...

Reviews: