26
When replacing the hard disk drive with the
unit power on
z
Call up the "HDD Setup" display on the LCD, and press
the [SET] button.
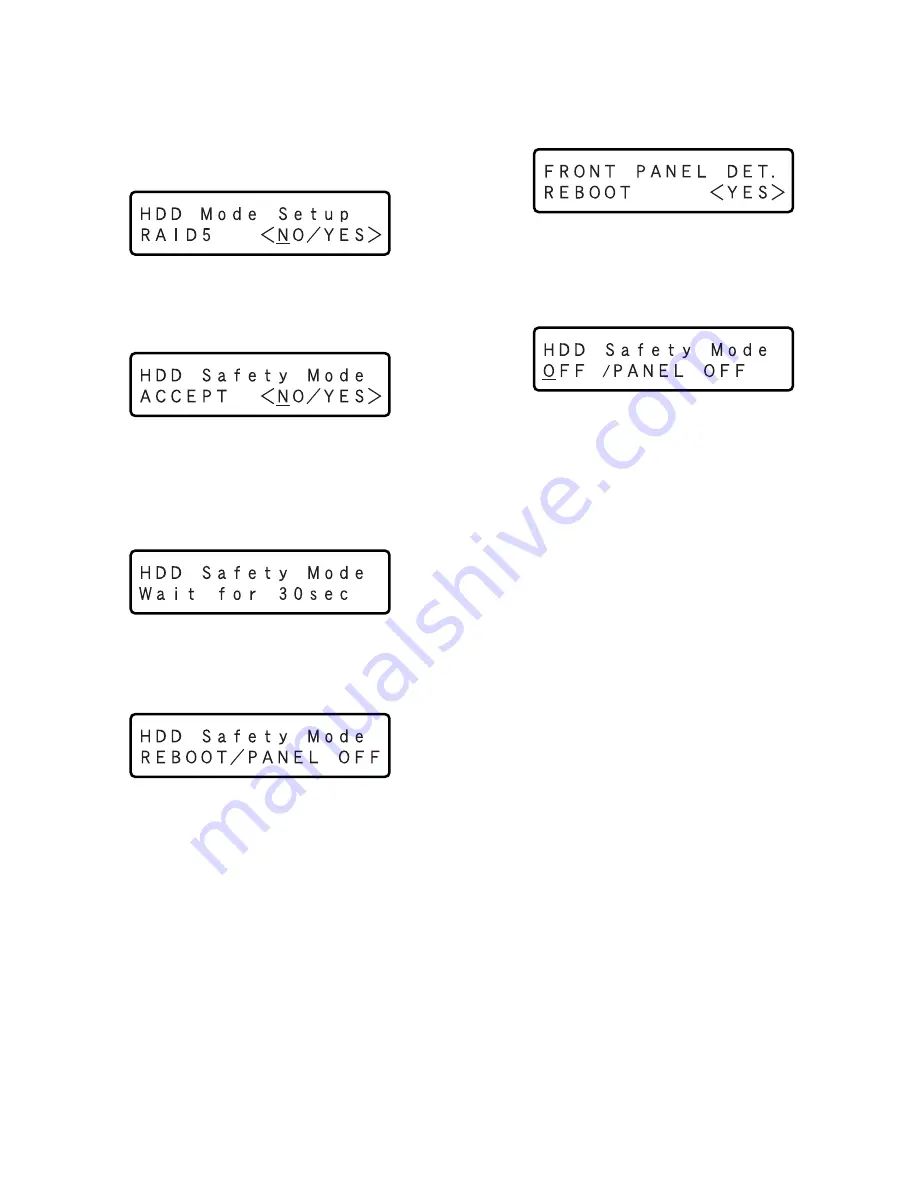
The following menu will be displayed on the LCD.
x
Press the arrows button (
C
or
D
) repeatedly until the
following menu is displayed.
c
Select "YES" and press the [SET] button.
The following menu will be displayed and the power of
the hard disk drive will be turned off automatically.
v
Wait for around 30 seconds until the following menu is
displayed.
b
Select "PANEL OFF" and press the [SET] button.
The OPERATE indicator and the LCD display will go off.
(The front panel is inoperable since the power supply to
the front panel is stopped now.)
n
Detach the front panel and replace the hard disk drive.
Refer to page 24 for descriptions of how to replace the
hard disk drive.
(When replacing the hard disk drive of the extension
unit, it is necessary to detach the front panel in the
same way as described above. Refer to the operating
instructions for descriptions of how to replace the hard
disk drive of the extension unit.)
Important:
When detaching the front panel, confirm that the OPER-
ATE indicator on the front panel is off.
m
After completing the HDD replacement, attach the
cable to the front panel. The OPERATE indicator will
light and the following menu will be displayed on the
LCD.
,
Press the [SET] button.
The unit will reboot. The following menu will be dis-
played.
.
Select "OFF" and press the [SET] button.
The unit will reboot and the time and date display
(standby display) will be displayed.
⁄0
Start the web browser.
After the browser starts, enter the IP address set to this
unit in the address box, and press the enter key.
The disk configuration menu will be displayed.
Configure the disk settings according to your need.
Refer to the Setup Instructions (PDF) for how to operate
the disk configuration menu.


