5
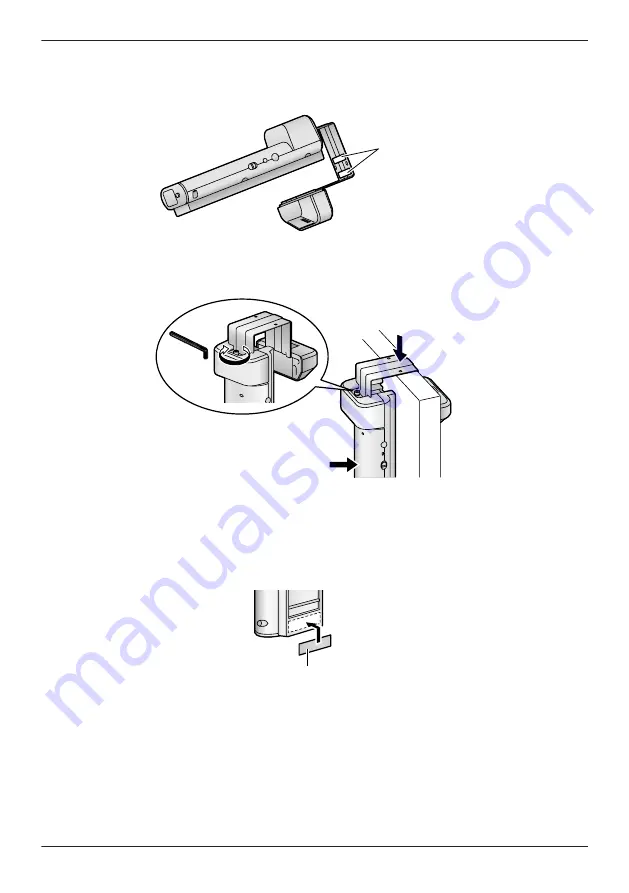
Carefully take the Wireless Camera off the door without loosening the fixing screw, and then remove
the silicon paper from the double-sided tape on the back of the metal plate.
R
Wipe dirt and moisture from the surface of the door, then attach the Wireless Camera to a flat area
on the surface of the door.
Double-sided tape
6
Hang the Wireless Camera from the position confirmed in step 4, then press the Wireless Camera
into the door so that the double-sided tape on the back of the metal plate and wireless unit sticks to
the door (
A
). Make sure that there are no gaps between the top of the door and the metal plate.
A
B
PRESS
PRESS
A
R
Check that the wireless unit does not easily move around when the door is closed.
R
Perform the following when the double-sided tape does not stick well to the door and the Wireless
Camera moves around easily.
(1)
Remove the Wireless Camera from the door.
(2)
Loosen the fixing screw, widen the distance between camera unit and wireless unit, and then
stick the additional double-sided tape to the back of the wireless unit.
Double-sided tape (included)
(3)
Remove the silicon paper from the double-sided tape, then hang the Wireless Camera from
where it was positioned before.
(4)
After pressing the wireless unit into the door to so that it sticks to the door, adjust the position
of the metal plate so that the distance between the wireless unit and camera unit matches the
width of the door while holding the camera unit.
7
Close the door, then firmly tighten the fixing screw (
B
) while holding the wireless unit to stop it from
moving.
R
Hold the long part of the hex key and firmly tighten the fixing screw.
R
Check that the fixing screw has not become loose at regular intervals.
21
Getting Started
Summary of Contents for VL-CM851A
Page 45: ...Customer services For United States 45 Appendix ...
Page 46: ...Warranty For United States 46 Appendix ...
Page 47: ...47 Appendix ...
Page 48: ...Warranty For Canada 48 Appendix ...
Page 49: ...49 Appendix ...
Page 51: ...51 Notes ...


