background image

12

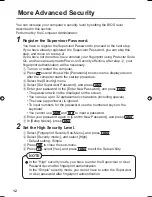
More Advanced Security

You can increase your computer’s security level by setting the BIOS level 
described in this section.
Performed by the Computer Administrator.

1

  Register the Supervisor Password.

You have to register the Supervisor Password to proceed to the next step.
If you have already registered the Supervisor Password, you can skip this 
step, and move on to step 

2

.

If you have not done this, have enrolled your 

fi

 ngerprint using Protector Suite 

QL, and have already made Power-on Security effective, after step 

B

, your 

fi

 ngerprint authentication will be necessary. 

A

 Turn on or restart the computer.

B

 Press 

F2

 several times while [Panasonic] boot screen is displayed soon 

after the computer starts the startup procedure.  

C

 Select the [Security] menu.

D

 Select [Set Supervisor Password], and press 

Enter

.

E

 Enter your password in the [Enter New Password], and press 

Enter

• The password will not be displayed on the screen.
• You can use up to 32 alphanumeric characters (including spaces).
• The case (upper/lower) is ignored.
• To input numbers for the password, use the numbered keys on the 

keyboard.

• You cannot use 

Shift

 and 

Ctrl

 to input a password.   

F

 Enter your password again in [Con

fi

 rm New Password], and press 

Enter

.

G

 In [Setup Notice], press 

Enter

.

2

  Set the High Security Level.

A

 Select [Fingerprint Security Sub-Menu], and press 

Enter

.

B

 Select [Security mode:], and select [High].

• Default setting: Simple

C

 Press 

ESC

 to close the sub-menu. 

D

 Press 

F10

, select [Yes], and press 

Enter

 to exit the Setup Utility.

NOTE

 In the “High” security mode, you have to enter the Supervisor or User 

Password even after 

fi

 ngerprint authentication.

  In the “Simple” security mode, you do not have to enter the Supervisor 

or User password after 

fi

 ngerprint authentication.

00_FingerprintReader_US.indd   12

00_FingerprintReader_US.indd   12

30.01.2008   15:08:00

30.01.2008   15:08:00

Summary of Contents for Toughbook CF-74JDMBD2M

Page 1: ...rograms Page in these Supplementary Instructions or in the Reference Manual for the computer Some of the illustrations in this manual may differ slightly in shape from the actual items in order to mak...

Page 2: ...e Operating Instructions for the computer Names and Functions of Parts CF 19 Series Fingerprint Reader Appearance may differ depending on specifications CF 30 Series Appearance may differ depending on...

Page 3: ...3 CF 52 Series Fingerprint Reader Appearance may differ depending on specifications CF 74 Series Appearance may differ depending on specifications Fingerprint Reader...

Page 4: ...A Set the first joint of your index finger on the sensor as illustrated to the right B Slide your finger toward yourself while keeping it in contact with the fingerprint sensor C Slide your finger do...

Page 5: ...ingerprint device or neglect of Fingerprint device use or any data loss resulting from such developments as Fingerprint authentication device malfunctioning Only for CF 19 and CF 30 Series To protect...

Page 6: ...your computer Recommended Installation Procedure Performed by the Computer Administrator Performed by each user Step 1 Step 4 TPM Installation Installation Manual of TPM If the TPM is not being used...

Page 7: ...r to Backup page 13 General interaction with third party applications There is no guarantee that there will not be any negative interaction with any third party software and will not accept any respon...

Page 8: ...l from upper right to the bottom right or bottom left If this procedure is skipped the Please swipe you finger message may overlap the Tablet PC Input Panel 1 Log on to Windows as an Administrator 2 C...

Page 9: ...s message is displayed by the Protector Suite QL Icon in the notification area If the TPM is not being used skip this step 1 Click on the Invalid TPM status message to start Advanced Security Initiali...

Page 10: ...and click Finish Enrollment mode You can make the configuration for the enrollment only once during this initialization phase Enrollment to the biometric device All enrolled fingerprints are stored d...

Page 11: ...mend you use the Power on Security feature This feature prevents unauthorized access to the user s computer at the BIOS level After first finger enrollment Power on Security message appears Select Yes...

Page 12: ...ect Set Supervisor Password and press Enter E Enter your password in the Enter New Password and press Enter The password will not be displayed on the screen You can use up to 32 alphanumeric character...

Page 13: ...sword you may lose your data in case of authentication hardware failure File used by each user Backup user passport data Default name UserAccount vtp You need this file when you replace the embedded f...

Page 14: ...ield password field but internally created with two independent forms There can be auto submit problems with web forms which do not have Submit button All forms that you cannot submit with Enter will...

Page 15: ...other dry conditions Malfunction or damage may occur when The fingerprint sensor surface was damaged by the strong rubbing of a solid material scratches or being pecked with a pointed item The sensor...

Page 16: ...ppears click Next without deleting fingerprint samples F Click Manage Passwords G Select Power On in Password Types and click Unset password H Enter the password for Power on Security and click OK I C...

Page 17: ...med by the Computer Administrator A Log on to Windows as an Administrator B Close all programs C Model with Windows XP Click start Control Panel Add or Remove Programs Model with Windows Vista Click S...

Page 18: ...f the conditions stated below Rough skin or injured finger with a cut or a skin inflammation Extremely dry Soiled with mud or oil Fingerprint has been worn and has faded Wet with water or sweat You ca...

Page 19: ...s necessary to cancel the fingerprint verification operation to get to the password dialog User cannot use enrolled finger e g injury It is strongly recommended to enroll at least two fingers to avoid...

Page 20: ...tion operation to get to the password dialog then enter your Windows log on password To access My Safe 2 If you did not perform the procedure in step B or it did not work you can still access My Safe...

Page 21: ...nger and go through the Fingerprint enrollment On the Advanced Security page you can change the backup password Protector Suite QL reinstallation During Protector Suite QL uninstallation you can selec...

Page 22: ...afe 3 directly using fingerprints Otherwise you can access My Safe 3 using the My Safe 3 backup password My Safe 3 will recognize that the installation was changed and will offer to use the backup pas...

Page 23: ...asswords secret keys and fingerprints A Log on to Windows as an Administrator You can always access the computer by using your Windows log on password In convenient mode any user can access the comput...

Page 24: ...ation it is necessary to cancel the fingerprint verification operation to get to the password dialog then enter your Windows log on password or backup password 4 Model with Windows Vista File Safe D M...

Page 25: ...25 Specifications Array Size 248 x 4 pixels Image Size 248 x 360 pixels Image Resolution 508 DPI...

Page 26: ...26 Memo...

Page 27: ...27...

Page 28: ...2008 Matsushita Electric Industrial Co Ltd All Rights Reserved Printed in Japan HS1206 1018 DFQX5628YA Matsushita Electric Industrial Co Ltd Web Site http panasonic net...

Reviews: