16
5.2.
Display unit
5.2.1.
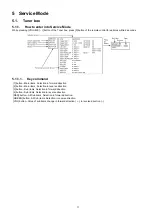
How to enter into Service Mode
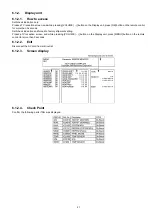
Service mode of display unit have 2 versions.
1. Separate mode: Normal mode (Connect the Display unit and Tuner Box).
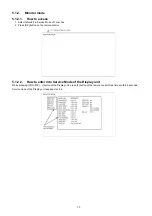
Enter: Monitor mode (See section 5.1.2.).
2. Stand alone mode: WB-ADJ mode (Connect the Display unit and HDMI equipment (Ex. DIGA) with HDMI cable).
Tools: IR remote control (Recommended IR remote control 09’ PDP / LCD models).
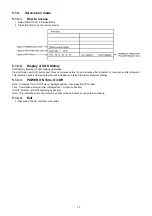
Enter: While pressing [VOLUME (-)] button of the Display unit, press [0] button of the IR remote control 3 times within 2 sec-
onds.
5.2.1.1.
Key command
[1] button...Main items Selection in forward direction
[2] button...Main items Selection in reverse direction
[3] button...Sub items Selection in forward direction
[4] button...Sub items Selection in reverse direction
[RED] button...All Sub items Selection in forward direction
[GREEN] button...All Sub items Selection in reverse direction
[VOL] button...Value of sub items change in forward direction ( + ), in reverse direction ( - )
Summary of Contents for TH-P54Z1D
Page 24: ...24 6 4 No Picture ...
Page 41: ...41 9 1 4 Adjustment Volume Location 9 1 5 Test Point Location ...
Page 42: ...42 ...
Page 54: ...54 11 3 Wiring Display unit 1 11 4 Wiring Display unit 2 ...
Page 55: ...55 11 5 Wiring Display unit 3 11 6 Wiring Display unit 4 ...
Page 56: ...56 11 7 Wiring Display unit 5 11 8 Wiring Display unit 6 ...
Page 57: ...57 12 Schematic Diagram 12 1 Schematic Diagram Note ...
Page 146: ...146 ...
Page 148: ...148 14 1 2 Exploded View 2 Display unit ...
Page 149: ...149 14 1 3 Exploded View 3 Display unit ...
Page 150: ...150 14 1 4 Packing 1 ...
Page 151: ...151 14 1 5 Packing 2 ...
Page 152: ...152 14 1 6 Packing 3 ...
Page 153: ...153 14 1 7 Packing 4 Pedestal stand ...
Page 154: ...154 14 1 8 Packing 5 ...
Page 155: ...155 14 1 9 Packing 6 ...
Page 156: ...156 14 1 10 Packing 7 ...
Page 162: ...162 14 2 Electrical Replacement Parts List 14 2 1 Replacement Parts List Notes ...

