


English
34
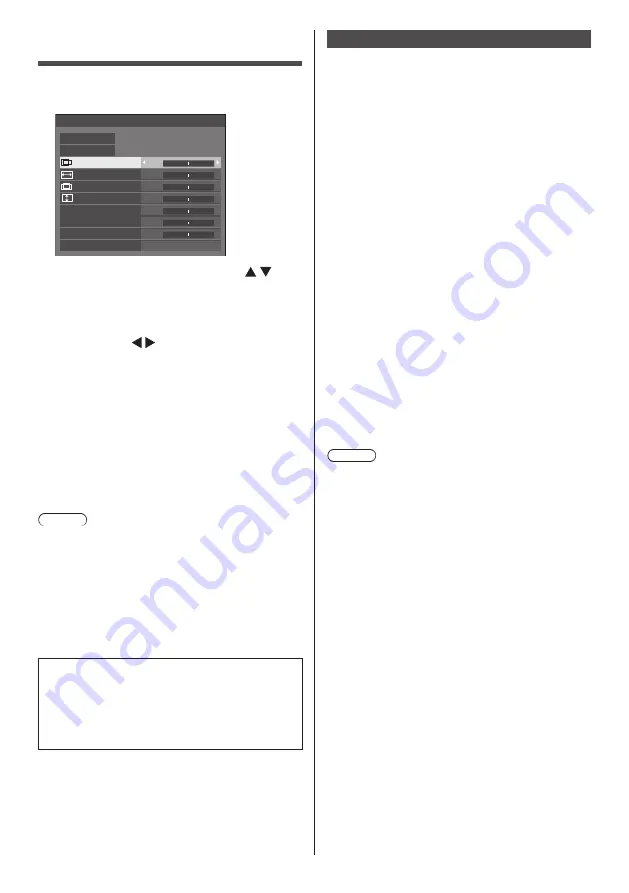
Adjusting Position
1
Press <POSITION> to display the
[Position] menu.
0
0
0
0
0
0
0
Position
Default
Default
Auto setup
H-position
H-size
V-position
V-size
Dot clock
Clock phase
Clamp position
Over scan
On
2
Select the item to adjust with .
●
Unadjustable items are greyed out.
Adjustable items differ depending on the input
signal and the display mode.
3
Adjust with .
4
Press <POSITION> to exit from adjust
mode.
■
To return to the previous screen
Press <RETURN>.
■
To reset to defaults
Press <DEFAULT> while the menu is displayed, or
press <ENTER> when [Default] is selected, then the
settings will be set to factory settings.
Note
●
[Position] cannot be adjusted during 4 Input multi
display.
●
[Position] is invalid during 4K picture mode. 4K format
signal will be displayed filling the entire screen.
●
For 4096 × 2160 signal (2048 × 1080 signal), the left
and right side of the picture will be cut off according to
the pixel number of the panel.
●
Settings for [Position] are memorised separately for
each input terminal.
Setting [Position] when the display is installed
vertically
When adjusting, please note that even when the
display is installed vertically, setting directions of
position / size are the same as that of horizontal
installation.
Auto setup
When inputting a PC signal as an example, [H-position]
/ [V-position], [H-size] / [V-size], [Dot clock] and [Clock
phase] are automatically corrected.
This setting is enabled under the following
conditions:
●
When inputting an analogue signal (PC):
This setting is enabled when [Component/RGB-in
select] (see page 44) in [Signal] menu is [RGB].
●
When inputting a digital signal (HDMI/DVI-D/
DisplayPort):
A PC format signal enables this setting.
This setting is enabled when the signal is not
PC format or [Over scan] (see page 35) is [Off].
[H-size] / [V-size] is not automatically adjusted.
While displaying the picture of the corresponding
signal, select [Auto setup] and press <ENTER>.
Using Remote Control
Press <AUTO SETUP>.
When Auto Setup does not work, [Invalid] is
displayed.
Auto mode
When the [Auto setup] is set to [Auto] in the [Options]
menu (see page 62), automatic position adjustment
starts:
●
When the display power is turned ON.
●
When the input signal is switched.
Note
●
[Auto setup] is invalid during 4K picture mode.
●
When the dot clock frequency of an analogue signal
is 162 MHz or higher, [Dot clock] and [Clock phase]
cannot be automatically corrected.
●
During digital signal input, auto setup for [Dot clock]
and [Clock phase] cannot be made.
●
Auto Setup may not work when a cropped or dark
image is input. In such case, switch to a bright image
with borders and other objects are clearly shown,
and then try auto setup again.
●
Depending on the signal, out of alignment may
occur after Auto Setup. Carry out fine tuning for the
position/size as required.
●
If Auto Setup cannot set properly for vertical
frequency 60Hz XGA signal (1024×768@60Hz,
1280×768@60Hz, and 1366×768@60Hz), pre-
selecting the individual signal in [XGA mode] (see
page 44) may results in correct Auto Setup.
●
Auto Setup does not work well when a signal such
as additional information is superimposed out of valid
image period or intervals between synchronizing and
image signals are short, or for image signal with tri-
level synchronizing signal added.
●
If Auto Setup does not work well, select [Default],
press <ENTER>, and then adjust the position/size
manually.


